
Search the wiki
Canon EOS C300 Mark II

Introduction
Here we will look at setting up the Canon EOS C300 Mark II. We’ll be drawing heavily from the Netflix best practices for the camera, which you can find here:
The settings have been configured for projects to be finalised for HDR but you can also configure the settings to be suitable for SDR.
Camera Settings
We’ll be shooting in 4K RAW and in Canon LOG 2. To set these up, go:
Custom Picture (CP)
- Preset: Canon Log 2 : C Gamut

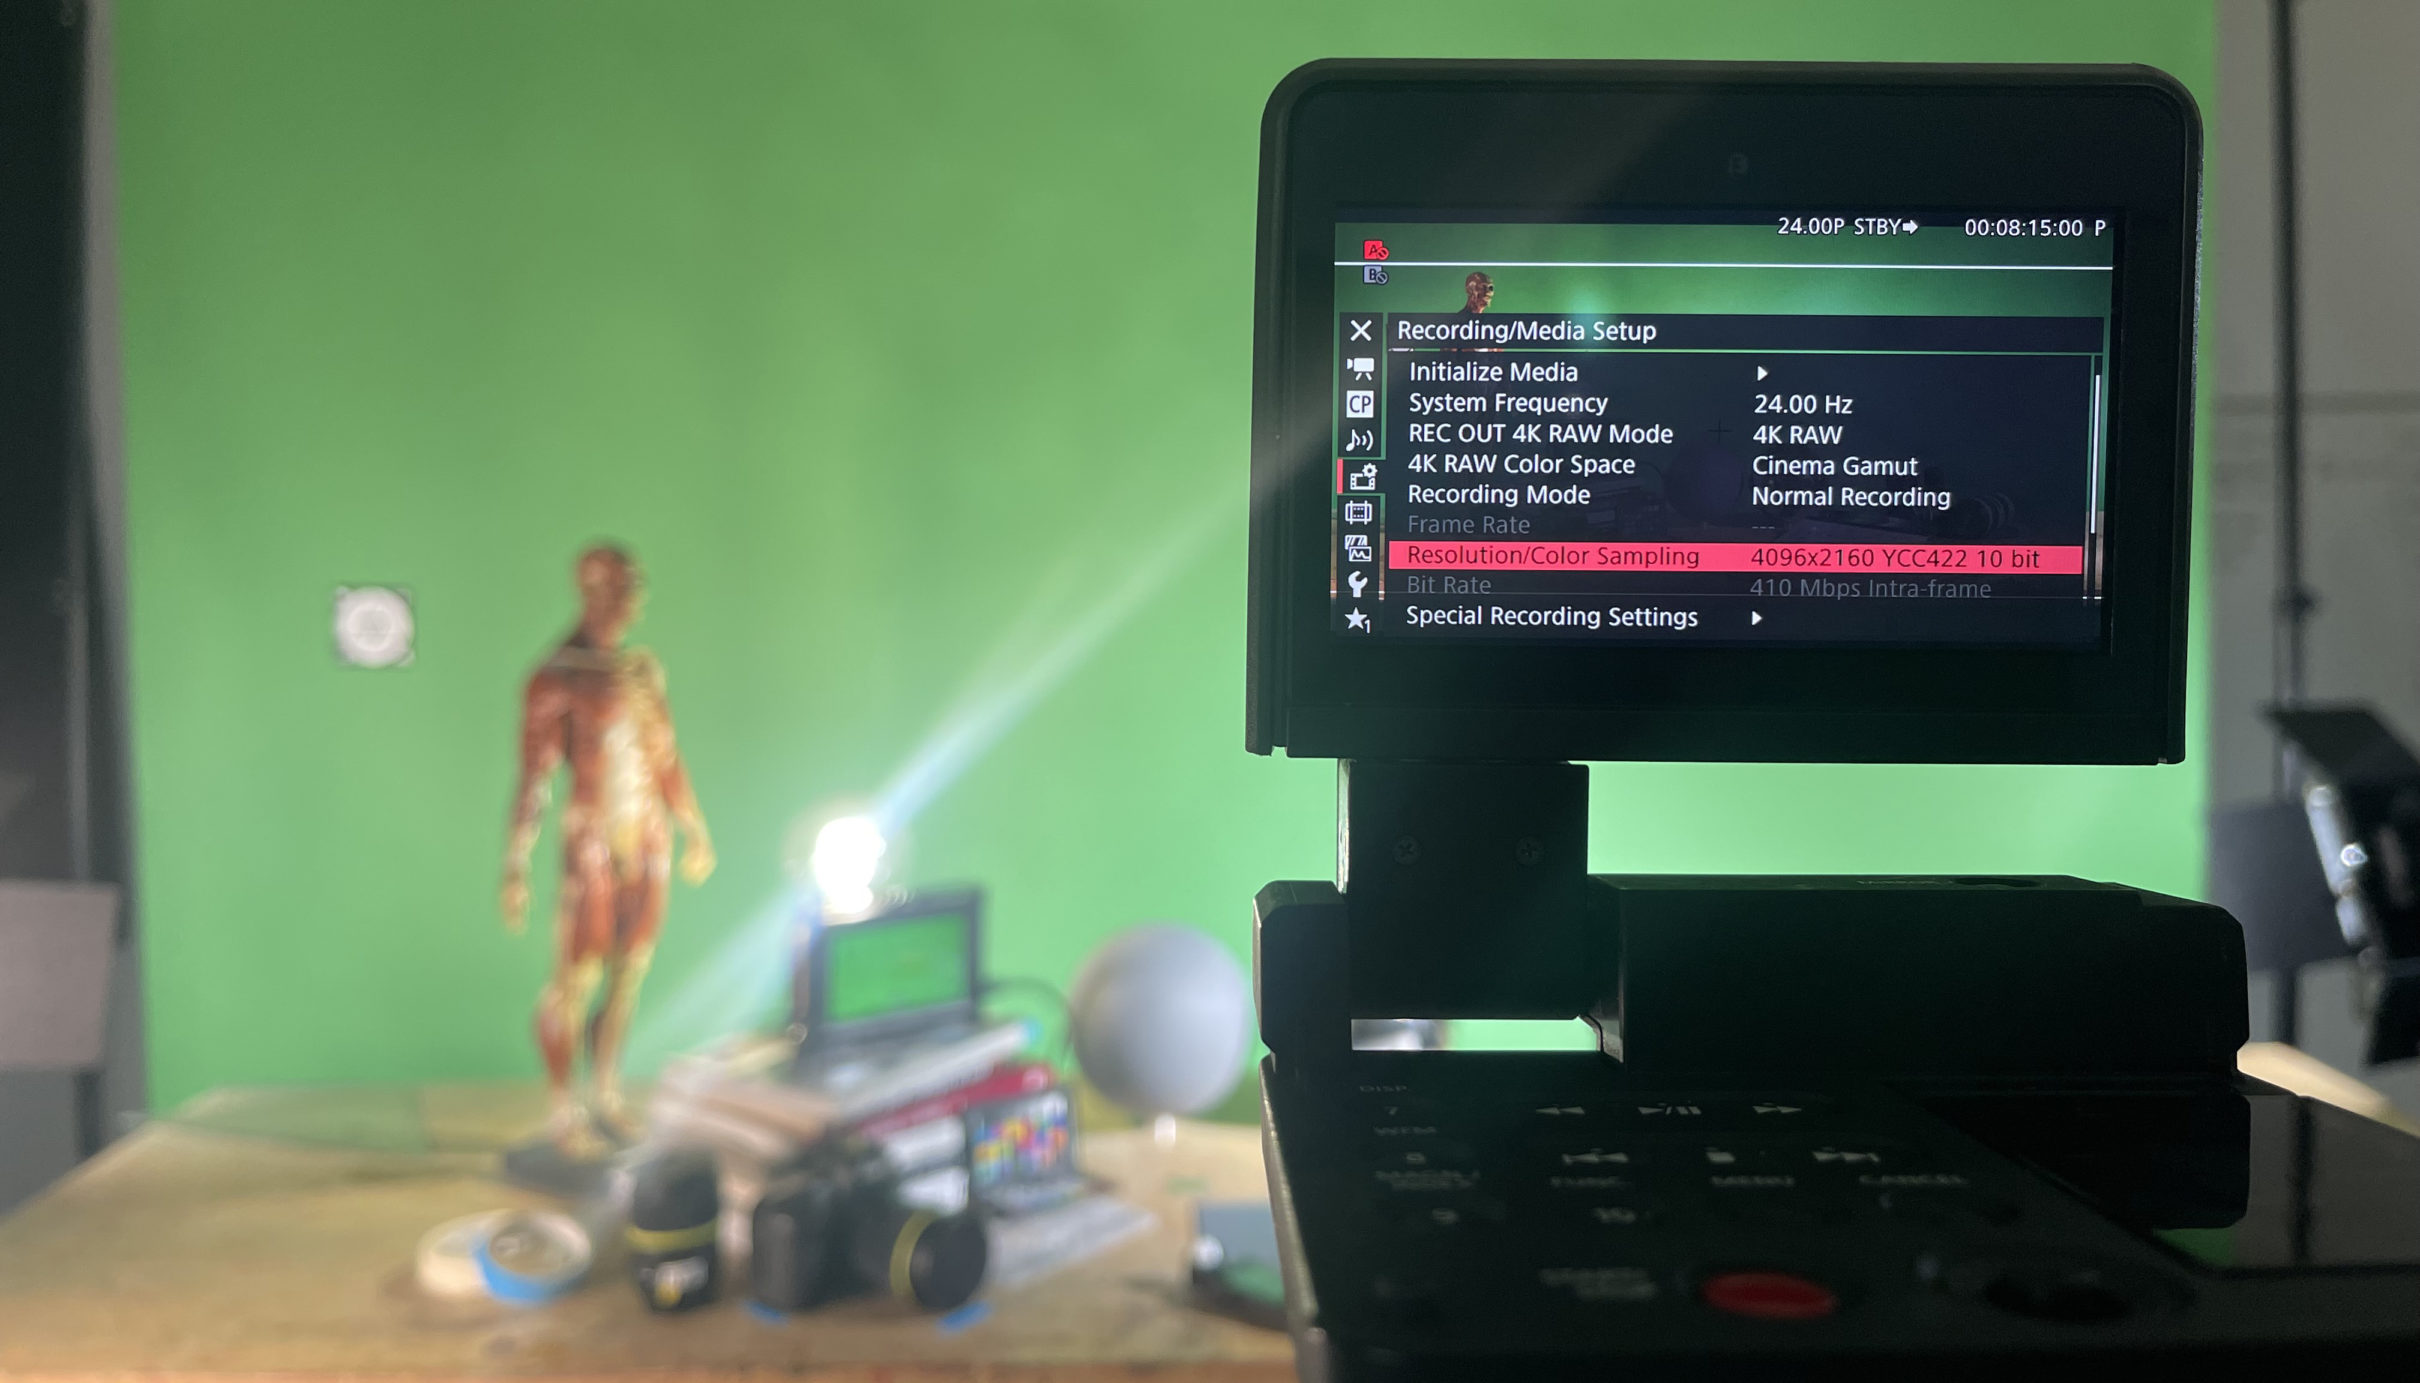
Recording/Media Setup
- System Frequency: 24.00 Hz
- REC OUT 4K RAW Mode: 4K RAW
- 4K RAW Color Space: Cinema Color
- Recording Mode: Normal Recording
- Frame Rate: 24P
- Resolution/Color Sampling: 4096×2160 YCC422 10 bit
Assistance Functions: LUT
- LUT > Activate: On
- LUT > MON. & HDMI (2K): BT.2020
- LUT > REC OUT (2K): BT.2020
- LUT > LCD & VF: BT.709

Assistance Functions: Markers
- Markers > Activate: On
- Markers > Center: Black
- Markers > Horizontal: Off
- Markers > Grid: Gray
- Markers > Aspect Marker: Black
- Markers > Aspect Ratio: 2.35:1
Additional Settings
We are also shooting with a base ISO of 800 and with a 180.00 shutter angle (or 1/48).
Onset Monitoring
For onset monitoring, we are using the EIZO ColorEdge CG318 31 inch 4K IPS monitor and we have set the Color Mode to DCI by going:
- Menu > Color: DCI

Testing your Footage in Resolve
For some great information on ACES workflows in Resolve, check out this video here: ACES Set Up in DaVinci Resolve
Once you’ve set your camera and captured some footage, you can take the shots into Resolve and output your data to be used within an ACEScg pipeline. In Resolve, first go:
-
- File > Project Settings
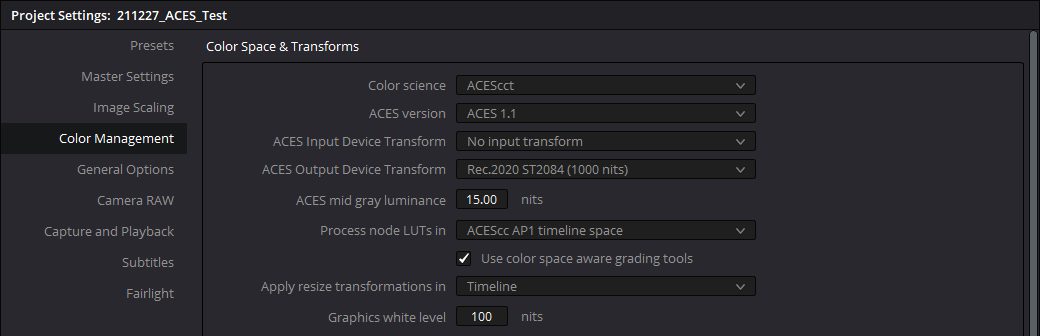
Next go: Color Management >Color Space & Transforms and set the following:
- Color science: ACEScct
- ACES version: ACES 1.1
- ACES Input Device Transform: No input transform (as we are working with RAW files, and this should set automatically based on the clip. If not, we can manually set this per clip.)
- ACES Output Device Transform: Rec.709 (for SDR)
- ACES Output Device Transform: P3-D65 ST2084 (1000 nits) (for HDR) or Rec.709 (for SDR)
- ACES mid gray luminance: 15.00 nits (for HDR)
- Process node LUTs in: ACEScc AP1 timeline space
- Use color space aware grading tools: Enable
HDR Settings
SDR Settings

Now go to the Media tab and drag your clips into the project.

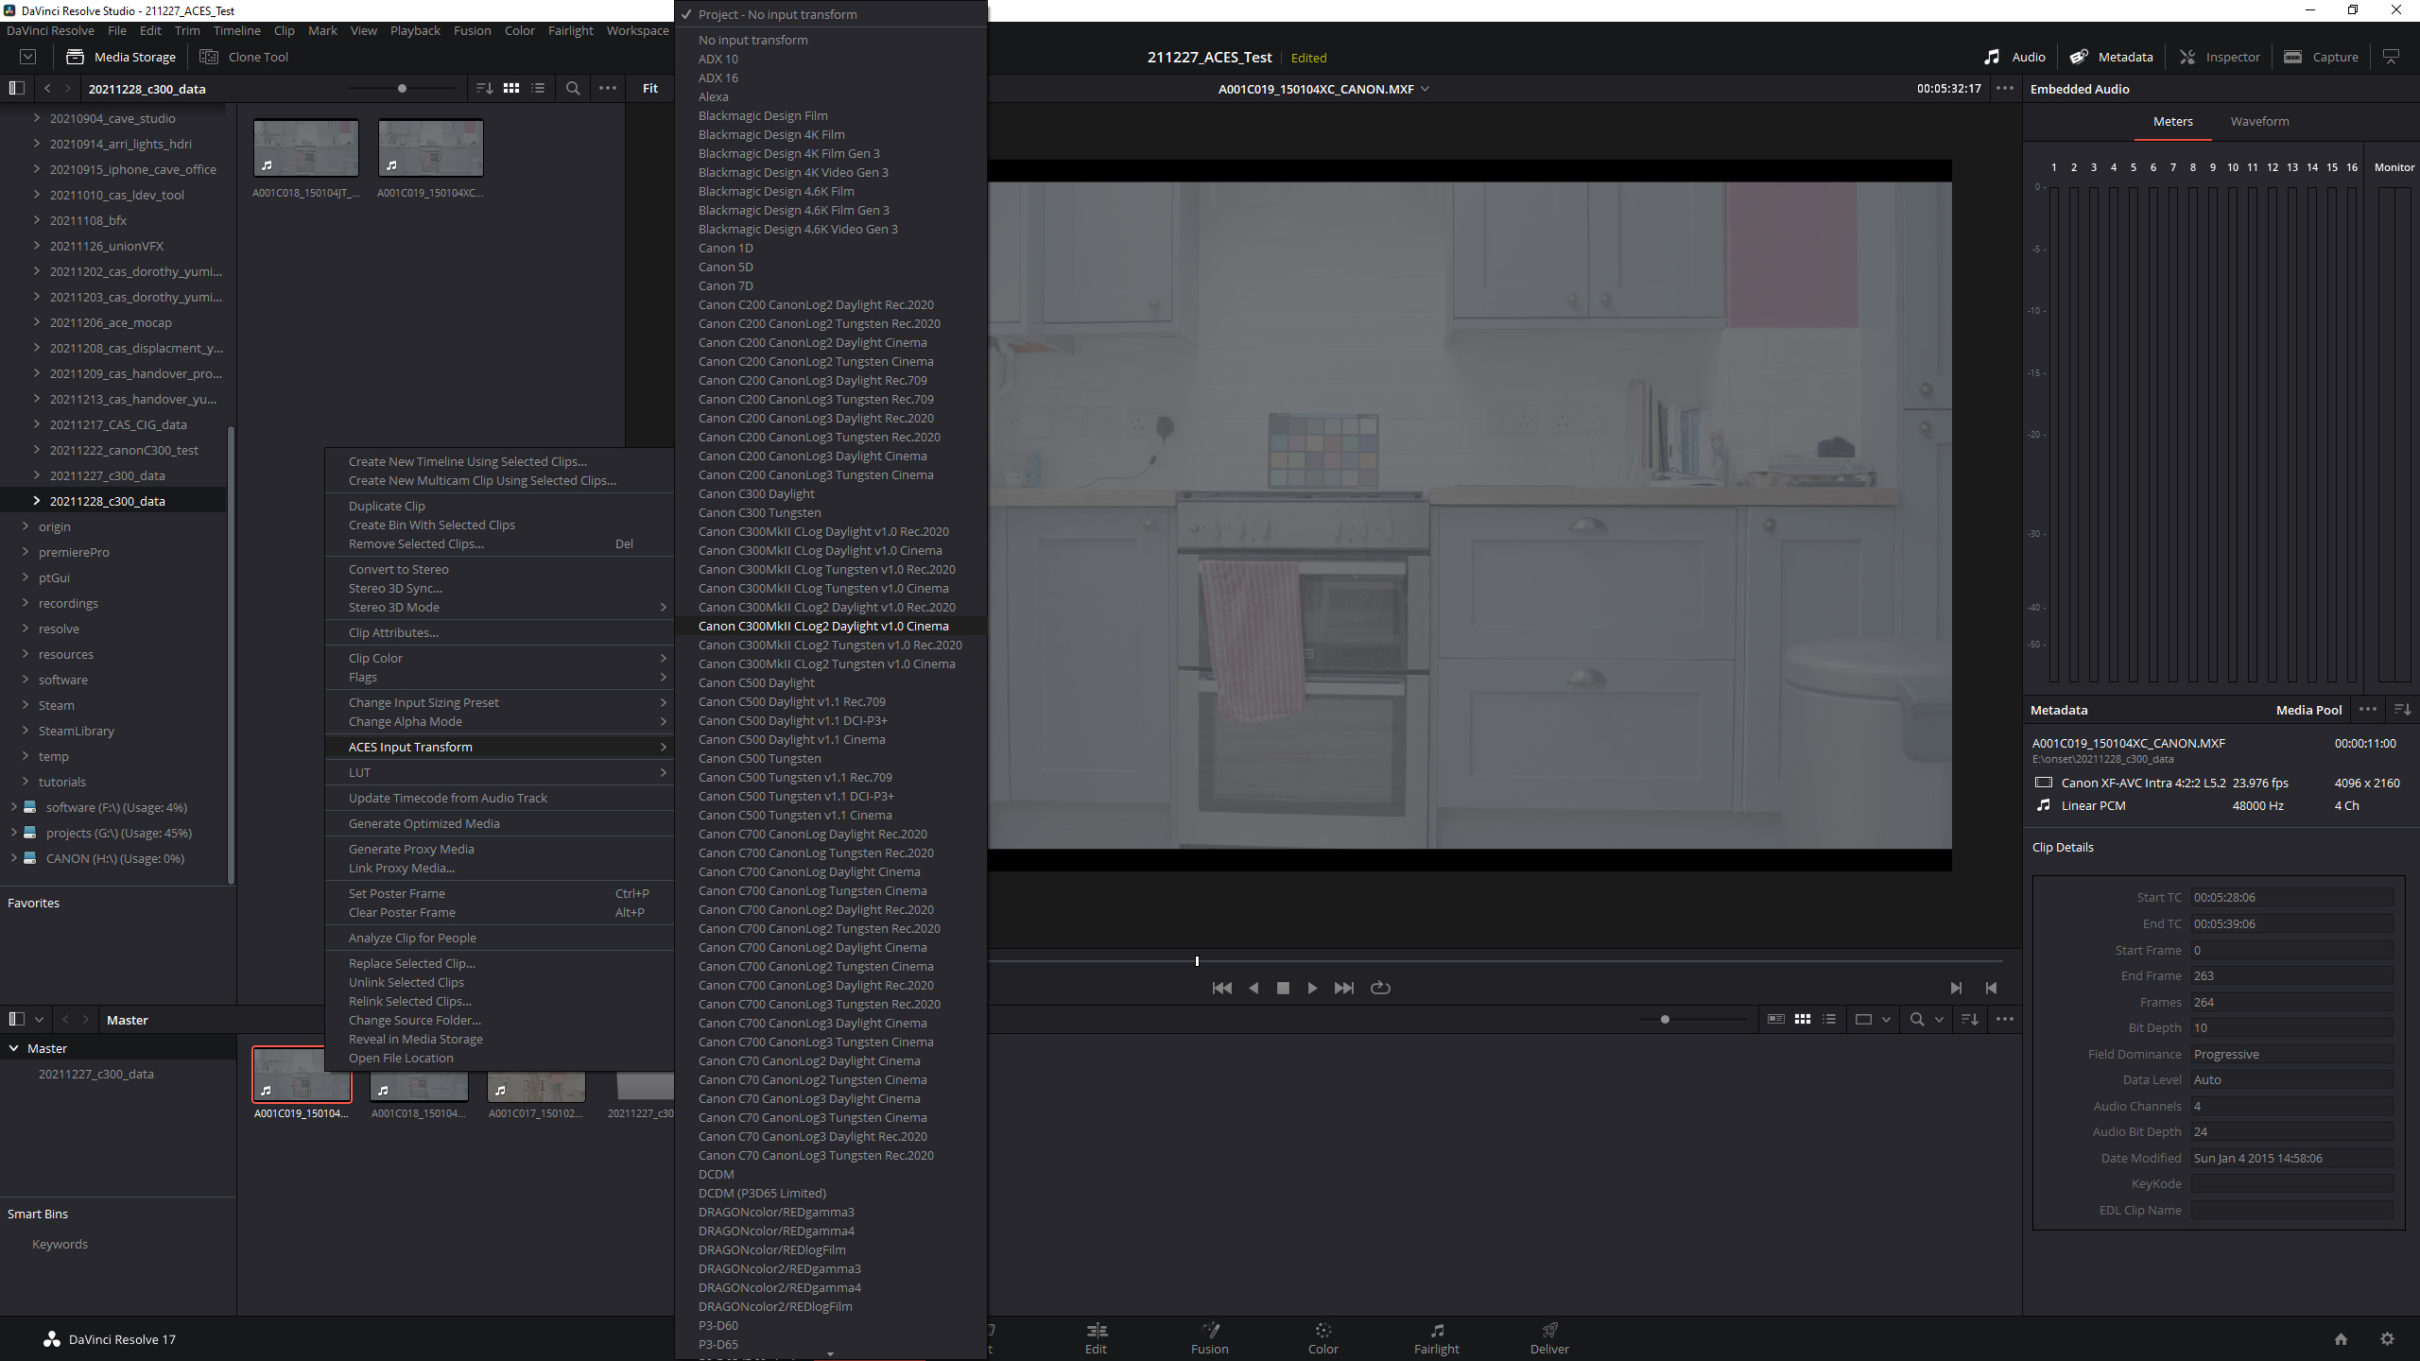
As you can see from the above image, it seems as though the correct ACES Input Device Transform has not been automatically set. To correct this, RMB-click over the clip and go:
-
- ACES Input Transform > Canon C300MkII CLog2 Daylight v1.0 Cinema
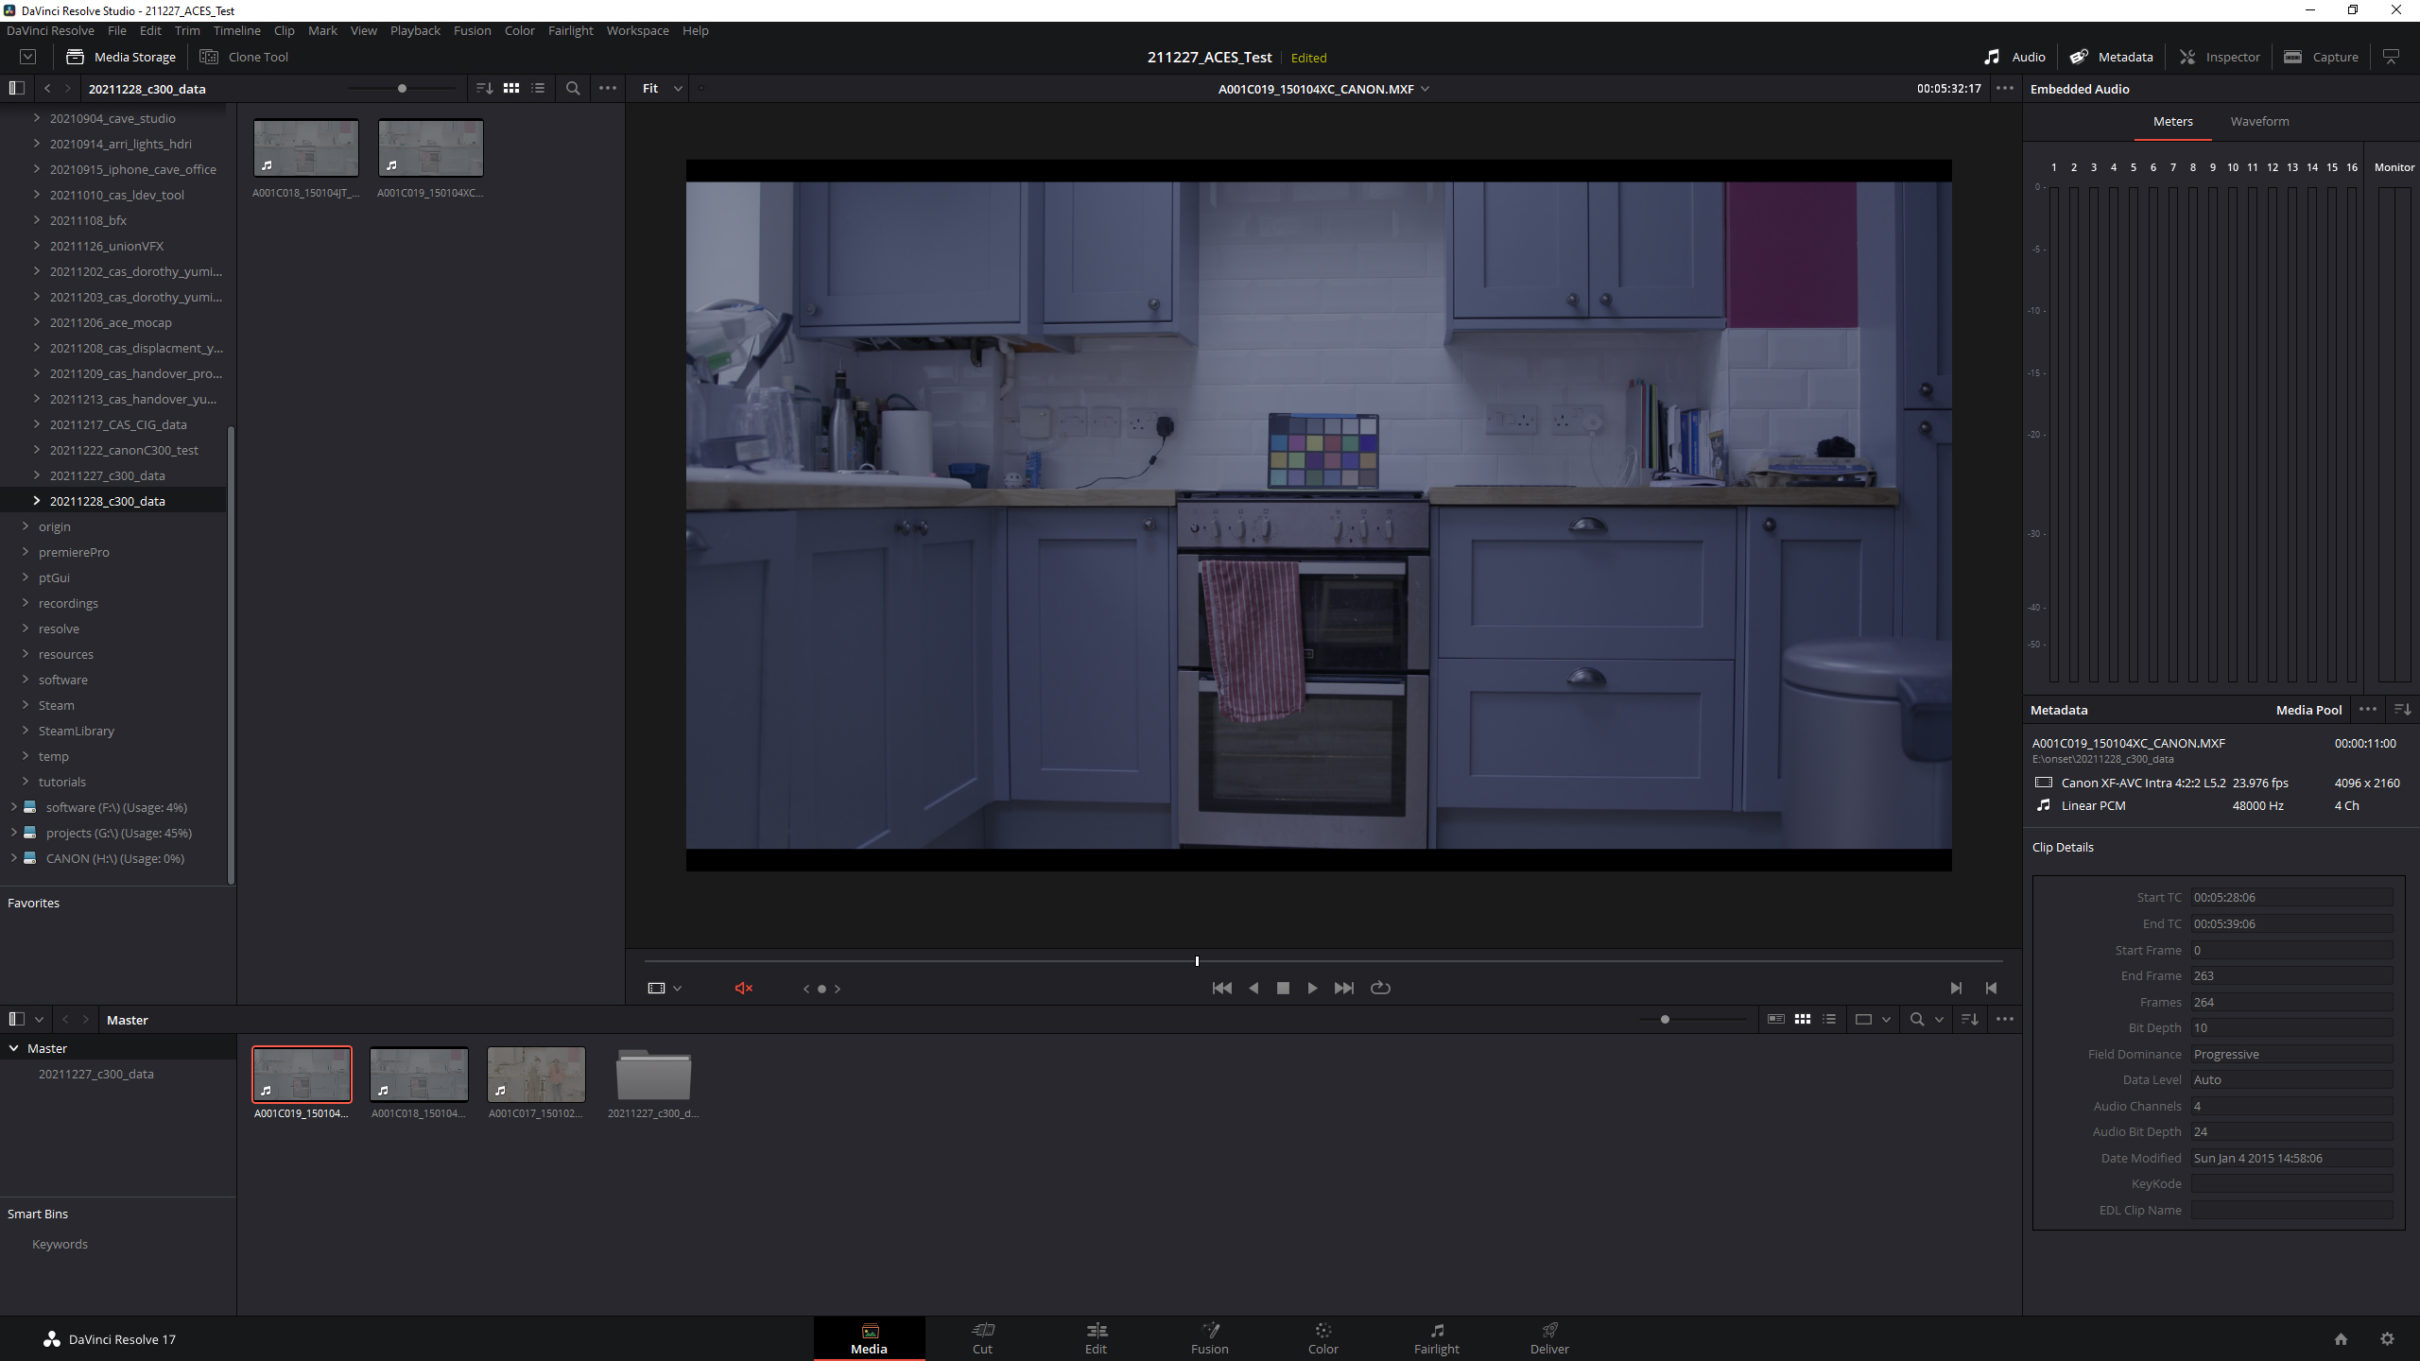
You should now have something like so:
Links
- Canon EOS C300 Mark II – official page for the camera
- Canon EOS C300 Mark II Manuals – offical docs for the camera
- Introducting the Canon OES C300 Mark II – Join Canon U.S.A.’s Technical Advisor Brent Ramsey as he discusses the new features and benefits of the EOS C300 Mark II Cinema camera
- Canon EOS C300 Mark II Tutorial Series – Make sure to check out all the vids!
Support CAVE Academy
Here at CAVE Academy the beauty of giving and sharing is very close to our hearts. With that spirit, we gladly provide Masterclasses, Dailies, the Wiki, and many high-quality assets free of charge. To enable the team to create and release more free content, you can support us here: Support CAVE Academy
Good info