
Search the wiki
Creating a HDRI Light Map in ACES

Test Data
If you are looking for some test data, you can pick up a a multi-bracketed set of images here:
Overview
In this doc, we are going to take a series of bracketed images of a light and then use PTGui Pro 12+ to merge them together to create a HDRI within ACEScg colourspace. Previously, I’d use an application such as RawTherepee or Adobe DNG Converter to convert the RAW images to DNG and then Nuke to switch the images to EXR/ACEScg. However, PTGui now supports ACEScg, so we can work all the magic solely in that application.
Once we’ve generated the HDRI in PTGui, we’ll then switch things to Nuke, so we can crop, square and make any other tweaked needed before testing in our renderer.
Assessing the Images
For this set of images, we captured 55 different shots of an Elinchrom softbox with a Canon 5ds and a 50mm lens. Using the shutter speed, we shot a complete range of images from 1/8000 to 30 seconds. This was overkill, so we then stripped things back to 28 images for processing. We could probably have stripped this back further or taken less shots on the day but we’d rather capture more data upfront (just in case). Depending on the light, you’ll possibly need to shoot with an ND filter too to capture the full exposure range. For the light we’ll be working with in this example, we did not need to use the ND filter.

Importing the Images and Merging them in PTGui
Once you’ve prepped your images, create a new PTGui project, and hit Load Images. Select all your CR2 (RAW) images so they pop into PTGui.

Next, jump into the Source Images tab, hit Ctrl+A to select all the images, and then hit the RMB button to bring up the options menu and select Link Selected Images.

This should merge all the images, so you end up with something like so:

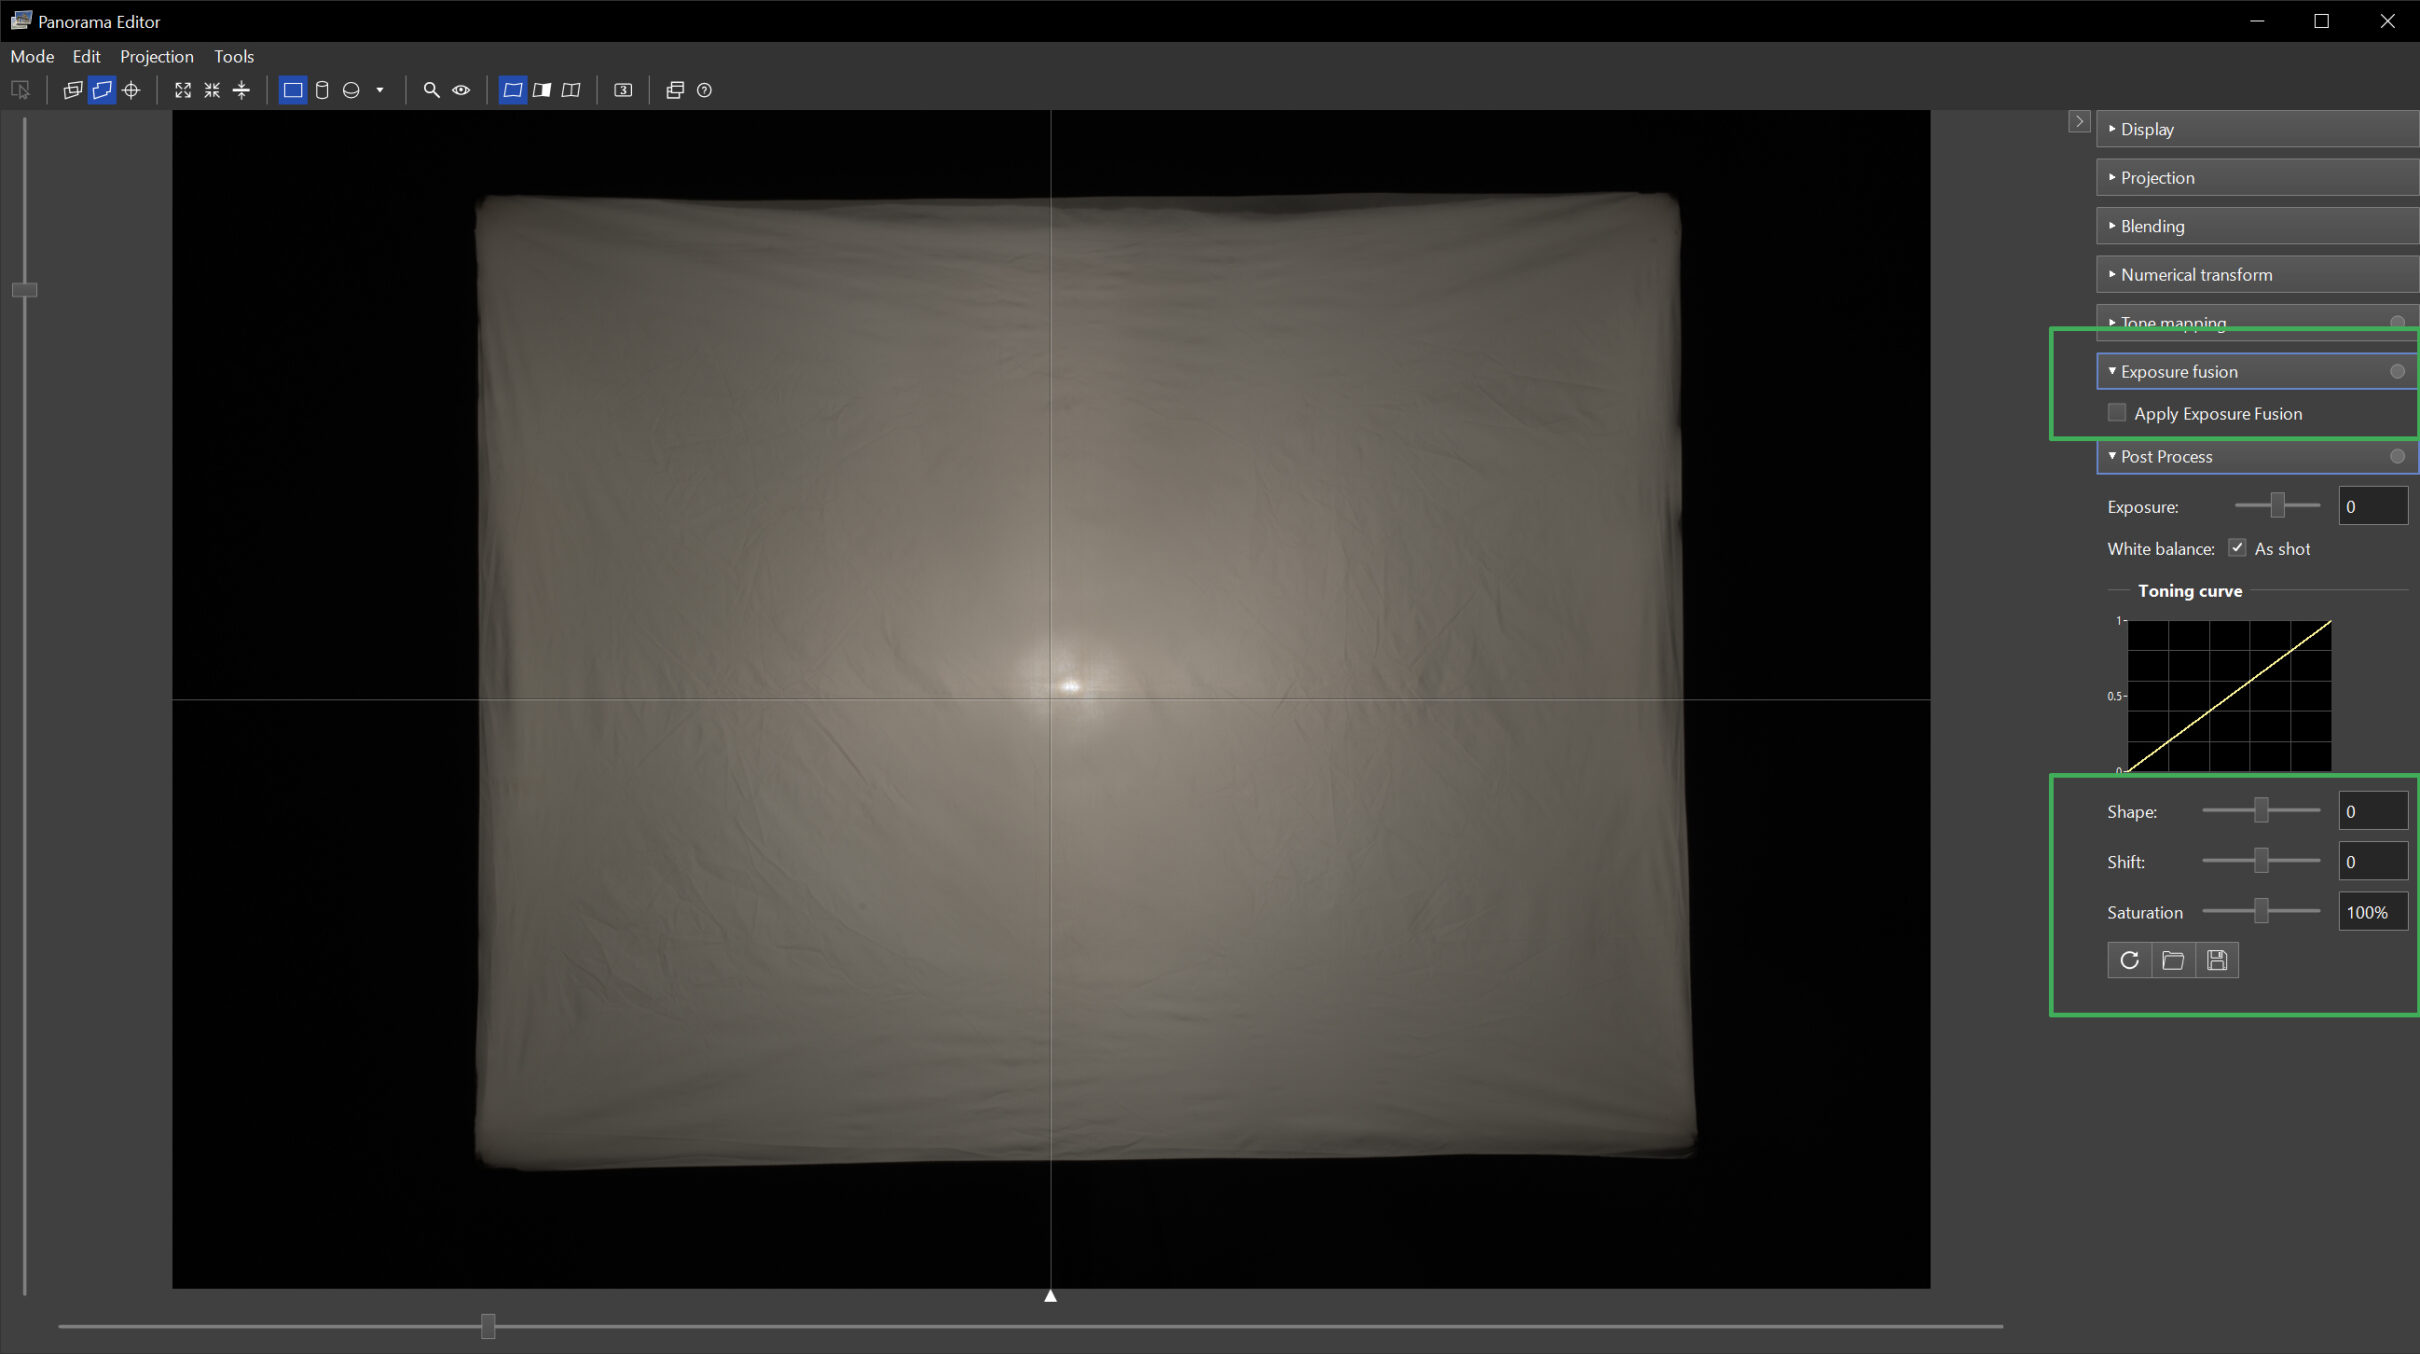
Now go Tools > Panorama Editor and within that window, go Edit > Fit Panorama. You’ll also want to ensure Tonemapping is disabled, and set Shape and Shift under the Post Process tab to 0.
Exporting your Light Map from PTGui
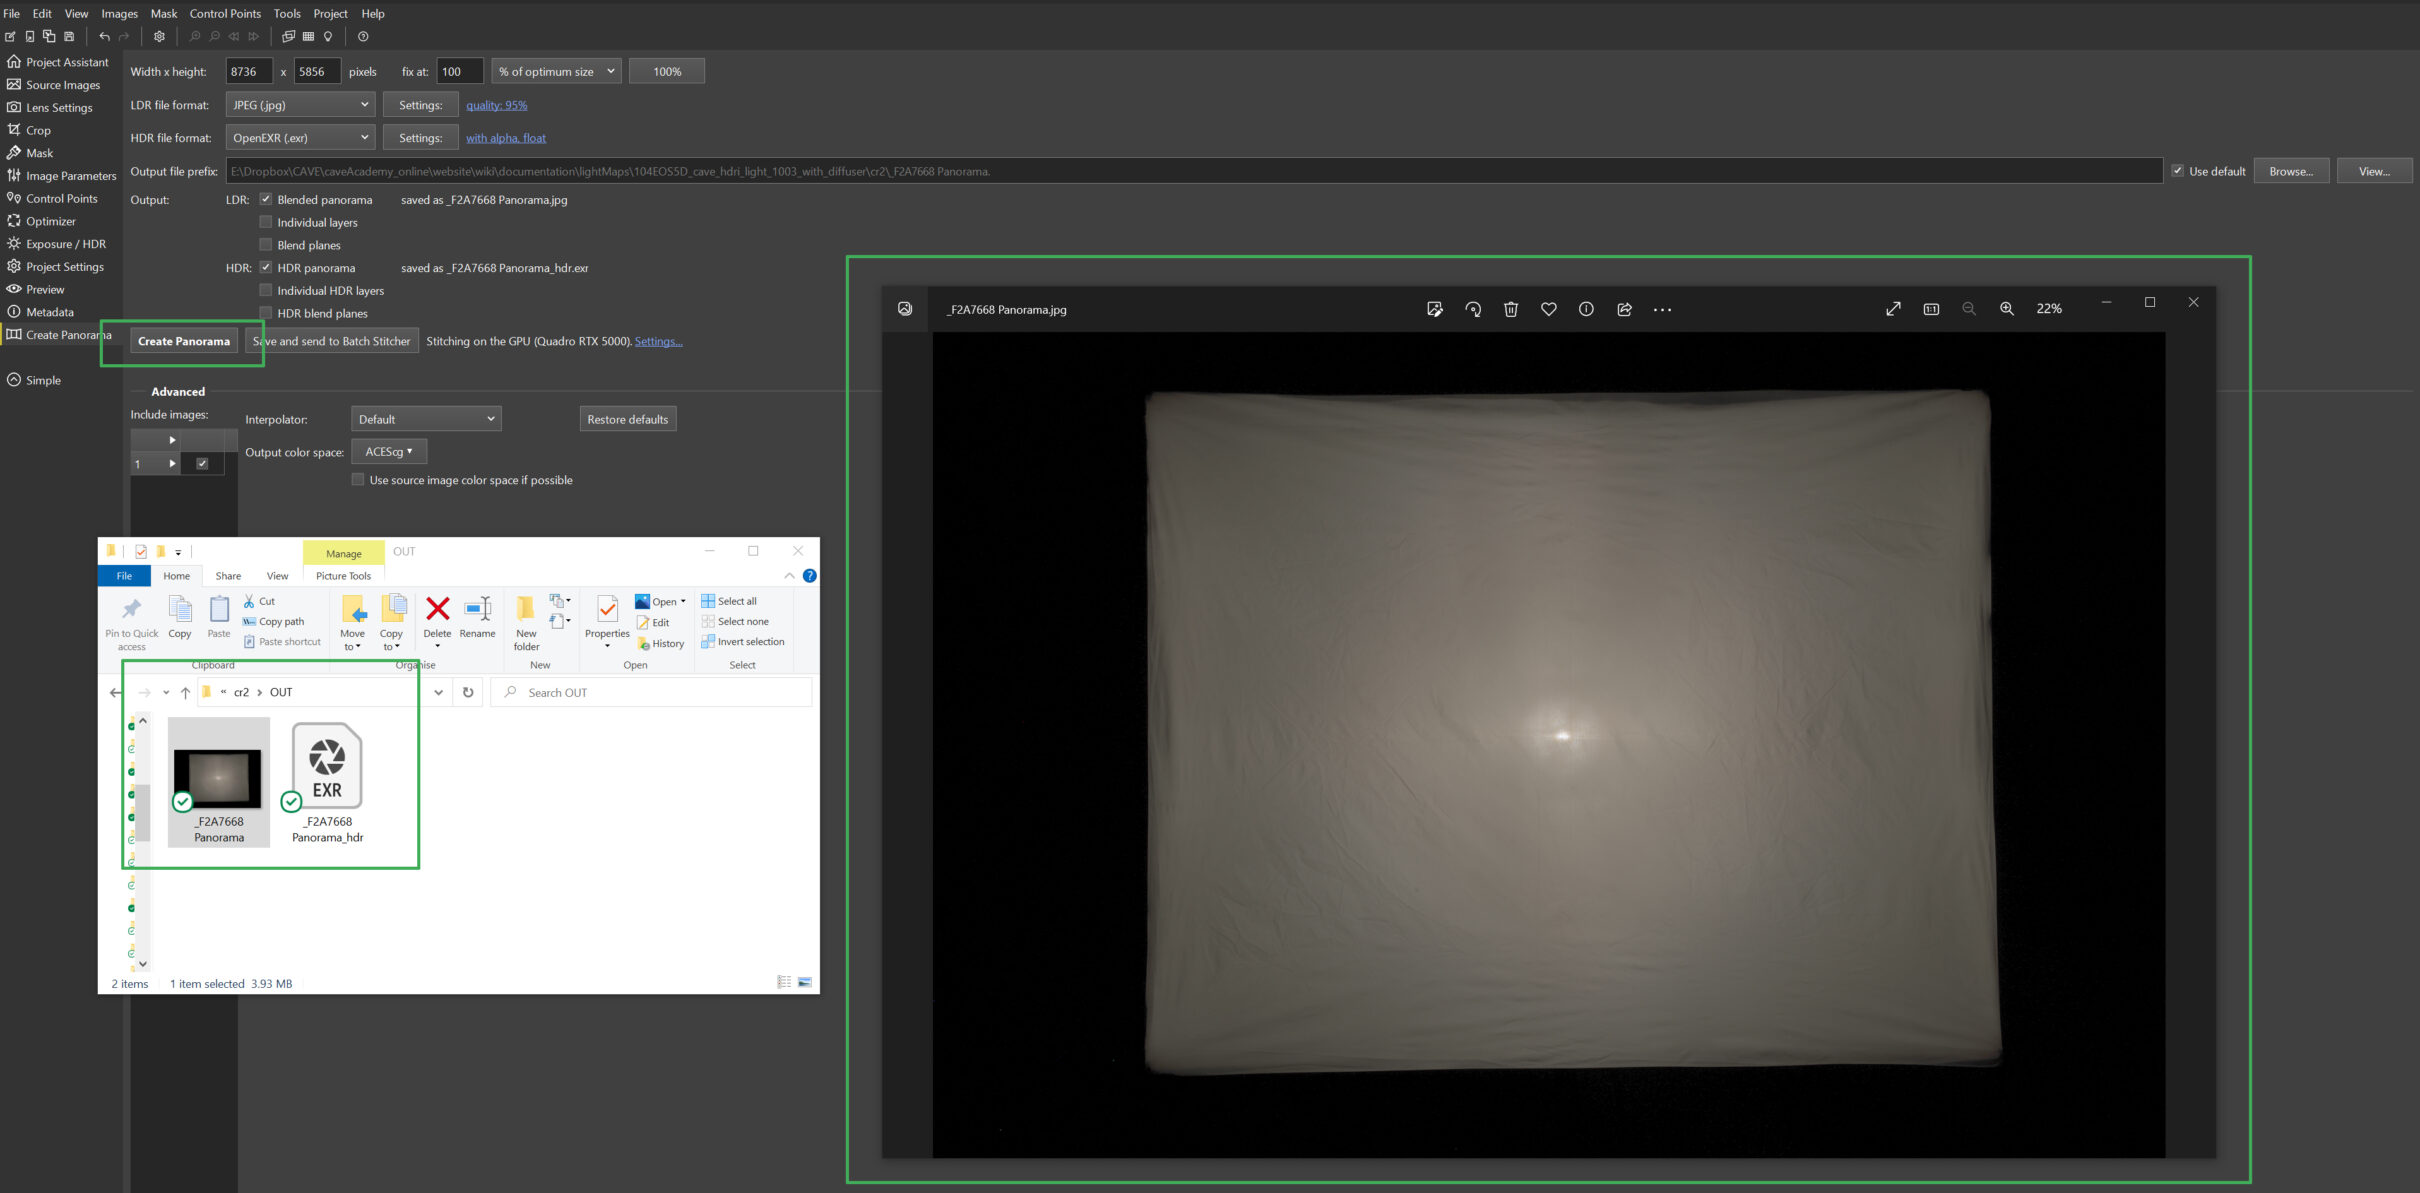
The next step is to export the map, so we can further clean things up in Nuke. To do this, go to Create Panorama tab and make sure HDR panorama is enabled and the Output color space is set to ACEScg.

Hit Settings for the HDR file format and make sure to set the following:
- Bit depth: Float (32 bits per channel)
- Compression: None

Hit Create Panorama and you should end up with something like so (I’m just previewing the jpg here):
Tweaking the Light Map in Nuke
Now that we have our light map, let’s jump into Nuke, so we can prep it to then use in our 3D app. In Nuke, we are going to make the light map square, so we can then re-scale it to size in our 3D app. You could leave the light map pretty much as is, but this is our preferred method of working.
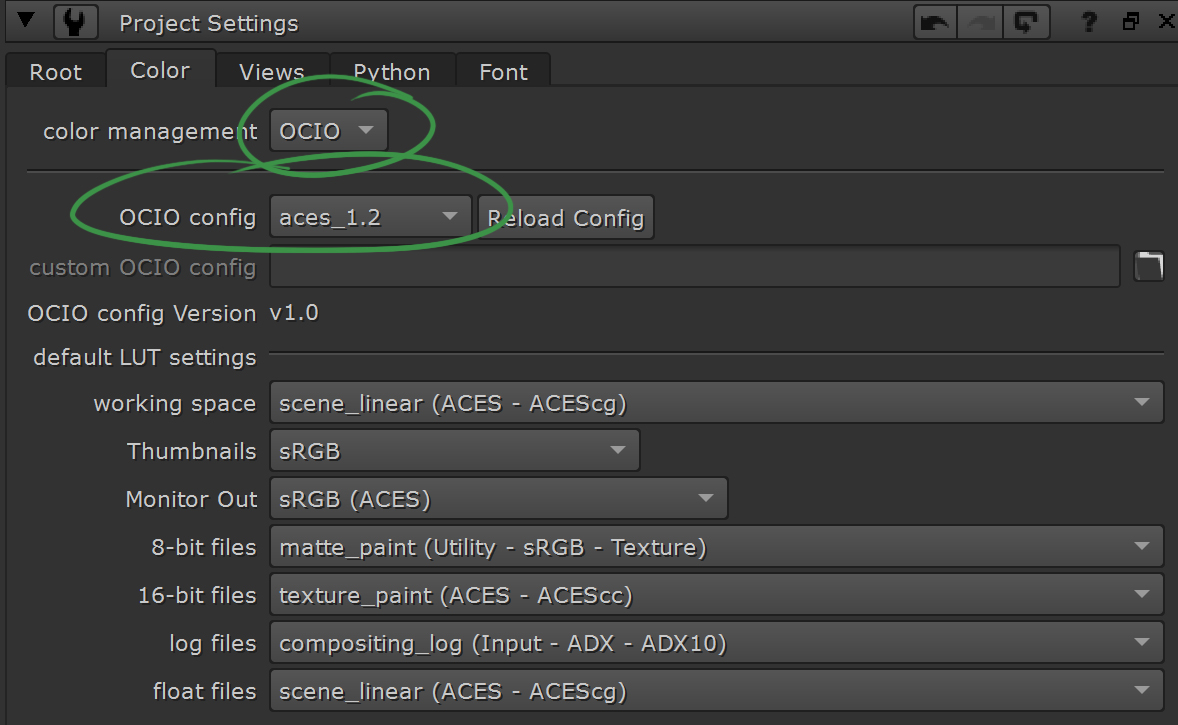
First, we need to make sure we are working in ACEScg.
In Nuke, hit the S key on the keyboard to bring up the Project Settings window (or go Edit > Project Settings), and set the following:
- color management: OCIO
- OCIO config: aces_1.1 or aces_1.2 (this depends on your version of Nuke)
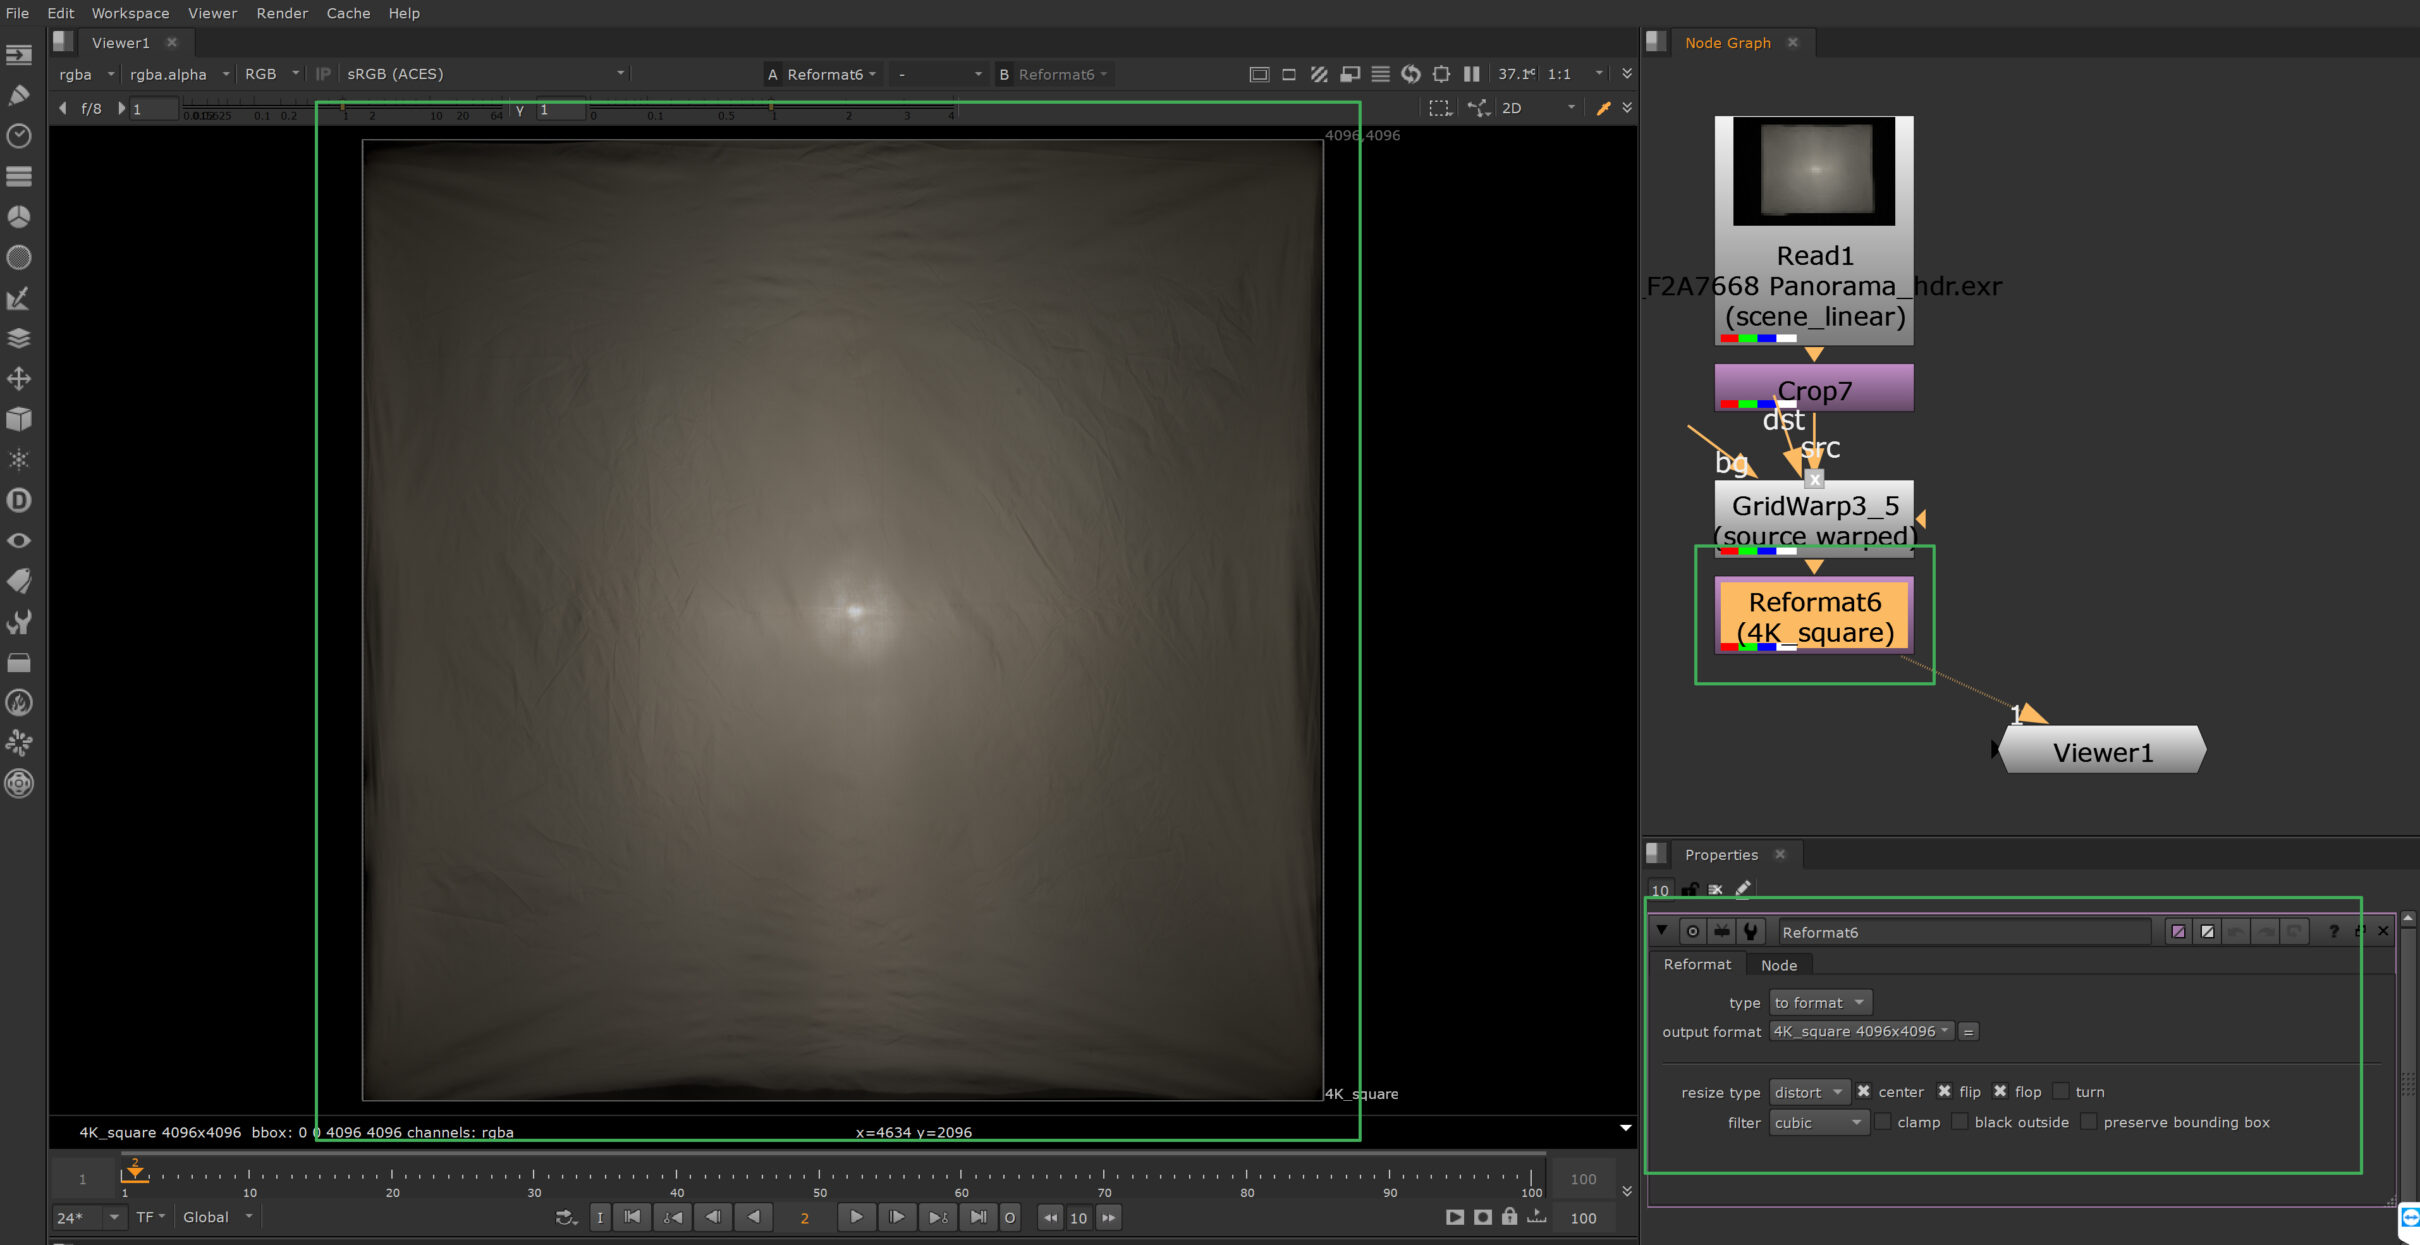
Hit R to load the light map (exr) using the Read node or simply drag and drop it into Nuke. Then add a crop node and remove any of the background, so we are solely cropped in on the light source.

Now add a Grid Warp node and use it to push the light map to the edges of the frame or remove any odd distortion.

Then add a Reformat node and set it to 4K (4096 x 4096). You may also need to play with the resize settings to orient the light map correctly and push things out to the edges.
At this stage, we are pretty much good to re-export the light map. However, if you are working with a light map that is of a different shape (for example, circular or otogon shaped), then you’ll want to add an alpha things render correctly in your renderer. To do this, you can use a RotoPaint node. You may also need to use a Transform node to ensure the light map is centred.

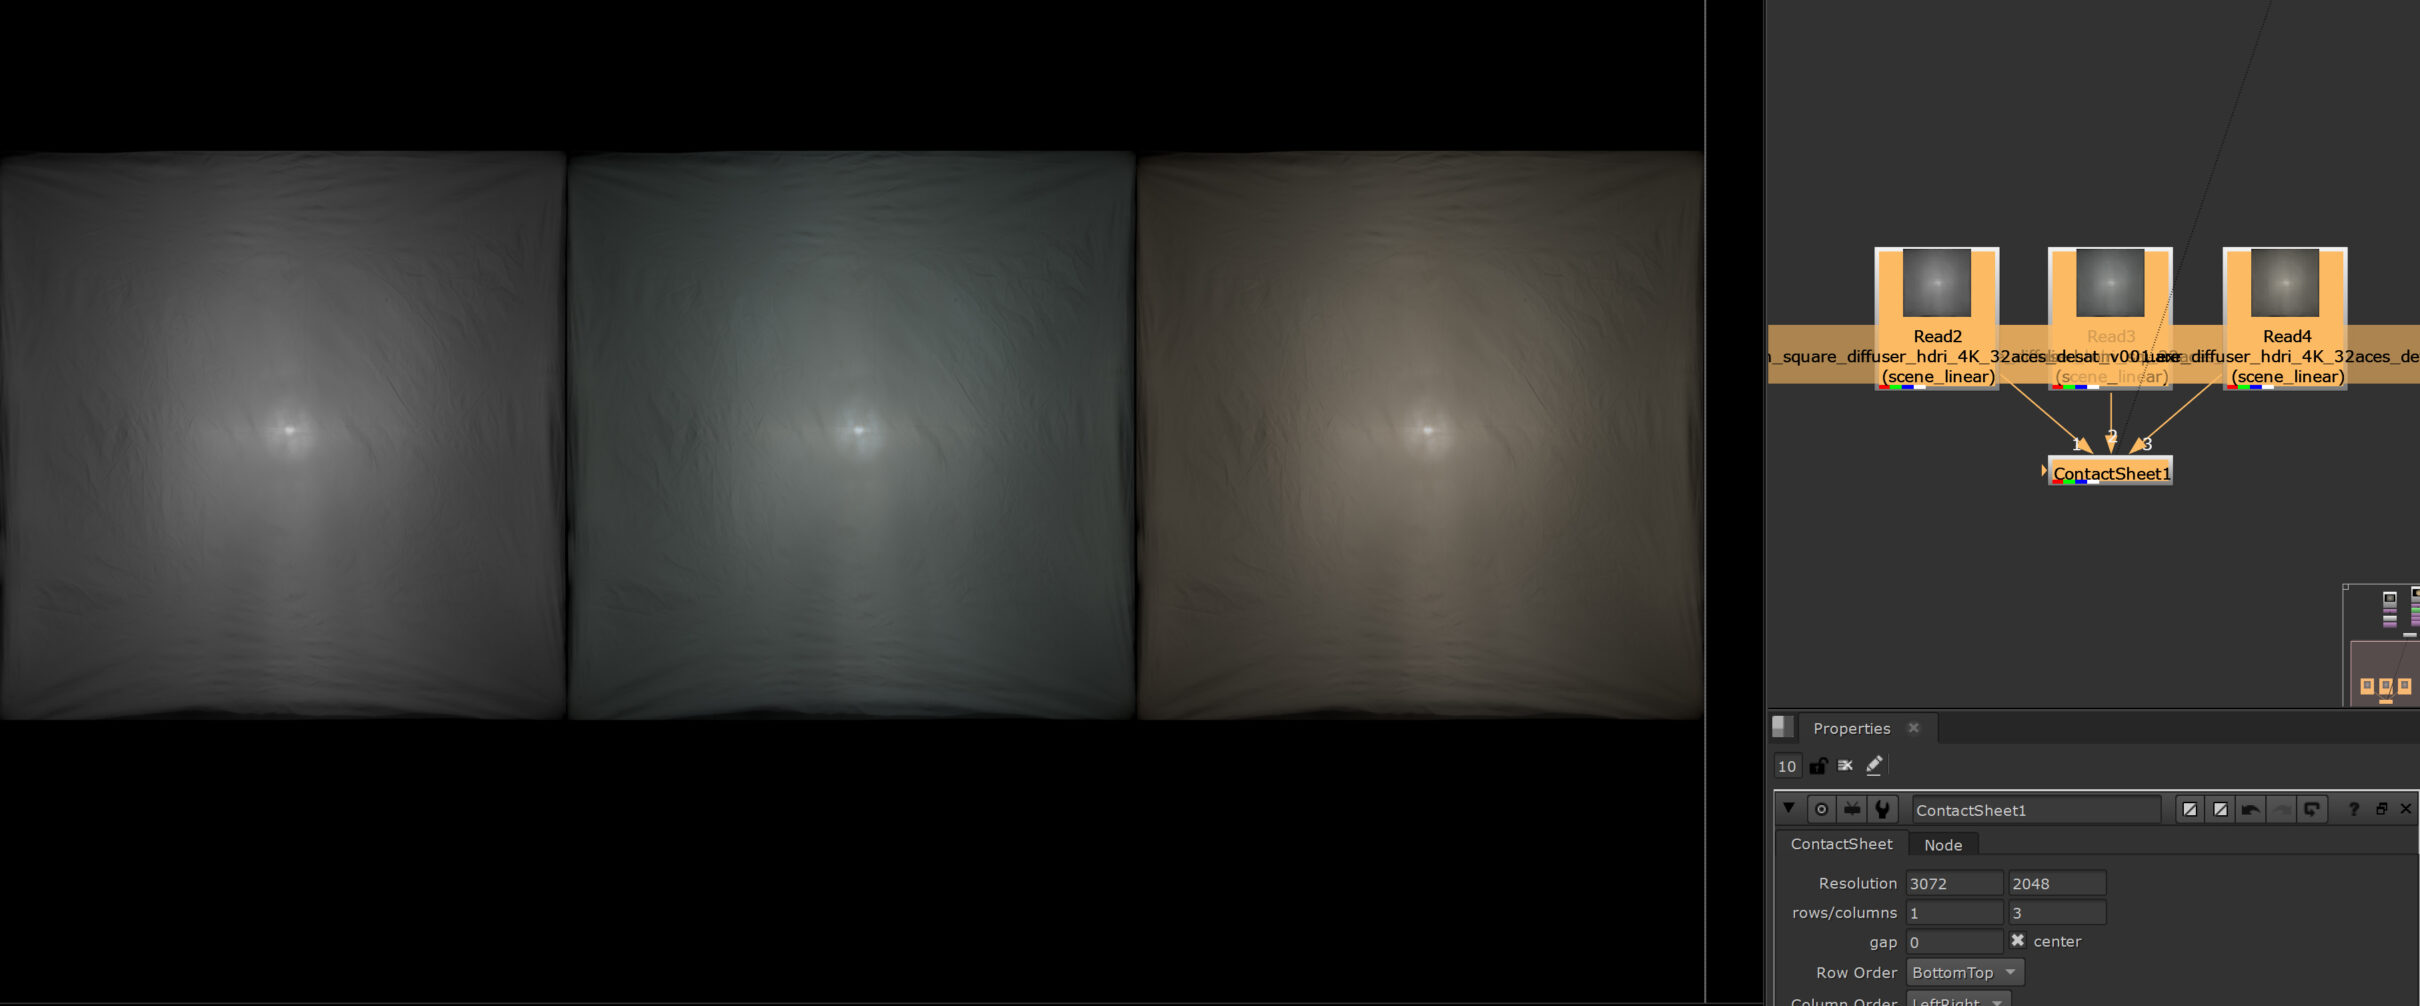
If you have a Macbeth chart shot with the light (captured during the shoot), you could also grade the light map. We tend to keep this part pretty creative, so we tend to leave a version as it is, then a graded version and lastly a desaturated version. By having a desaturated version, we can always multiply colour into the light map for better creative control.
Export your Light Map from Nuke
Once you are happy with your light map, drop down a Write node and set it to the following:
- channel: rgba (the alpha will be important if your light map does not extend to the edges of your image).
- file: <fileName>.exr (foe example: elinchrom_square_diffuser_hdri_4K_32aces_default_v001.exr)
- output transform: ACES – ACEScg
- File type: exr
- datatype: 32 bit float
- compression: none

Testing your Light Map
With your light map ready to go, let’s test the HDRI in Maya using the Arnold renderer.
In Maya, create an Area Light and scale it to to around 83 x 100cm (which is the size of the physical real-world light).

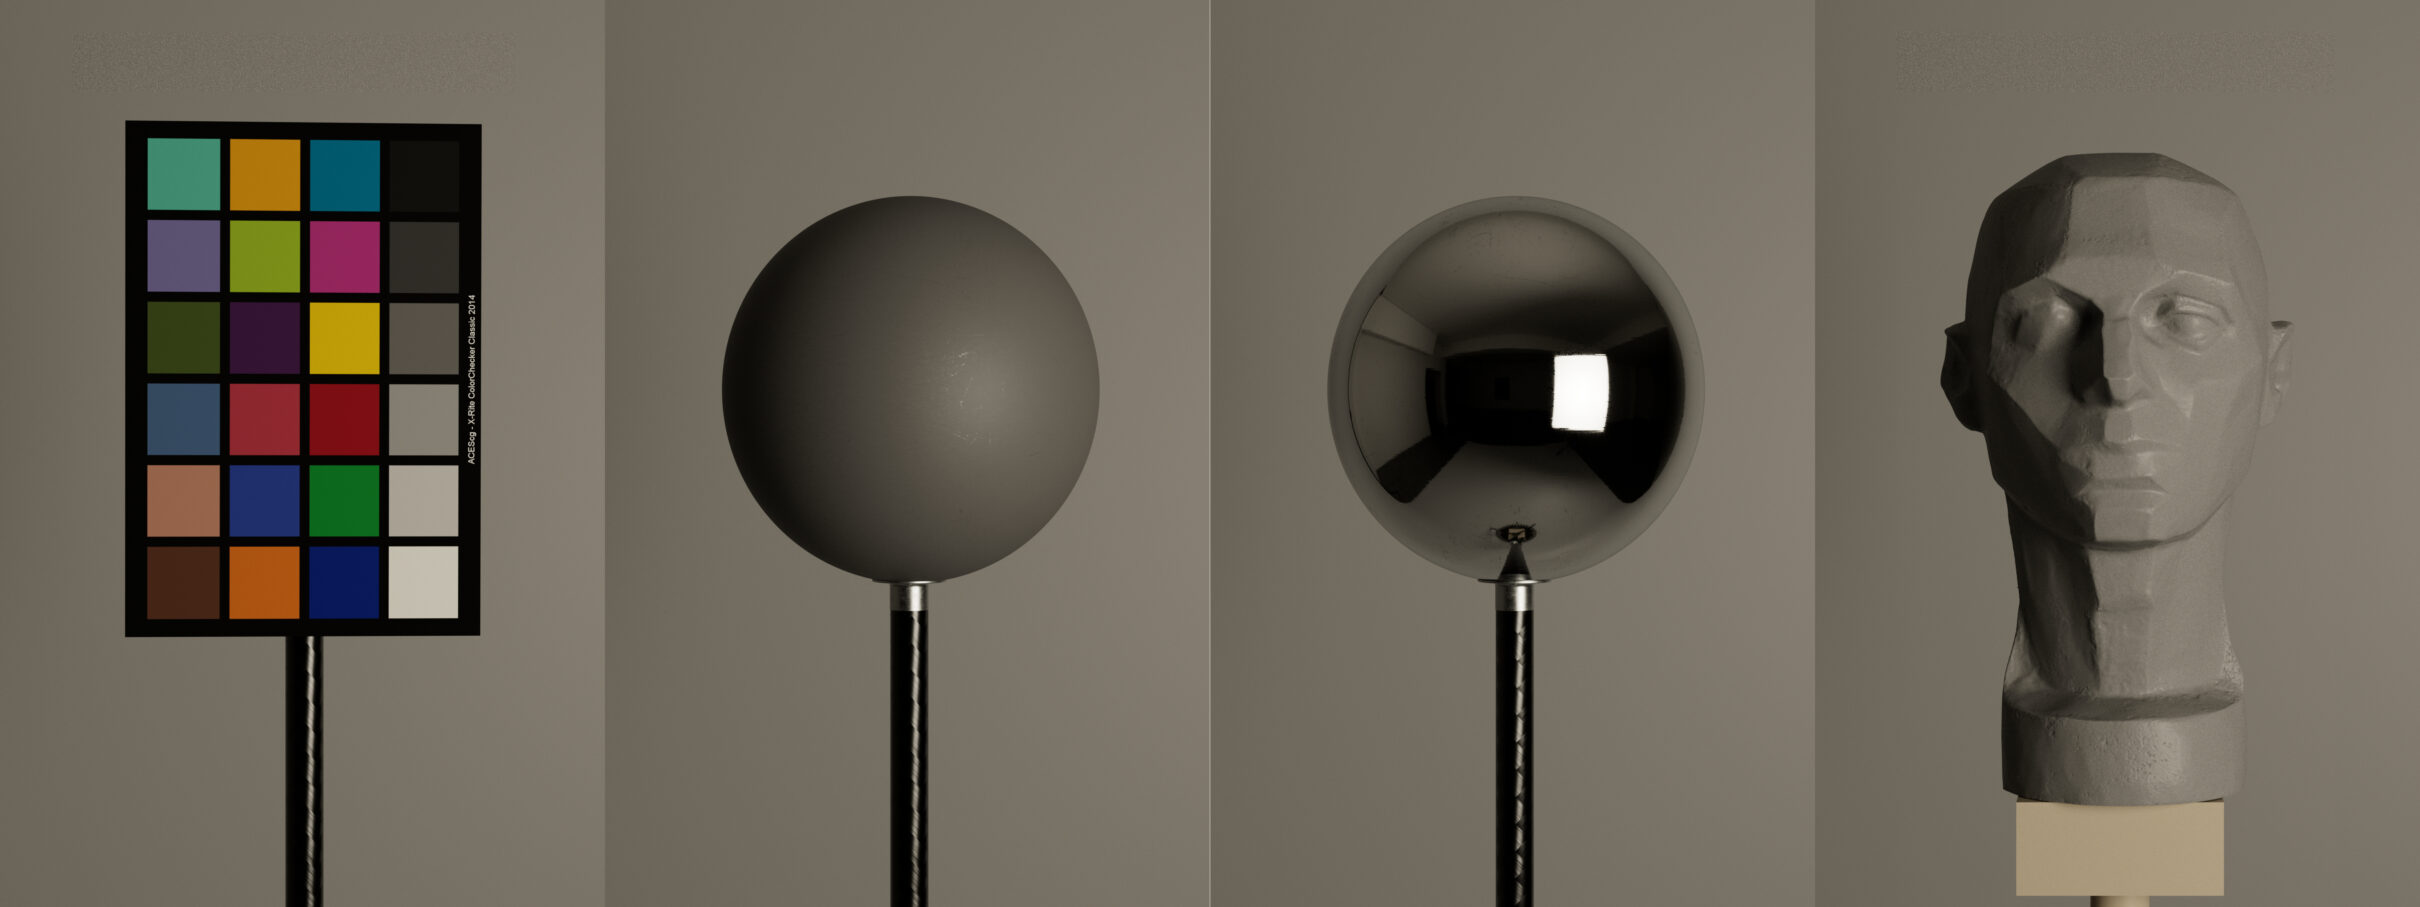
Then map the HDRI to the color input, play with the exposure value and hit render.

Here are some of my results:


Onset Data Acquisition and Creating Look Dev Environments Course
If you are looking for a more detailed step-by-step breakdown, you can check out our courses on capturing and working with light maps here:
- Shooting Texture and Look Development Reference 1001
- Creating Digital Studio Look Development Environments 1001
- Onset Data Acquisition 1001
- Shooting HDRIs and Panoramas 1001
Support CAVE Academy
Here at CAVE Academy the beauty of giving and sharing is very close to our hearts. With that spirit, we gladly provide Masterclasses, Dailies, the Wiki, and many high-quality assets free of charge. To enable the team to create and release more free content, you can support us here: Support CAVE Academy