
Search the wiki
Shooting Grain Reference

Introduction
In this document, we’ll cover how we go about shooting grain reference.
If you are looking for a more detailed step-by-step breakdown on all things onset related, you can check out our courses on the topic here:
- Onset Data Acquisition 1001
- Introduction to Cameras and Lenses 1001
- Shooting HDRIs and Panoramas 1001
- Shooting Texture and Look Development Reference 1001
In this lesson, we won’t go into detail regarding the solving of the grain. Our focus will be on how to go about shooting grain reference, so it can be used later on in the VFX pipeline.
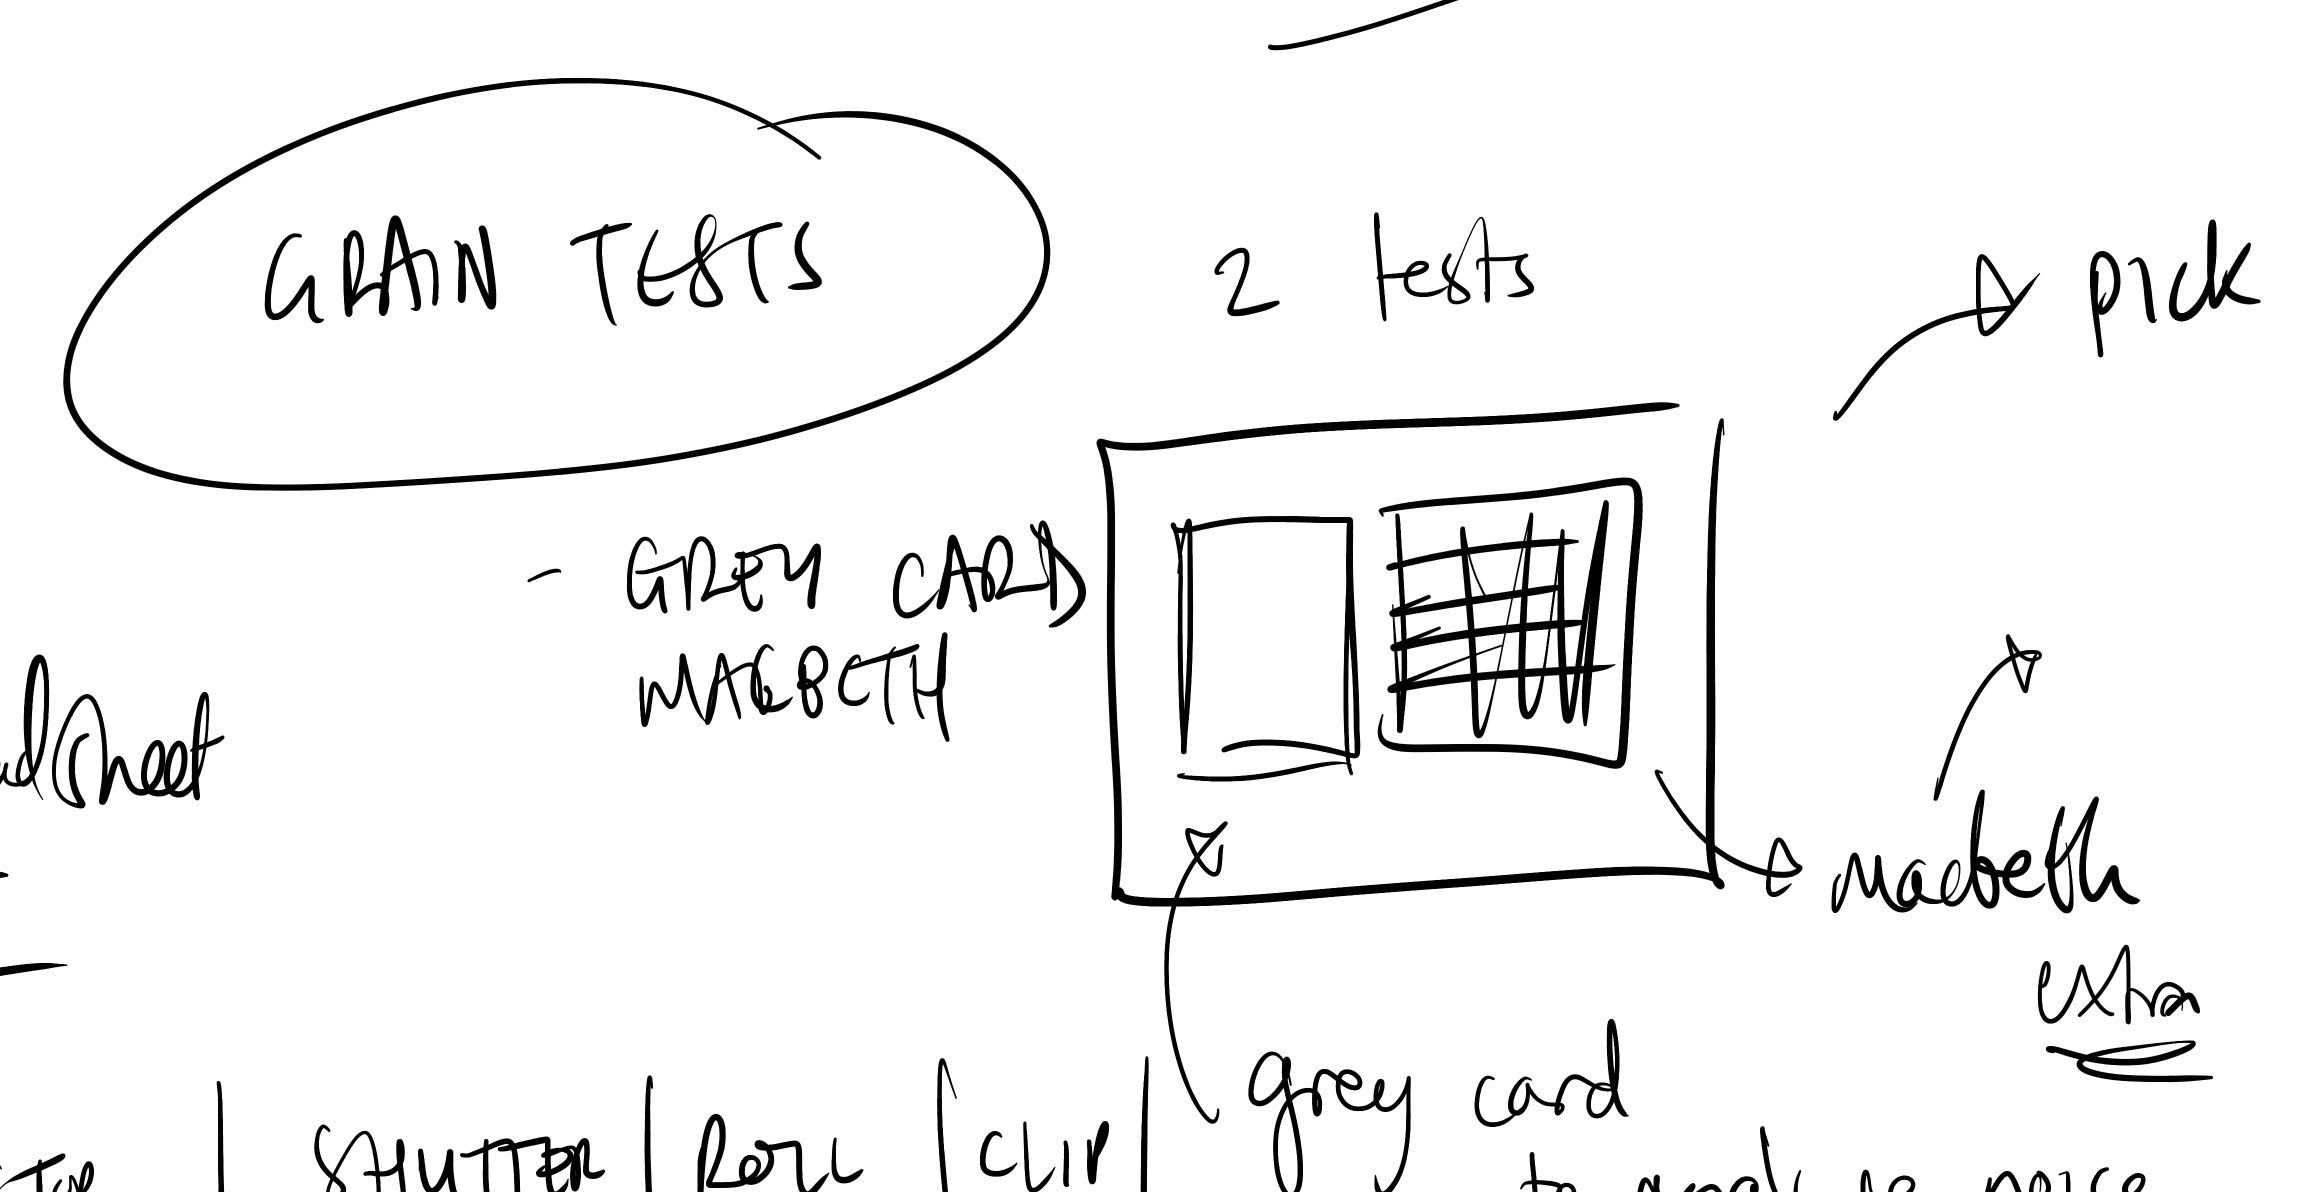
Shooting Grain Reference Setup
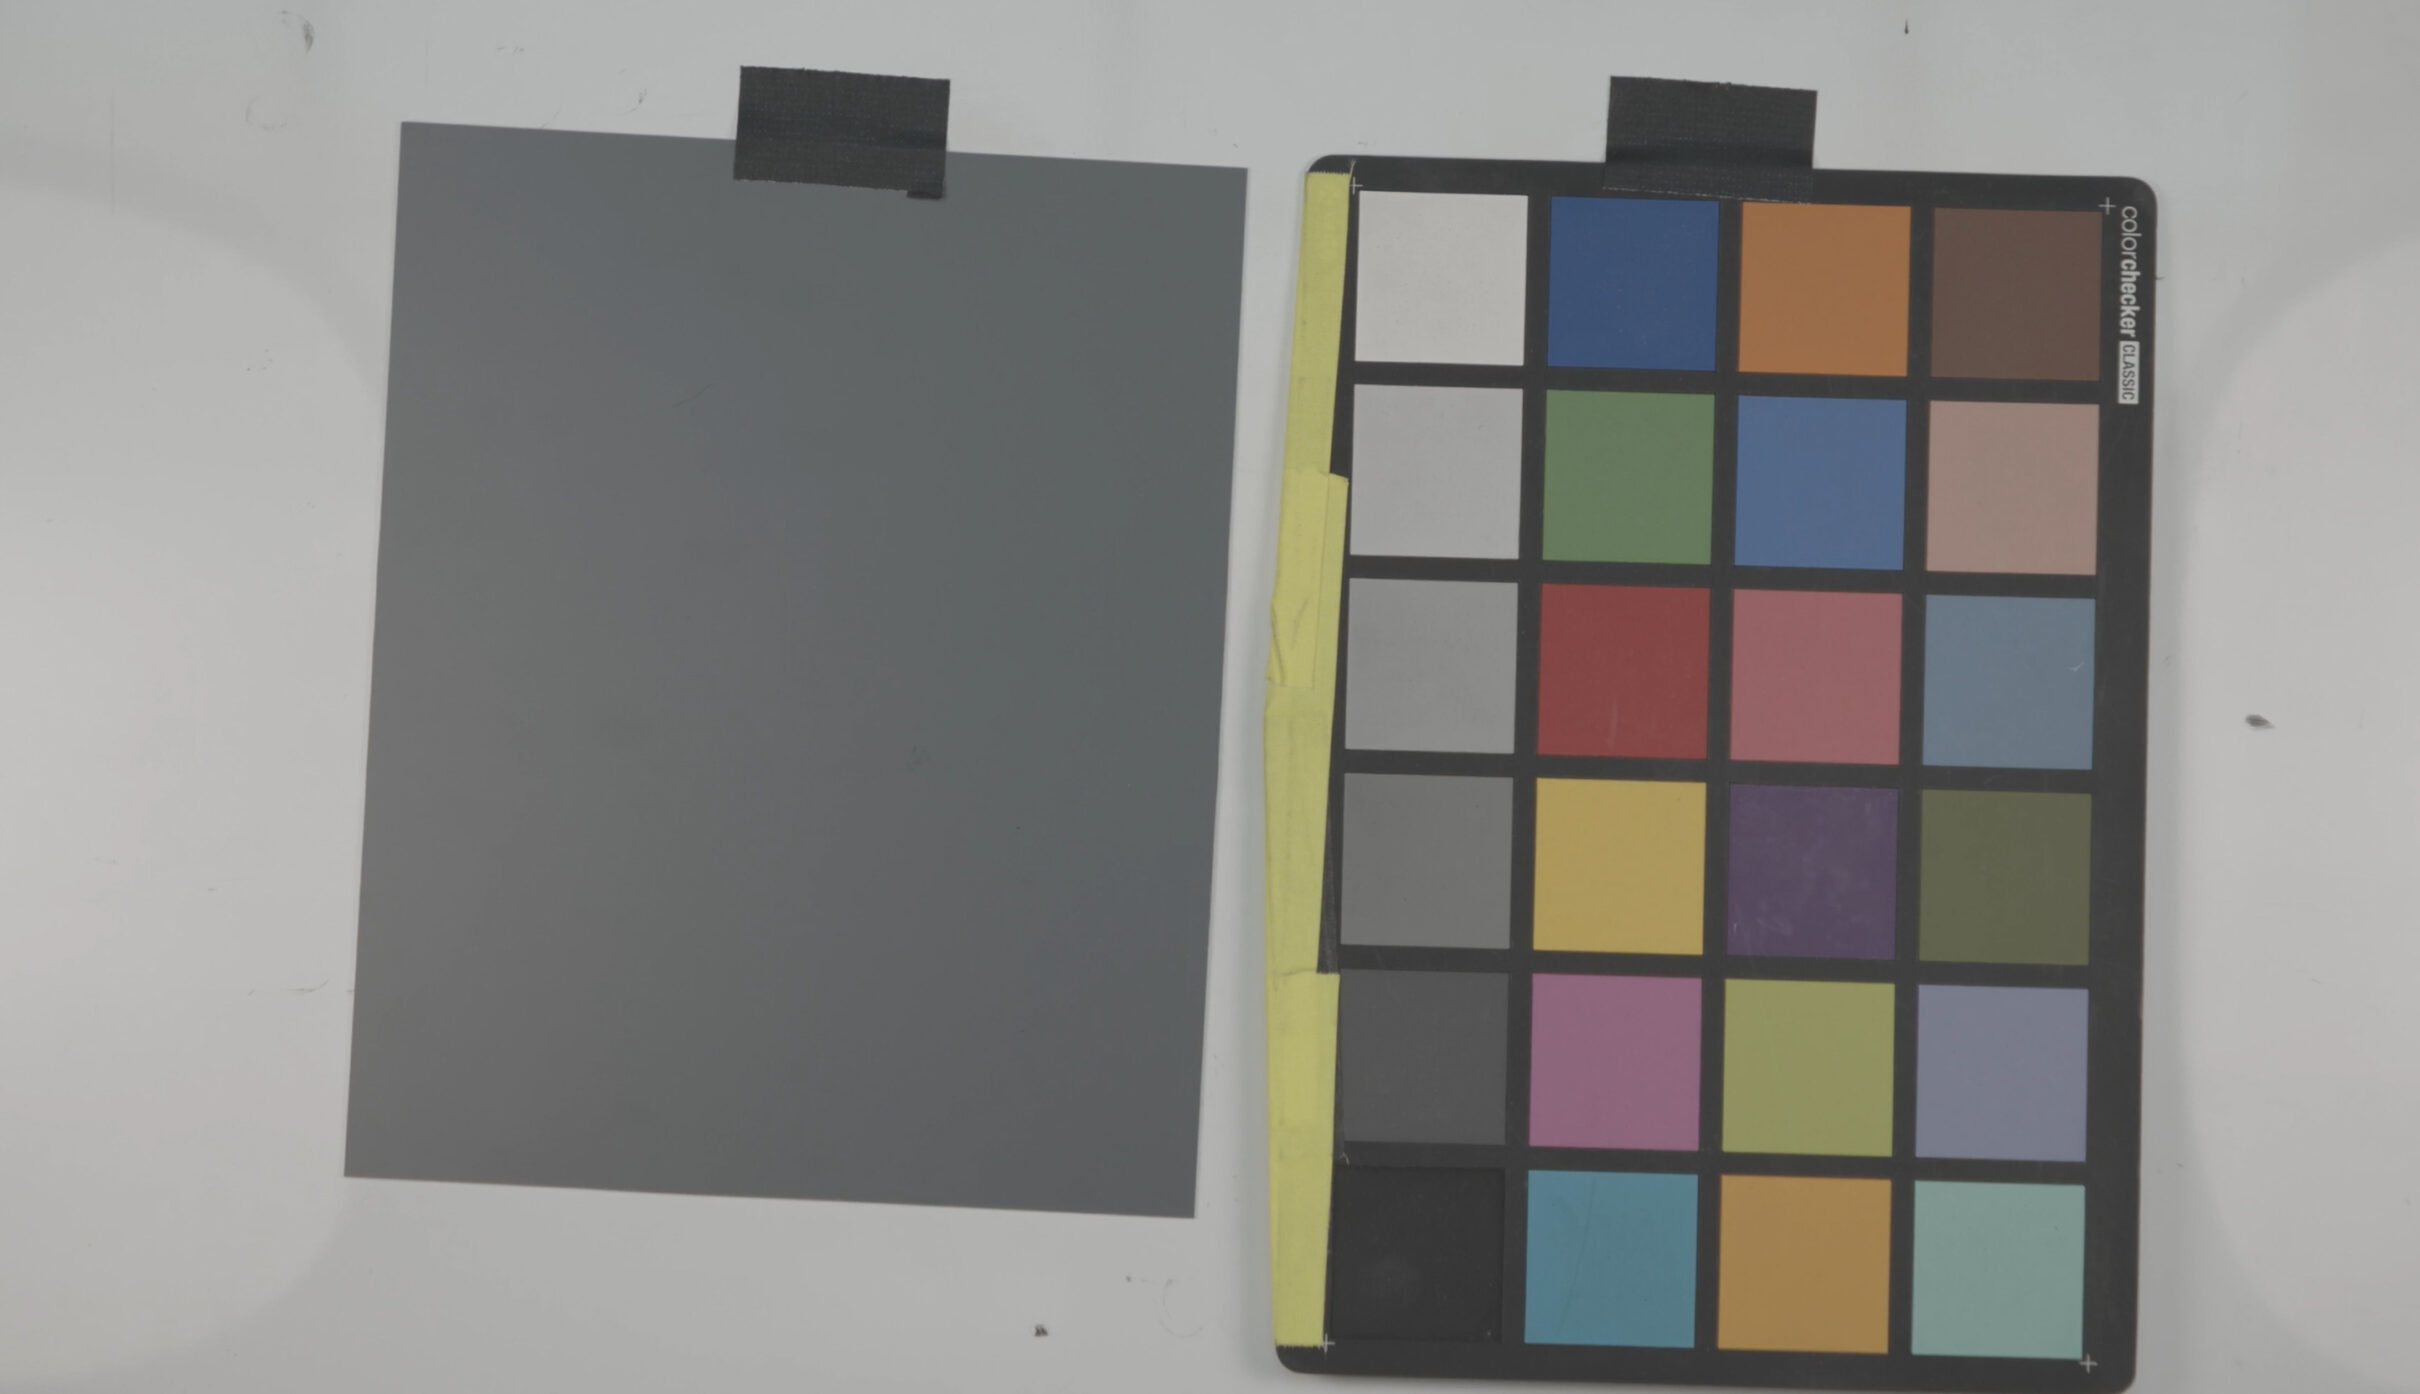
To capture grain reference, frame a frame a large grey card and the Macbeth chart side by side on a flat surface (wall for example). The grey card will be used to analyse noise by the denoiser. Pick a good lens as we are testing the sensor. 50mm for example should do the trick.
ISO/ASA contributes to noise, so this is our focus for the shoot. It is also important to balance the exposure through the T/F-stop for each ISO. All the ISO takes should have the same exposure. We’ll then want to shoot reference for each ISO value. For example, if your ISO range is 100 – 3200, then shoot the following:
- ISO 100
- ISO 200
- ISO 400
- ISO 640
- ISO 800
- ISO 1280
- ISO 1600
- ISO 3200
Slate Info
On the slate, include the following:
- Project Name
- Date
- Camera body + serial number
- Lens + serial number
- Lens focal length
- ISO
- T-Stop/F-Stop
- Shutter
- Roll
- Clip
- Take

And if you don’t have space to fit everything on the front of the slate, use the back too:

Grain Reference Naming Convention
Create a fixed naming convention that pulls in the info from the data sheet. At CAVE, our convention is as follows:
<cameraBody>_<lens>_<focalLength>_<iso###>_<t/fstop>_
For example:
canon5ds_sigma_50mm_iso100_f8_
arriAlexa_arriMasterPrime50_50mm_iso320_f5.2_
All the info for the naming convention should be visible on the slate.
Shooting Grain Reference Workflow
Once you’ve got things set up, do the following:
- For each ISO:
- Balance the exposure with the T/F-Stop, start the recording, get the slate into frame and then out of frame, shoot for a couple of seconds, stop the recording.
- Adjust the T/F-Stop 2 under, start the recording, re-slate (-2), shoot for a couple of seconds, stop the recording
- Adjust the T/F-stop 2 over the original, start the recording, re-slate (+2), shoot a few a couple of seconds, stop the recording
- Extra: Shoot full-frame reference of a very large grey card
- You will want to make sure the grey card is still evenly lit
- Extra: Shoot the grey card in focus and then out of focus
- this is because the grey card may have some scratches which when in focus, may end up being used by the denoiser. Out of focus will give you what the sensor mainly has as noise
- Extra: Shoot a few seconds of black (with the lens cap on) at ISO 100 and 400
The reason for all the ‘extras‘ is to cover how different compositing supervisors may work with the data. Before the shoot, have a conversation with them to double check what they’d prefer to be captured.

Onset Training
For more information on all things onset related, you can check out our courses here:
- Onset Data Acquisition 1001
- Introduction to Cameras and Lenses 1001
- Shooting HDRIs and Panoramas 1001
- Shooting Texture and Look Development Reference 1001
The Connection Programme
If you are a fan of mixing science with art, or maths with creative thinking, then join our Connection Programme, where we’ll be exploring VFX, animation and games from the core fundamentals:
Resources
- VFX Camera Database – The VFX Camera Database is a database of cameras, formats and workflows. Designed for visual effects in general.
Support CAVE Academy
Here at CAVE Academy the beauty of giving and sharing is very close to our hearts. With that spirit, we gladly provide Masterclasses, Dailies, the Wiki, and many high-quality assets free of charge. To enable the team to create and release more free content, you can support us here: Support CAVE Academy