
Search the wiki
Model LODs
![]()
Introduction
LODs (Level of Detail) are a great way of managing the complexity of an asset. If you are new to LODs, check out the following Wikipedia page: Level of detail, which has plenty of good info on what LODs are, how they are used and how they came about.
When creating assets, a discussion should take place with the supervisor to decide which LODs should be created as not all assets will require multiple levels of detail. Primarily, we’ll be using LODs for two purposes:
- We will switch the model LOD depending on the assets proximity to the camera (for example, an asset closer to the camera will require a higher level of subdivision and detail).
- Allow artists to work with LODs at a lower resolution for better performance (for example, an animator will want to work with a LOD that allows for real-time playback).
In many studios, you’ll find that they’ll have a ‘number’ or ‘letter’ based system for LODs. For example, from low-res to high-res meshes, they may go: 0, 1, 2, 3, 4… Or they may go 100, 200, 300, 400…, Or maybe A, B C, D.
At CAVE, we’ll be going with a number based system (025, 050, 100, 200, 300…) where we will use screen height as the main factor for defining the model LOD as described in the LODs Breakdown section of this page.
For custom hero topology and all other resolutions will either work down from that or be created from an existing base mesh.
Please note that all LODs are based on a 4K render (3840 x 2160).
Overview
In this video, we’ll give you an overview of model LODs using real-world examples shot on a goPro at 4K resolution.
LODs Breakdown
Although the notes below refer to modelling, we will also use a similar LOD system for rigging and textures where required. More details on this to come soon. For model LODs, it is all based on screen height. We use lod100 as our base LOD, where the asset is seen from head to toe onscreen. Anything smaller, we reduce the LOD number by half (025 > 050 > 100), and anything bigger, we increase the LOD number (100 > 200 > 300).
| LOD | DESCRIPTION | SHOT TYPE |
|---|---|---|
| lod025 | For crowd assets. Proxy geo or calimari geo for rigging purposes. | Extreme Wide Shot (EWS) |
| lod050 | For low-resolution assets. | Wide Shot (LS) |
| lod100 | For mid-resolution assets | Full Shot (FS) |
| lod200 | For high-resolution assets. | Medium Full Shot (MFS) |
| lod300 | For ultra-high resolution assets. | Medium Close-up (MCU) and Close-up (CU) |
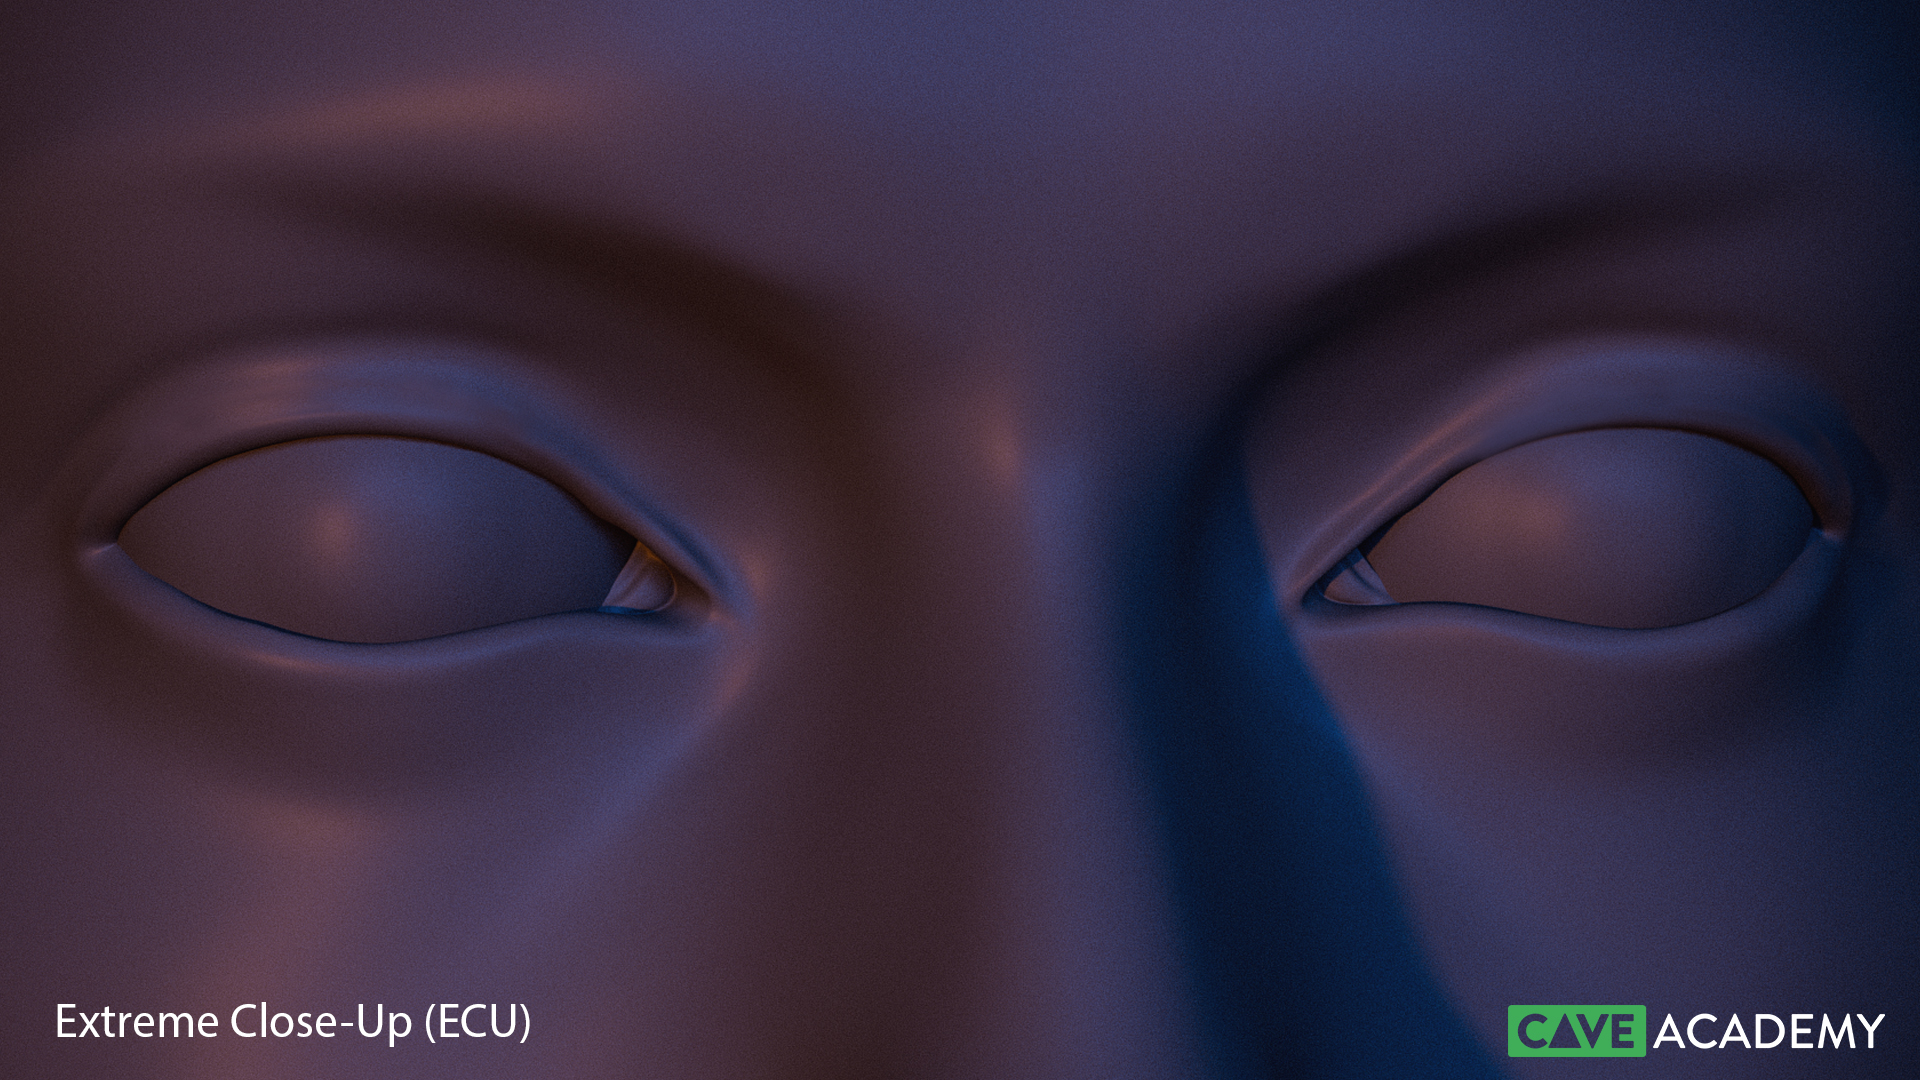
| lod400 | For assets that need custom topology (wrinkles, skin folds, etc.) | Extreme Close-up (ECU) |
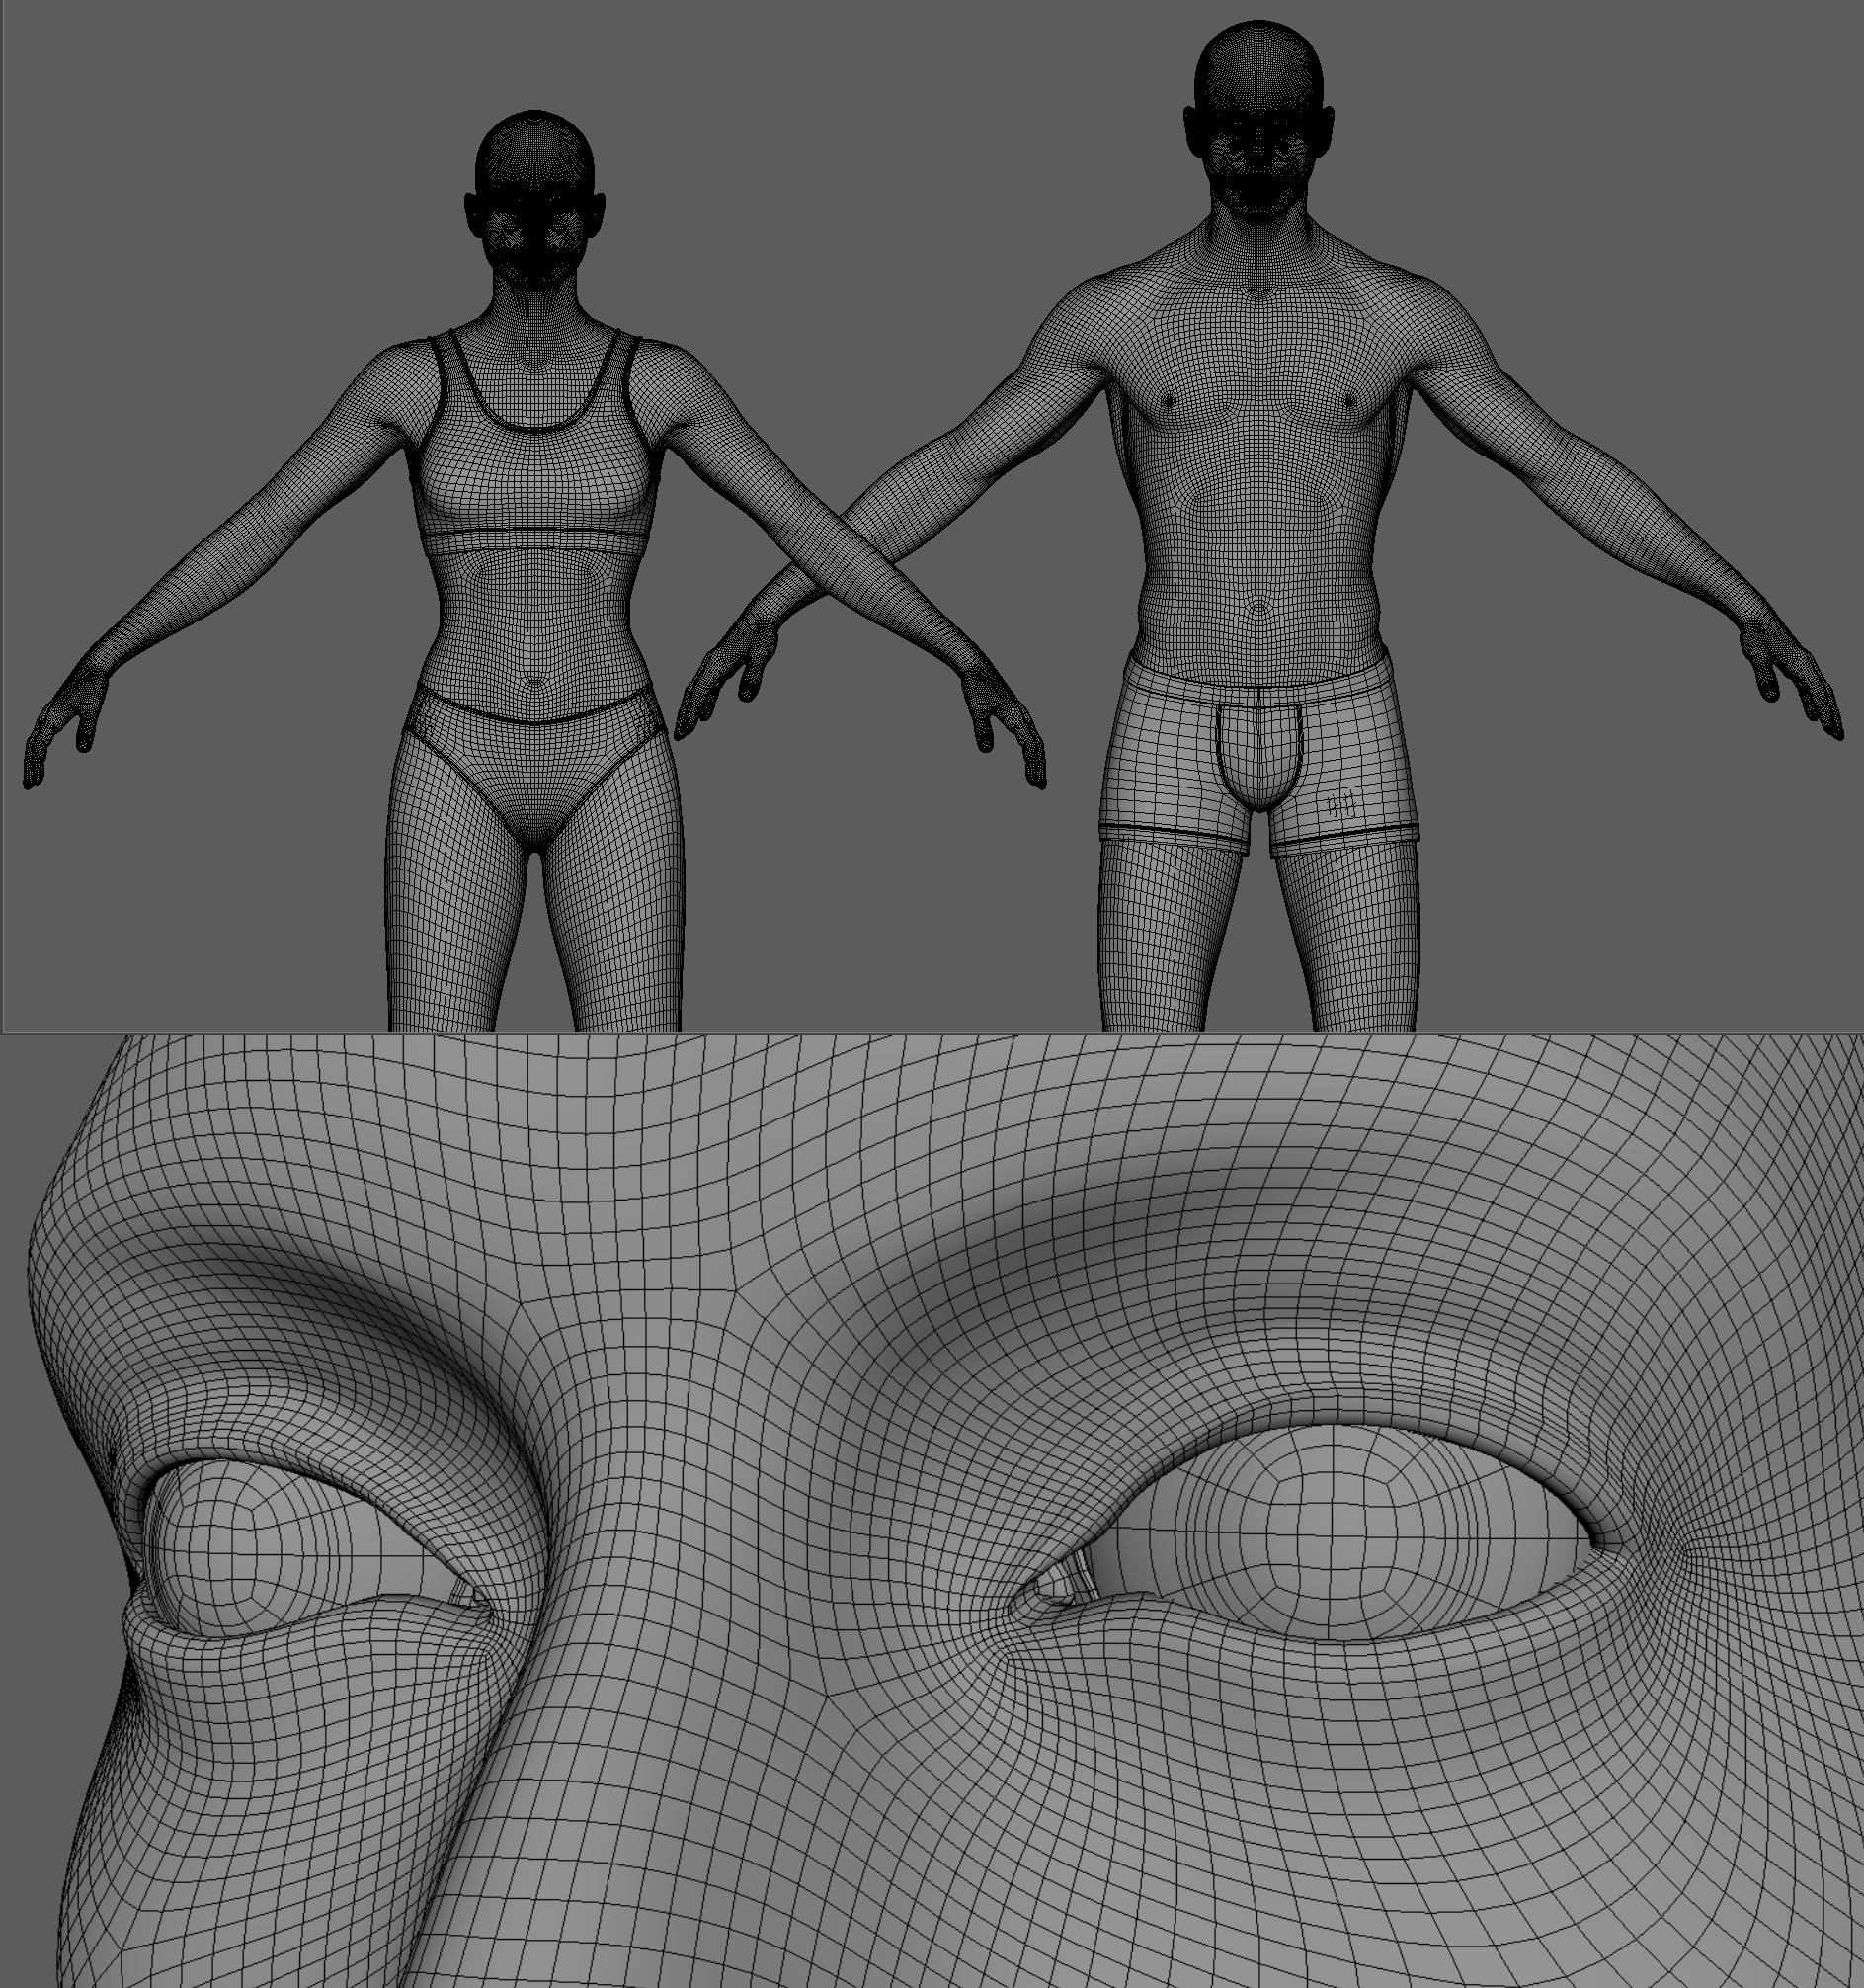
In terms of subdividing the mesh, on most occasions, we’ll kick things off with the lod100 and then subdivide up (or decimate down) from that. And in terms of subdivision, here is a breakdown on how many times to subdivide/decimate the mesh:
- lod025: lod100 x 0.25 decimation
- lod050: lod100 x 0.50 decimation
- lod100
- lod200: lod100 x 2 subdivision
- lod300: lod100 x 3 subdivision
- lod400: lod100 x 4 subdivision

Model LODs in Detail
Here we will break down each LOD to give you a clearer idea on how to approach your assets.
lod025
Models at this LOD will primarily be used for crowd agents. This LOD should support Extreme Wide Shots. Bevelled edges (and creases) will not be required at this level. If need be, you can delete polygons where they are not visible in render.
Additional detail could be added to this LOD via normal maps but may not be required.

When creating crowd assets, make sure to check in with the FX team who will be tackling the crowd simulation. You’ll want to ensure your assets are going to be suitable for simming. For example, ask them what the optimal poly count will be for them to handle the data. They may ask for 8000 polys for combined body and costume. And maybe they want the costumes modelled seperately to the body mesh, so they can mix and match.

lod050
This LOD should be suitable for Long Shots. Bevelled edges (and creases) may not be required. The geometry should be usable for projection work. This LOD does not need to have details such as wrinkle lines modelled into the topology.

Here is an example of the model resolution for this LOD. Additional detail could be added to this LOD via normal and displacement maps but may not be required.

lod100
This LOD should be suitable for Full Shots. Bevelled edges (and creases) may be required. The geometry should be usable for projection work. This LOD does not need to have details such as wrinkle lines modelled into the topology.
As with every asset, it is important that you test your models in context. So as you create a version, make sure to pass it to the next stage of the pipeline, so they can get it into shot as soon as possible and check if the model holds up to the shot requirements.


Here is an example of the model resolution for this LOD. Additional detail could be added to this LOD via normal and displacement maps but may not be required.

lod200
This LOD should be suitable for Medium Shots and support the full asset being viewed on screen. If creating a hard surface asset for this LOD, bevelled edges (or creases) will be required. This LOD does not need to have details such as wrinkle lines modelled into the topology.


Here is an example of the model resolution for this LOD. Additional detail will be added to this LOD via normal and displacement maps.
lod300
This LOD should be suitable for Medium Close-up and Close-up shots, and support head and shoulders, and neck and head shots. If creating a hard surface asset for this LOD, bevelled edges (or creases) will be required. This LOD does not need to have details such as wrinkle lines modelled into the topology.
At this LOD, the model should be suitable for hald body renders, however, you should aim to use the CAVE base mesh for characters and maintain the topology.

This LOD is also for assets that need to be suitable for destruction. For such assets, you will also need to model the interior aspects (for example, when modelling a wall for FX, you will need to model the plaster and the brick, and anything else in-between).

Here is an example of the model resolution for this LOD. Additional detail will be added to this LOD via normal and displacement maps.

lod400
This is our hero LOD and is for extreme close ups and where you will need to create a custom topology to account for skin folds and wrinkles. When used in combination with displacement/vector displacement and normal maps, you should be able to pull off any shot.
For characters, you should start with our base mesh but be prepared to modify the topology to hit the requirements of the model. For props, vehicles, etc. you should still aim to create a mid-resolution model and then work into it. That way, you’ll have something that is great for viewport viewing and the fancier hero LOD for fancy renders.

…and if you need to get even closer, then lod up again 😉
Further Reading
- Model Naming Conventions – This doc will give a breakdown of how to go about naming objects for modelling.
Useful Links
The following links are mainly for your reference and to give you an idea of how other companies approach and tackle LODs:
- Unreal LODs: https://docs.unrealengine.com/en-US/Engine/Content/Types/StaticMeshes/HowTo/LODs/index.html
- Unity LODs: https://docs.unity3d.com/Manual/LevelOfDetail.html
- Maya LODs: https://knowledge.autodesk.com/support/maya/learn-explore/caas/CloudHelp/cloudhelp/2018/ENU/Maya-Basics/files/GUID-79C7A942-0547-4AC4-8A4D-DCAC4ABB1EF2-htm.html
Support CAVE Academy
Here at CAVE Academy the beauty of giving and sharing is very close to our hearts. With that spirit, we gladly provide Masterclasses, Dailies, the Wiki, and many high-quality assets free of charge. To enable the team to create and release more free content, you can support us here: Support CAVE Academy
This is very usefull. Now I will no longer use the highest resolution for my renders only for close shots. Really appreciate your work.
Thanks
You are welcolm SOH Lagrange. When you set up your renders, do test your meshes. You’ll always want the best result, so if a _fg_ asset actually looks better for an _mg_ shot, then use that. The core idea is that you can flip between meshes which gives you flexibility.