
Search the wiki
Setting up a PBR Metal/Roughness Shader
Introduction
For this walkthrough, we’ll be prepping our texture maps in Substance Painter and then setting up our shader in Maya/Arnold using the Metal/Roughness shader model. Although we’ll be using Substance, Maya/Arnold, you should be able to follow along in any PBR supported application that uses the Metal/Roughness shader model.
For more information on PBR-based shading and rendering, make sure to check out the Substance docs here and Physcially Based Shading at Disney:
What I have so far
Before we begin, let me give you a breakdown of what I have so far.
In Maya 2022, I have a skull model that has topology and UVs and I’ve applied a 32bit displacement map extracted from ZBrush. For more details on the setup, check out this doc here:

…and in Adobe Substance Painter 3D Painter 7.4.0, I’m using a Metal Roughness template, UDIM workflow and I’ve enabled the OpenColorIO Color management profile.

I’ve baked some Mesh Maps and then I spent a few minutes using a combination of presets to create the following set of textures. In fact, I would go further and say – I’ve done around 5% of texturing and used other peoples work from the wonderful team at Substance as these presets were created by them. I just merely slapped them onto the model 😉
What I have done is use a combination of metal presets and non-metal presets from which we can generate all the maps we’ll need for our shader.

Reviewing the Textures in Substance Painter
If you press the C key in Substance, you’ll be able to switch between the texture maps, including:
- Base color: this contains colour information for both metal and non-metal elements. For non-metal elements, the colour will be plugged in as diffuse reflection. For metal elements, the colour will be plugged in as specular reflection as metals in reality are all specular reflection. Most Metal/Roughness shaders will do this remapping under the hood.
- Height: This map can be used as a bump or displacement map.
- Roughness: This map will be plugged into the specular roughness parameter and will describe how smooth (black) or rough (white) the material is.
- Metallic: This map will describe what elements should be treated as a metal (white) or a non-metal (black)c. Metals will use a higher IOR (which is handled under the hood). For non-metals, you will be able to control the IOR.
- Normal: this map can be used as a normal map
- Normal+Height+Mesh: this map is a combination of the height and normal details in Substance that can then be used as a normal map for our shader.

To go back to viewing the full material, hit M in Substance. For the Maya/Arnold Standard Surface shader, we’ll be using the Base Color, Metallic, Roughness and Normal+Height+Mesh maps.
Exporting the Textures from Substance Painter
To export your textures from Substance Painter, go File > Export Textures (Ctrl+Shift+E). When the window pops up, switch to the OUTPUT TEMPLATES tab. Here you’ll be able to tweak your output maps and review the template that best suits your renderer. For this example, I’ll be sticking with the Arnold (AiStandard) template.

Switching back to the SETTINGS tab, make sure you have set the Output template correctly (in my case, the Arnold (AiStandard) template). Do also set the Output directory and Size. I’ve gone for 4096 (4K). For File type, I set this to ‘Based on output template’, so it uses the settings from the Arnold (AiStandard) template.

If all looks good, hit Export and you should have something like so:

Overview of the Arnold Standard Surface Shader
We’ll now be jumping into Maya to set up our shader.
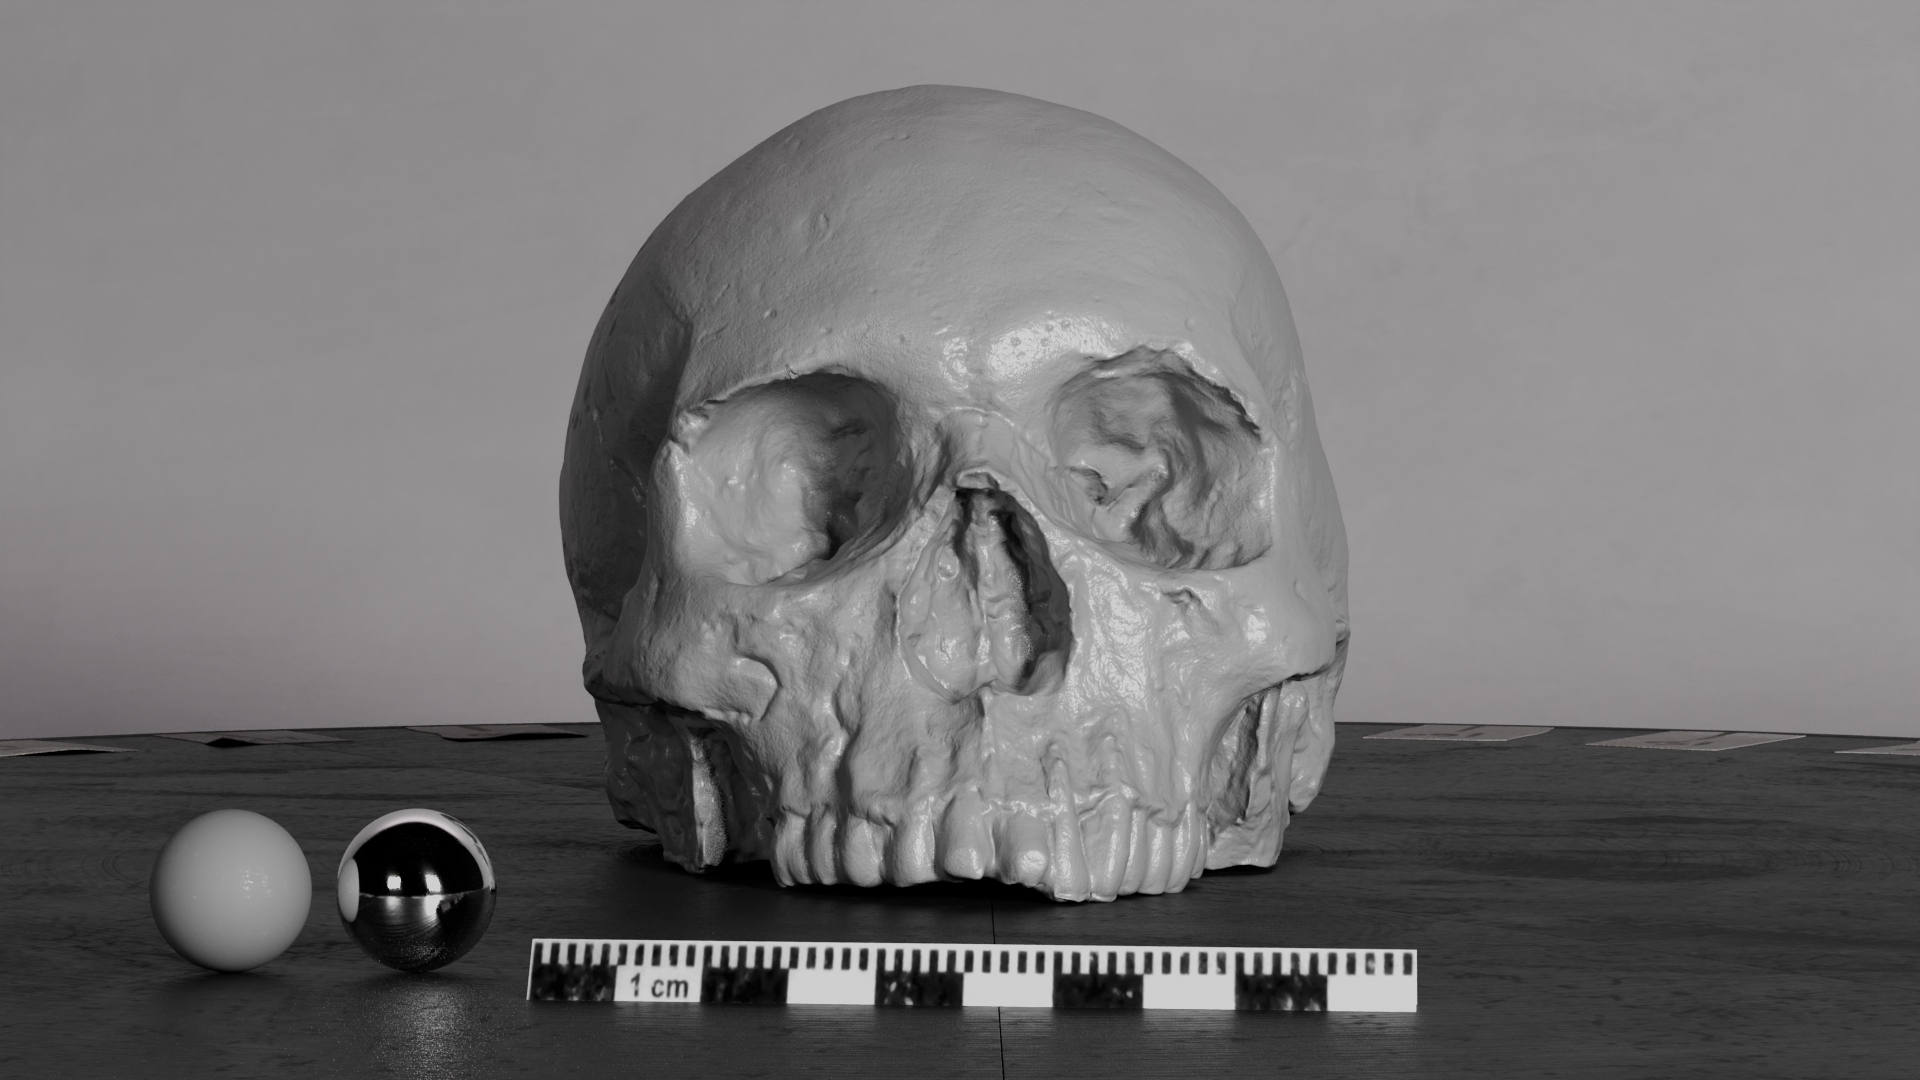
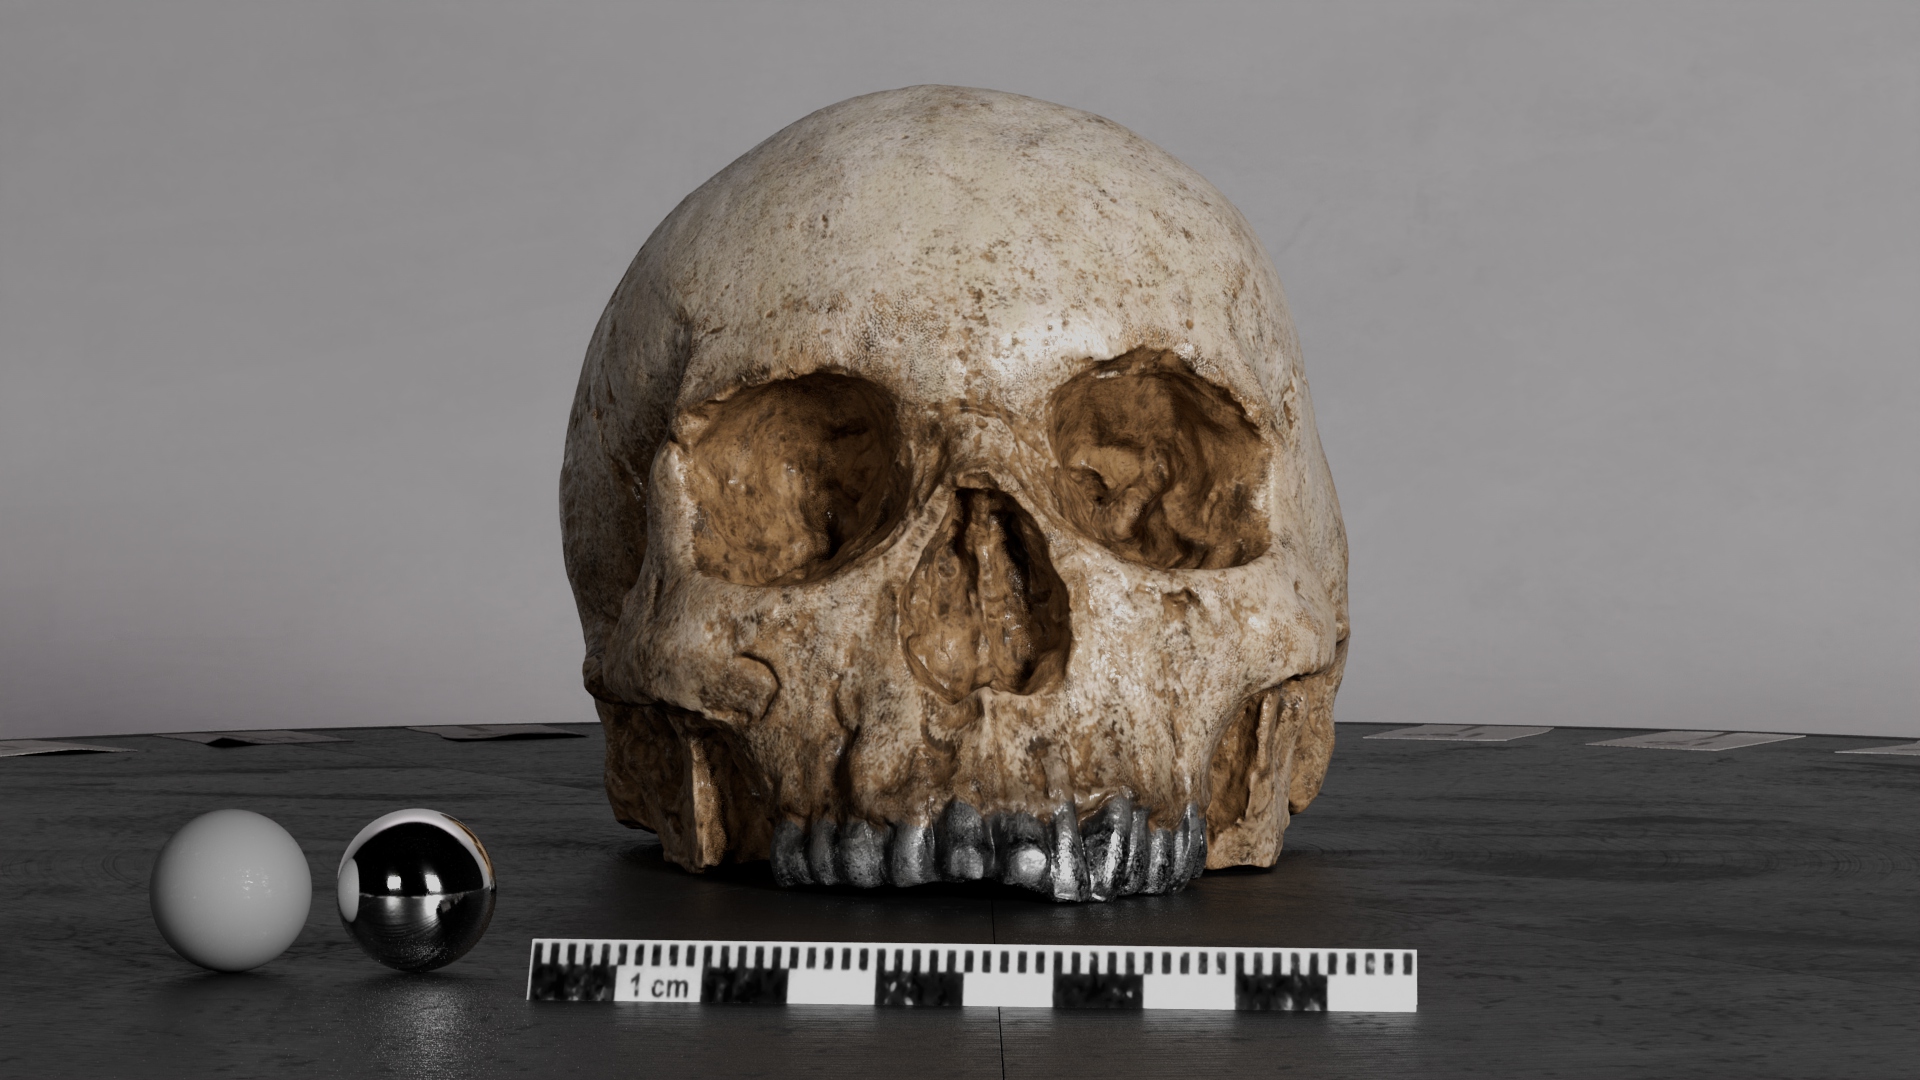
I have loaded the Lod1 skull model into the Maya Prop Look Dev and Lighting Turntable Project 1002, which is using an ACEScg profile.
I’ve then reframed the asset and tweaked the size and position of the grey/chrome balls (so they resemble large marbles). On the model, I have applied a Standard Surface material and set the Base Colour to mid-grey. For a more detailed guide on setting your mid-grey value, you can follow our guide here:
One quick note, if you find your model looks faceted, run Mesh Display > Soften Edges over your model.
For more details on the Arnold Standard Surface Shader, check out the official docs here:
Adding Textures to the Shader
Displacement
As mentioned previously, the skull has a 32bit displacement map extracted from ZBrush. For more details on the setup, check out this doc here:
Normal
The next texture I like to add is the normal map. The reason I like to drop this in after the displacement is because it affects the surface detail. To start his, open up the Hypershade and graph your current shader. As you can see below, I’ve already got the displacement map plugged in.
Next, hit the Tab key in the Hypershade and type and create an aiNormalMap node. Then click on the input icon for Input parameter on the node and go File.

Next, select the file node and click on the folder icon by Image Name, and then select your normal map file. You will only need to select the first UDIM file.

On the file node now, set the following:
- UV Tiling Mode: UDIM (Mari) (this should find all the additional UDIM maps if they are named correctly)
- Color Space: Utility – RAW (this is so no tweak is applied to the image. We want them as they are)
- Alpha is Luminance: Disabled

For the above example, I used the CAVE CG Animation ACES OCIO Config. However, from Maya 2022 onwards, ACES was set as the default, so you may find you do not need to use the config (as it works out of the box). The only thing may be that the Colour Space settings are different as Autodesk tend to enjoy changing the names in the drop-down menu. But Raw or sRGB should still be somewhere in the drop-down.
Then plug the Out Value from the aiNormalMap node into the Normal Camera parameter on your shader. Your shader should now look like this:

Do a quick render and you should have some high frequency detail. If you want to crank things up, you can also play with the Strength parameter on the aiNormalMap node.
Base Colour
Now to add some colour. Select your shader, click on the input icon for Base Color, then go File. Next, click on the Folder icon for Image Name and point to your Base Color map.

On the file node now, set the following (I’m using an ACEScg workflow and the CAVE CG Animation ACES OCIO Config):
- UV Tiling Mode: UDIM (Mari) (this should find all the additional UDIM maps if they are named correctly)
- Color Space: Utility – Linear – sRGB (this is so no colour correction is applied to the image. Depending on your colour pipeline, you may need to set this to Utility – sRGB – Texture)
- Alpha is Luminance: Disabled

Hit render, and you should have some colour on your asset.

Again – on the Metal/Roughness shader, all colour (whether diffuse or specular colour) is all plugged into the Base Color. Next, we’ll use the Metallic map to define what parts of the model are metallic and non-metallic.
Metalness
Next, back in the Hypershade, select your shader, click on the input icon for Metelness, then go File. Next, click on the Folder icon for Image Name and point to your Metalness map.
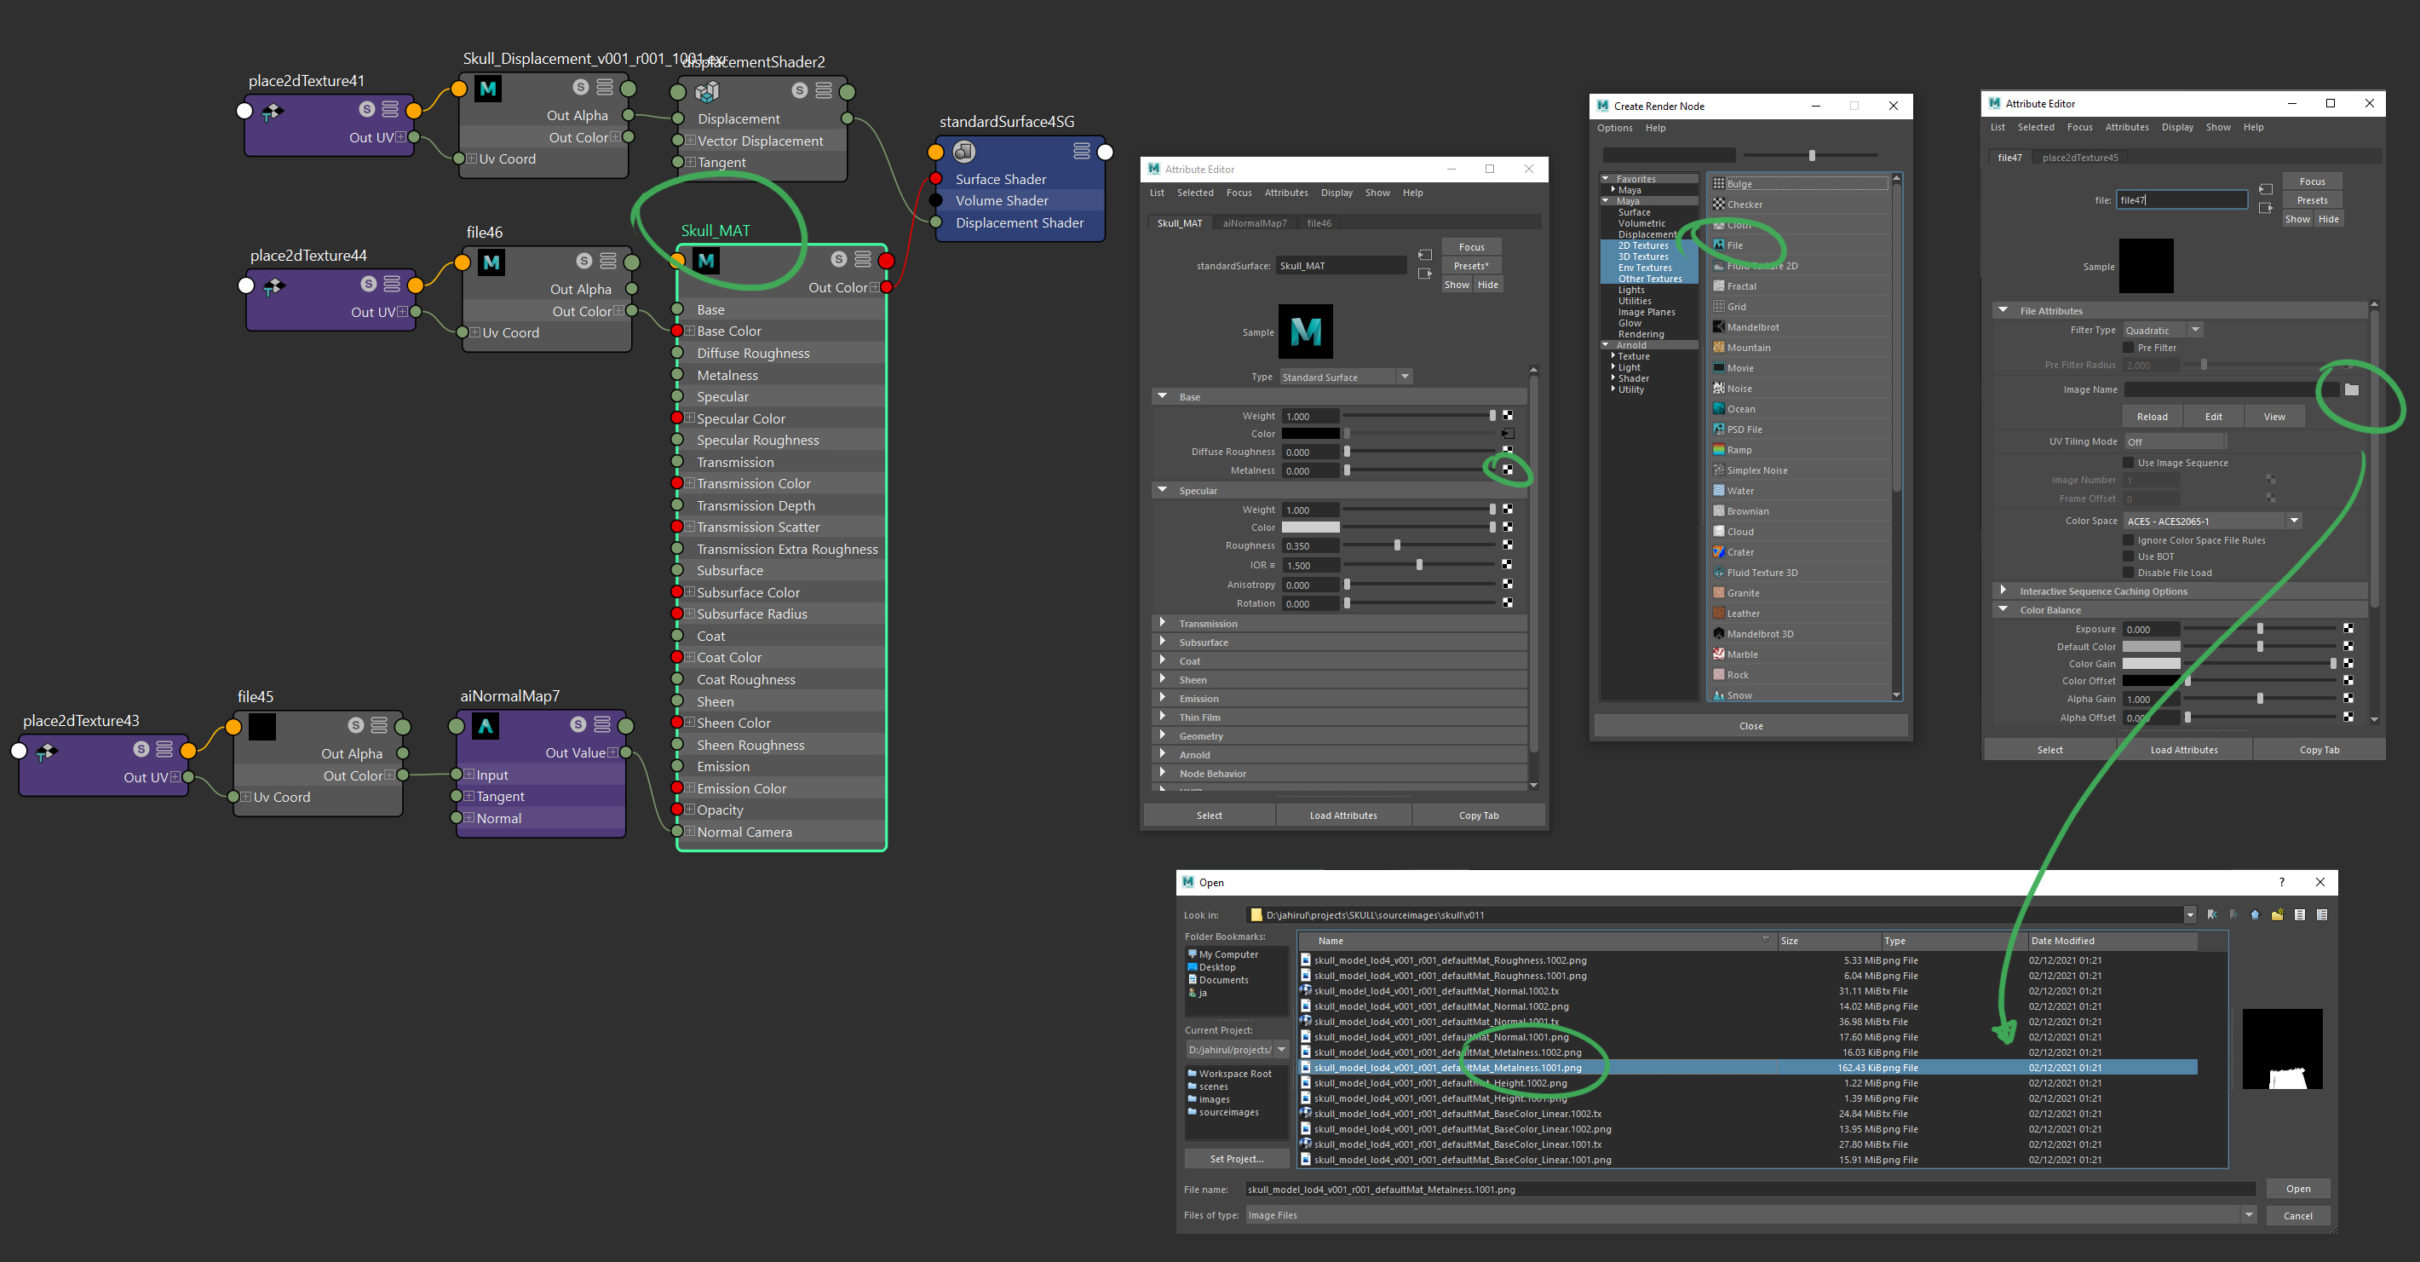
On the file node now, set the following:
- UV Tiling Mode: UDIM (Mari) (this should find all the additional UDIM maps if they are named correctly)
- Color Space: Utility – RAW (this is so no tweak is applied to the image. We want them as they are)
- Alpha is Luminance: Enabled (this will use the luminance of the image as an alpha)

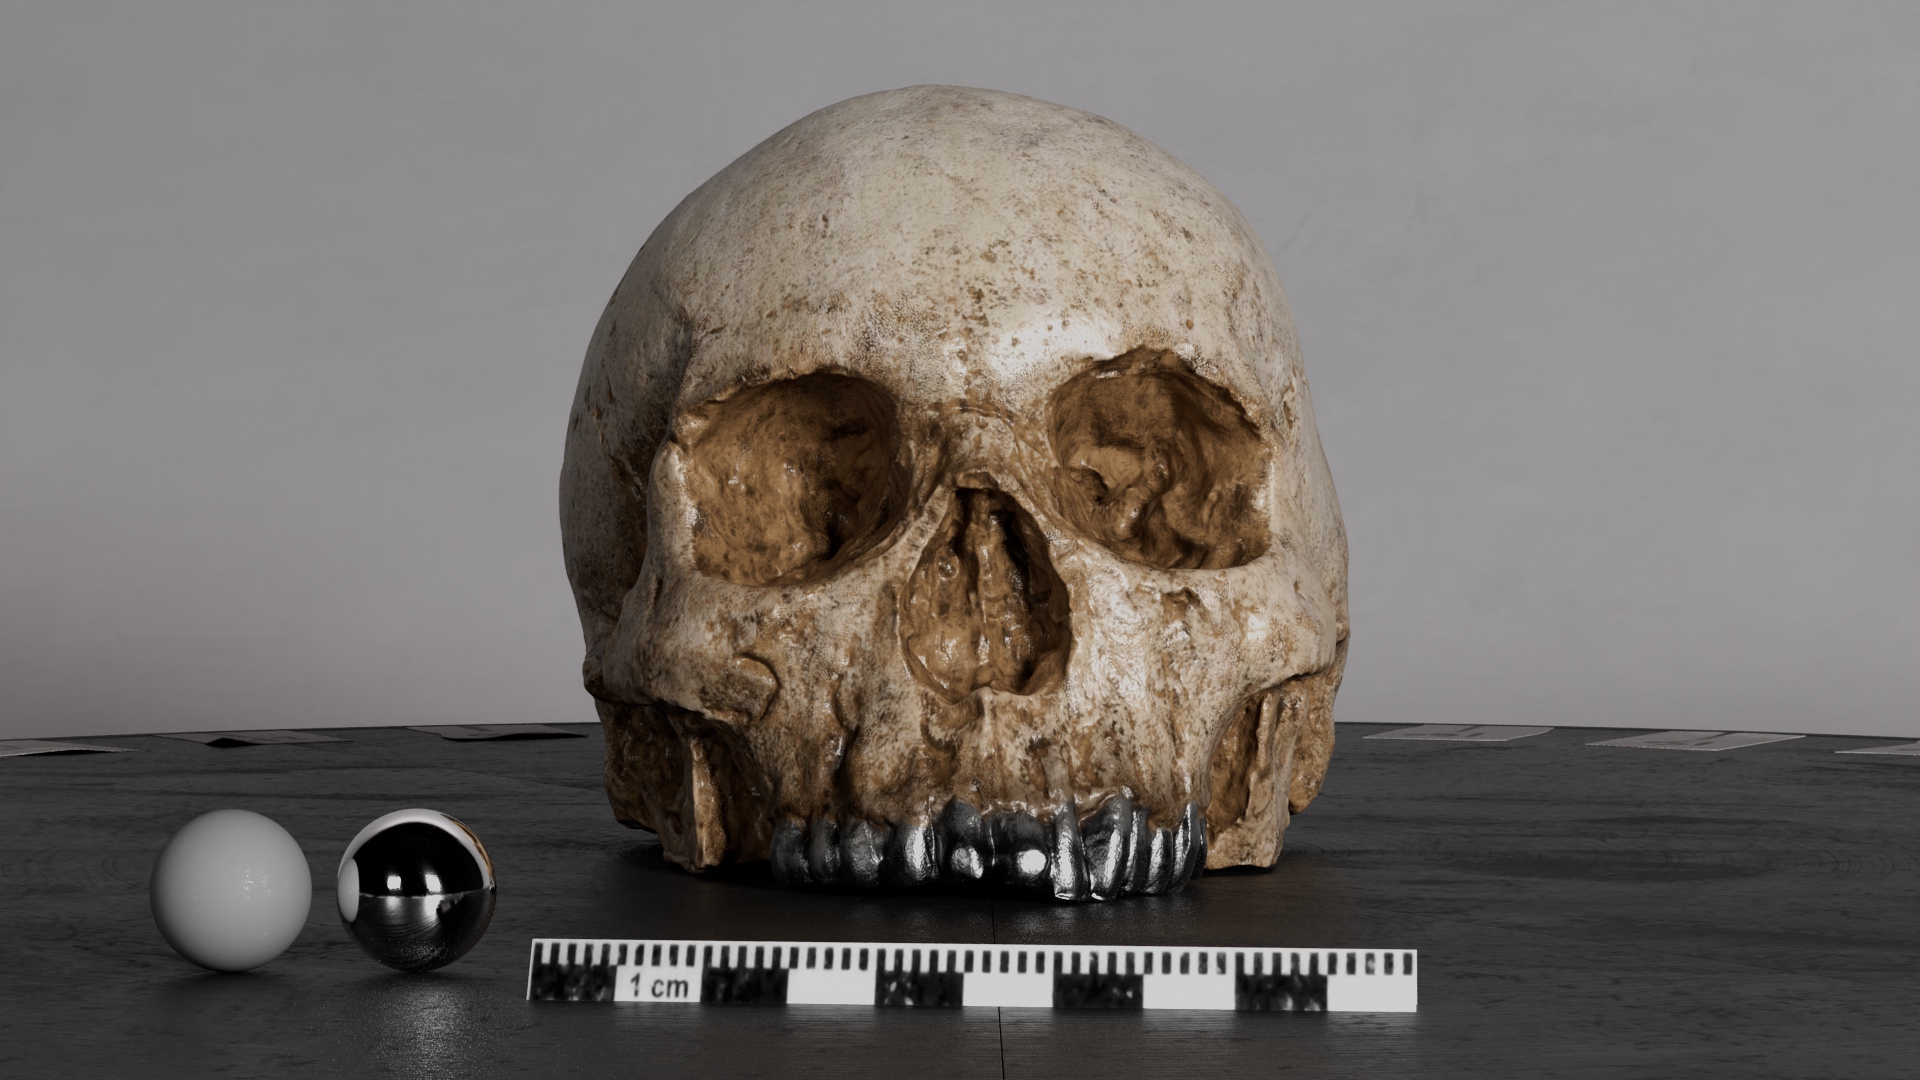
Hit render and all the areas of the map that are filled with black colour will be treated as a non-metallic object, and all the areas of the map filled with a white colour will be treated as a metal (as can be seen by the teeth on my render).
Specular Roughness
Now for the Roughness map, which we’ll be pluggin into the Specular component of the shader. Now we can plug this directly into the Roughness attribute but instead, we’ll be passing it through an aiRange node. This will allow us more control to push and pull the effects of the roughness map.
Back in the Hypershade, hit Tab and type and create an aiRange node. Then click on the input icon for Input parameter on the node and go File, and select your Roughness map.
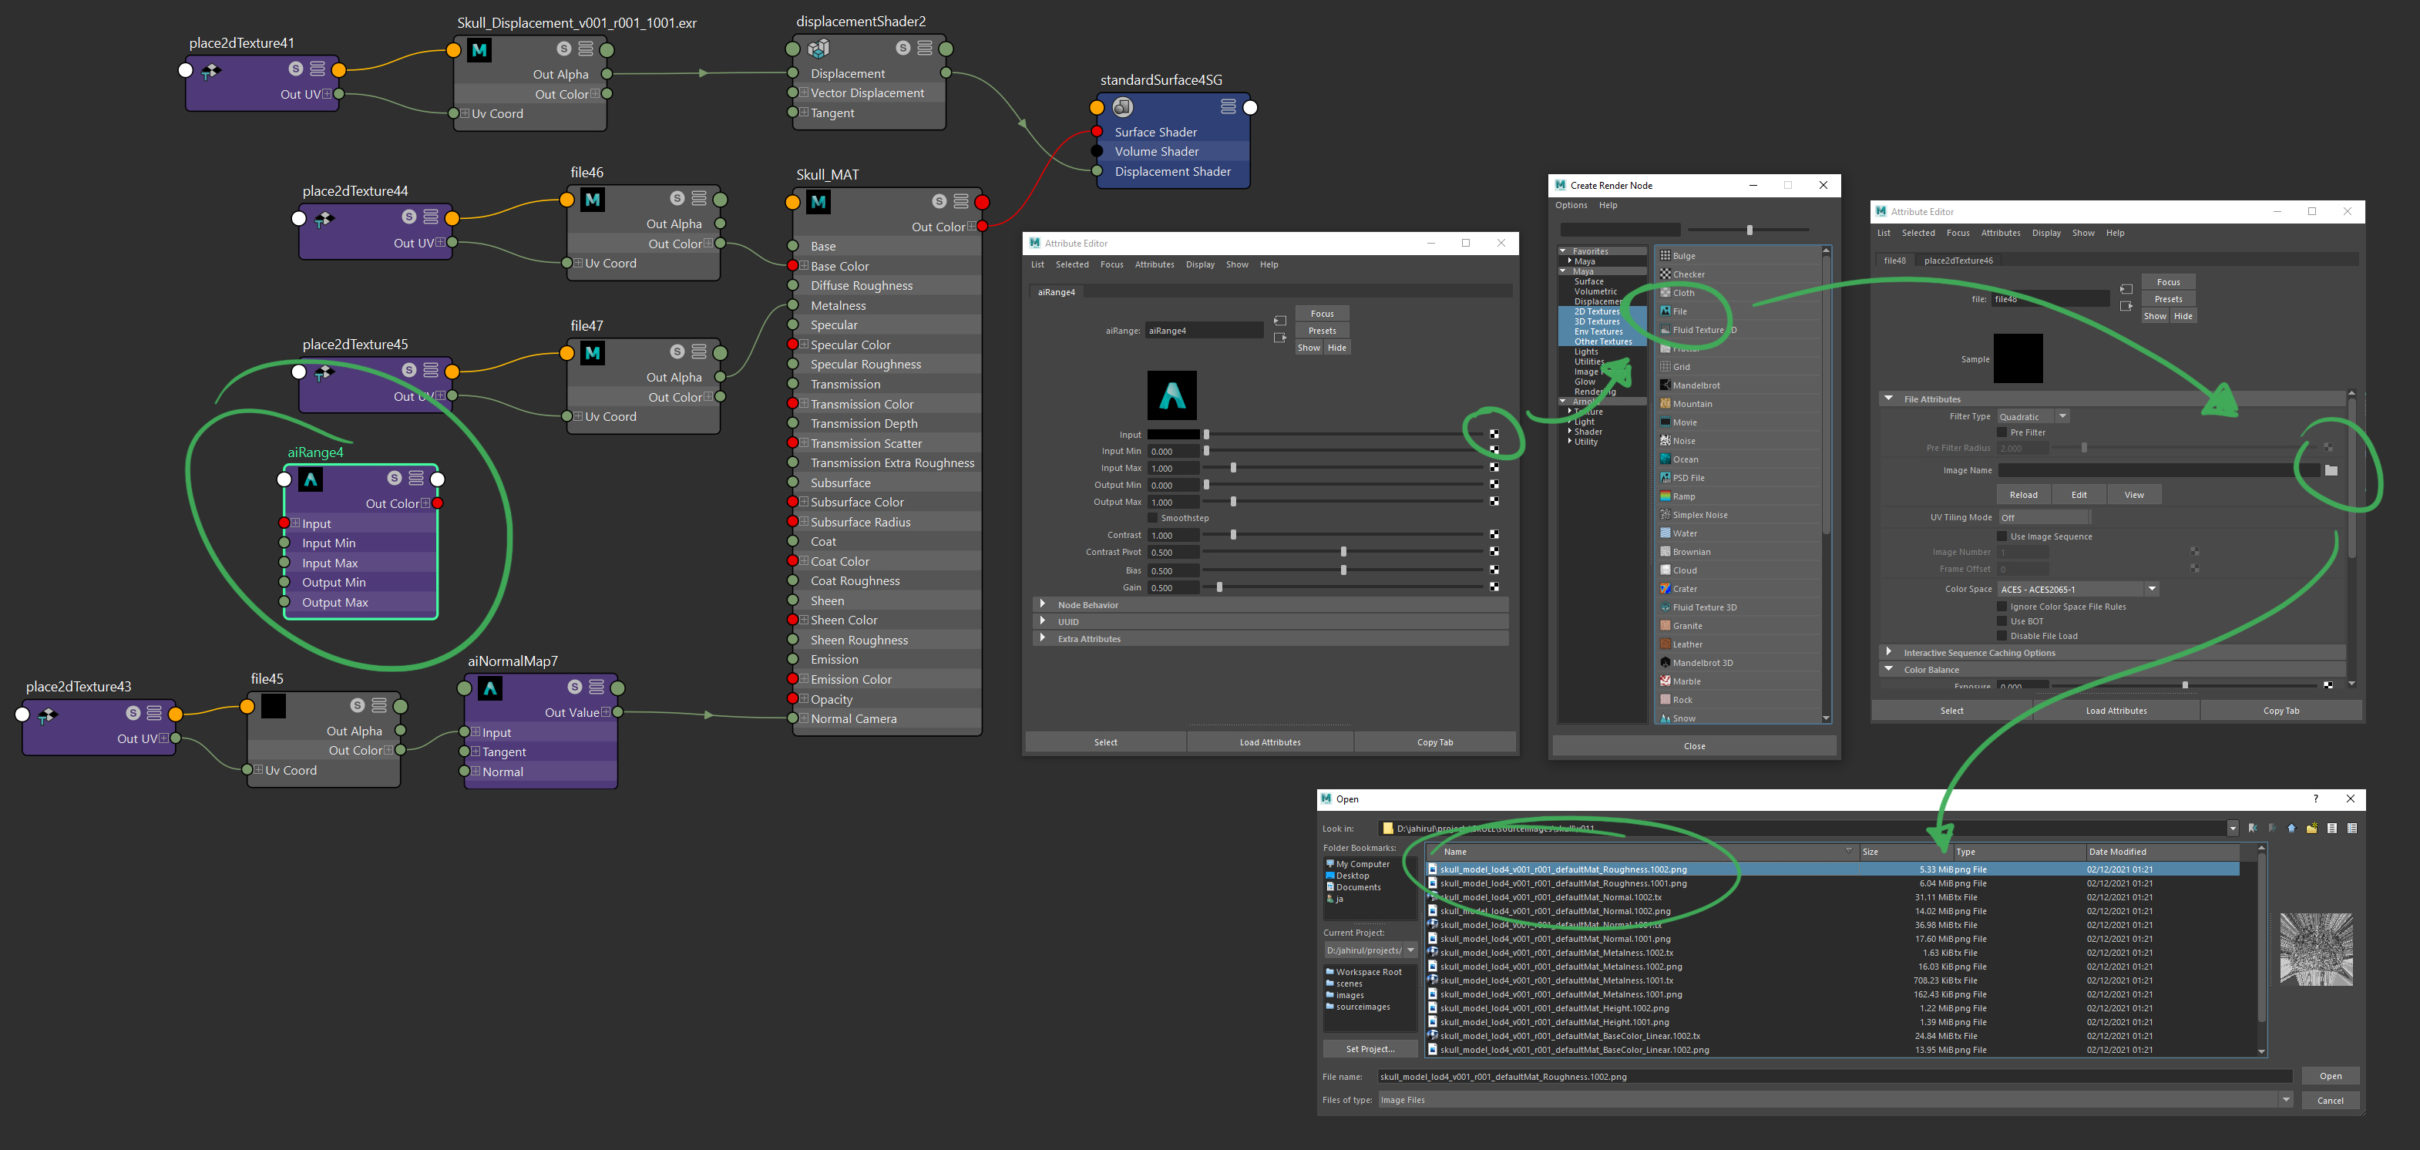
On the file node now, set the following:
- UV Tiling Mode: UDIM (Mari) (this should find all the additional UDIM maps if they are named correctly)
- Color Space: Utility – RAW (this is so no tweak is applied to the image. We want them as they are)
- Alpha is Luminance: Enabled (this will use the luminance of the image as an alpha)

Back in the Hypershade, plug the Out Color R from the aiRange node into the Specular Roughness attribute on the shader. You can now play with the Input Min and Input Max values on the aiRange node to tweak the roughness (but don’t go too crazy!)

Hit render and all the areas of the map that are filled with black colour will be very shiny, and all the areas of the map filled with a white colour will be very rough. Anything inbetween will be somewhere on the spectrum between shiny and rough.
Additional Maps
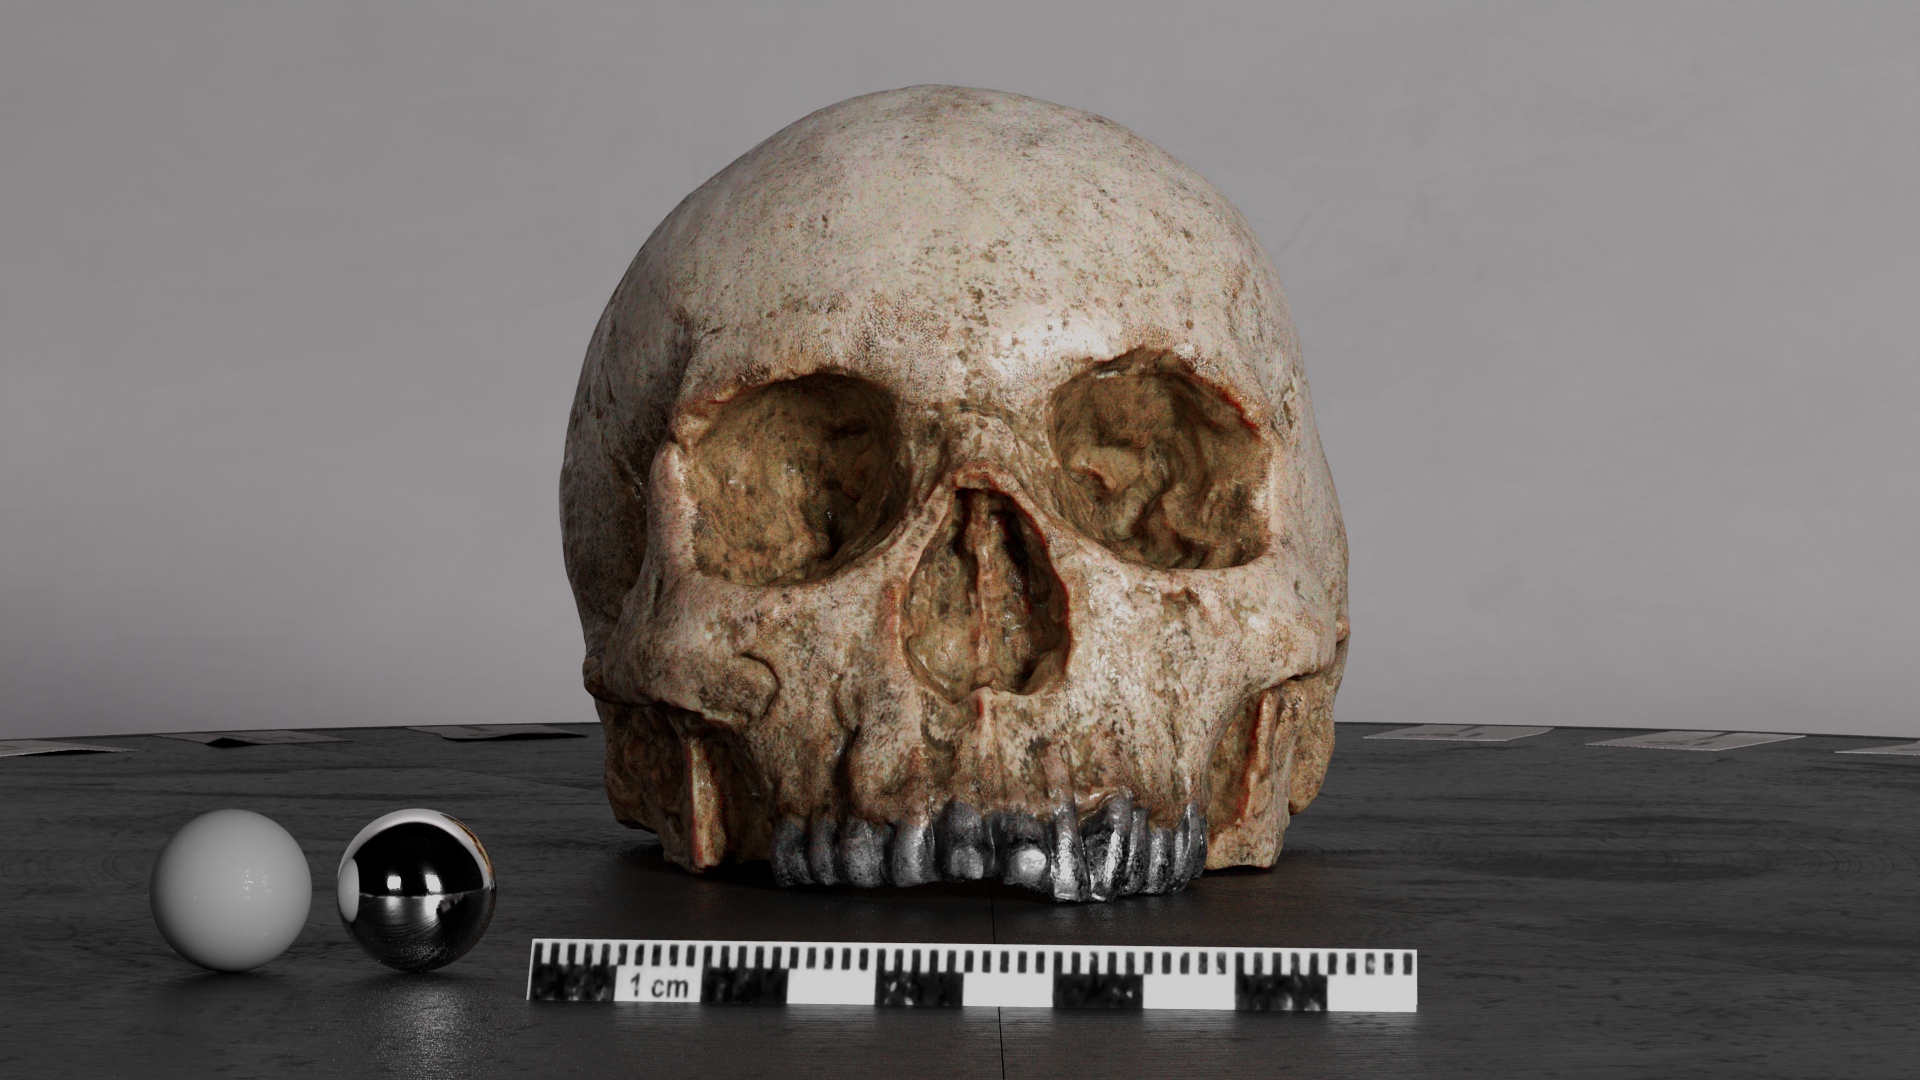
You could take things further with Subsurface maps, Coat, Sheen, etc. but hopefully at this stage, you have the very basics for a PBR textured and shaded asset. If you do want to play with Subsurface (and I won’t go into detail here), try the following for a simple test:
- Plug your existing base colour map into the Subsurface Color attribute
- Set the Subsurface Weight to something like 0.6
- Set the Subsurface Radius to a reddish colour
- Set the Subsurface Scale to 0.2 (play with this)
- Set the Arnold Sub-surface Type to randomwalk_v2

You’ll have to play with the orientation of your asset and the light to see the real effects but hit render to see what you get. I’ve over-increased the Scale so you can see the results in the render below. Subsurface should be subtle but by adding SSS, it adds a whole new layer of believability when done well in my opinion (along with increasing render time!).
Rendering and Assessing the Results
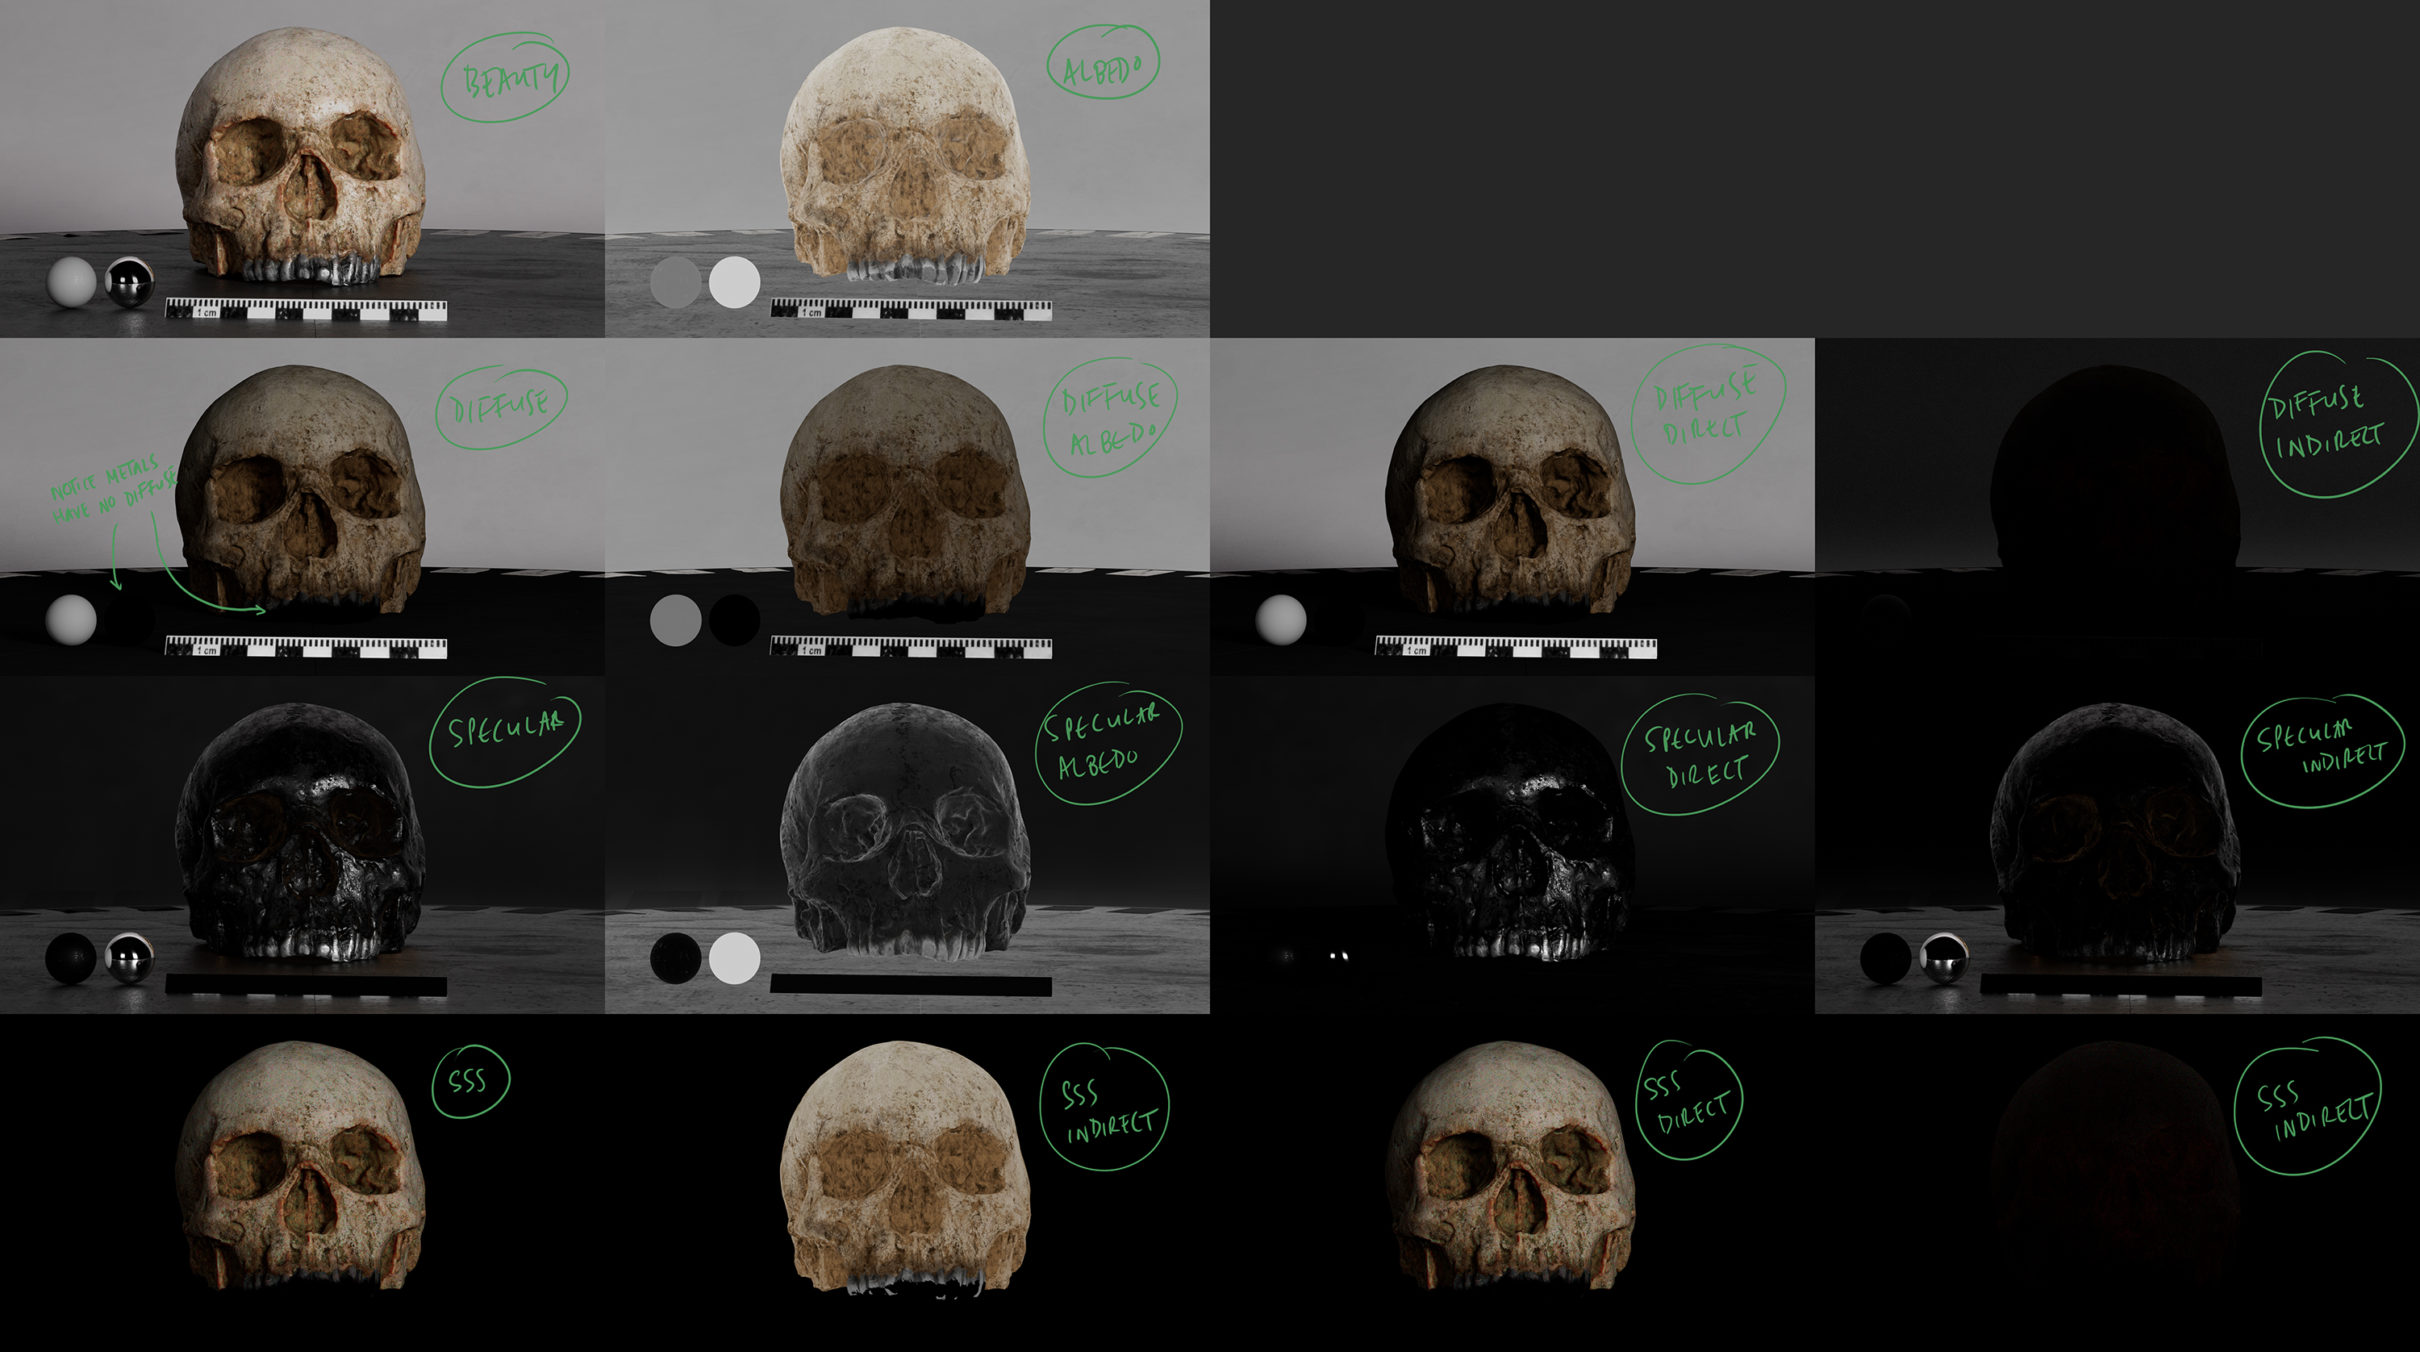
That’s it – you should now have an asset that is textured and shaded. To further assess your surfacing work, I would reccomend enabling some AOVs so you can better review the diffuse, specular, and subsuface components and get a clear idea of how these can be used in compositing.
I usually enable to following AOVs to assess the surfacing:
- albedo
- diffuse
- diffuse_albedo
- diffuse_direct
- diffuse_indirect
- specular
- specular_albedo
- specular_direct
- specualr_indirect
- sss
- sss_albedo
- sss_direct
- sss_indirect

…and here is a contact sheet of the AOV results:
Links
- Extracting a 32bit Displacement Map from ZBrush – This doc will run through the steps to extract a displacment map from ZBrush. We’ll then look at how to use the map in Maya.
Support CAVE Academy
Here at CAVE Academy the beauty of giving and sharing is very close to our hearts. With that spirit, we gladly provide Masterclasses, Dailies, the Wiki, and many high-quality assets free of charge. To enable the team to create and release more free content, you can support us here: Support CAVE Academy