
Search the wiki
Shooting Texture and Look Development Reference

Introduction
Before we kick off, a huge thanks to the fantastic team at Clear Angle Studios for providing all the kit and making this tutorial possible, and for Rebellion Film Studios for allowing me to capture the data onsite.
In this document, we will cover the process of capturing texture reference using cross polarization techniques. We will also look at some of the additional reference you can capture that will be valuable to the look development team so they can get a better sense of how the asset materials respond to light.
If cross-polarization is new to you, I highly recommend you check out the following resources:
- Kahn Academy – Polarization of light, linear and circular
- Polarized Light Explained + Experiments
- Cross-Polarization Photography for Textures
- How To Split Specular And Diffuse In Real Images
- Taking Better Photos For Textures
For more information on shooting reference for texturing and look development, you can check out this course here:
Texture/Look Development Shoot Kit
The following kit list is to give you an idea of what I generally use to capture texture and look development reference. I like to use the 5Ds or 5D MkIII as it allows you to shoot multiple brackets with one click. For texture reference, I tend to shoot 3 brackets but we’ll also need to shoot a minimum of 7 brackets for look development lighting reference.
- Camera: Canon 5DS, Ricoh Theta Z1
- Lenses: 8mm fisheye, 24mm, 35mm, 50mm, 100mm
- CPL Polarizing Filter for the lenses you’ll be capturing the texture/look dev reference with
- Remote shutter release
- Ninja nodal panoramic head (I use the Ninja Nodal 3 or 6)
- Manfrotto tripod (1 or more)
- 20cm grey and chrome reference balls
- Macbeth colour charts (1 x standard, 1 x passport)
- Slates (1x large, 1 x small)
- Tape measure
- Gaffer tape
- Notepads
- 2 x softbox lights (I have the following light kit and also this kit)
- Rosco polarising filter for 2 x softbox lights
- Grey photo studio paper
- Sandbags

001. What we Need to Capture
When capturing any data, it is important to know how the data will be used in post. For texture reference, the data is going to be passed to the texture or environment artist and used either for projections or as visual reference. The look development reference will go to the look dev team and this will be used to get a clearer picture on how the asset responds to light. Ideally, both teams (and Groom) would all work collaboratively as the combined data is valuable for all.
When I capture data, I like to do the following:
- Shoot parallel polarised and cross unpolarised photography. This will give us reference of how the object looks to the human eye/camera and also how things look when we remove the specular reflectance and allows us to capture the important diffuse colour. It is also a great way to get a clear idea on what parts are metal and non-metal. As metals are all specular, they should go black in the diffuse. In reality, you won’t tend to get pure black as we have dirt in the atmosphere and dust but overall, metals when shot under cross polarised light should go dark.

- Shoot multi-bracketed shots. This is not always required when you have a fancy camera that captures many stops in one hit, but if not, this would allow you to later on merge the images together to create HDR images for texture projection. Please note (and this will be repeated below), you should capture both parallel-polarised and cross-polarised photography with multiple brackets, and all the images should line up.

- Look development reference. To see how the object responds to light as the object turns or the light moves around the static asset.
- Backplates. To rebuild the look development scene in post-production.
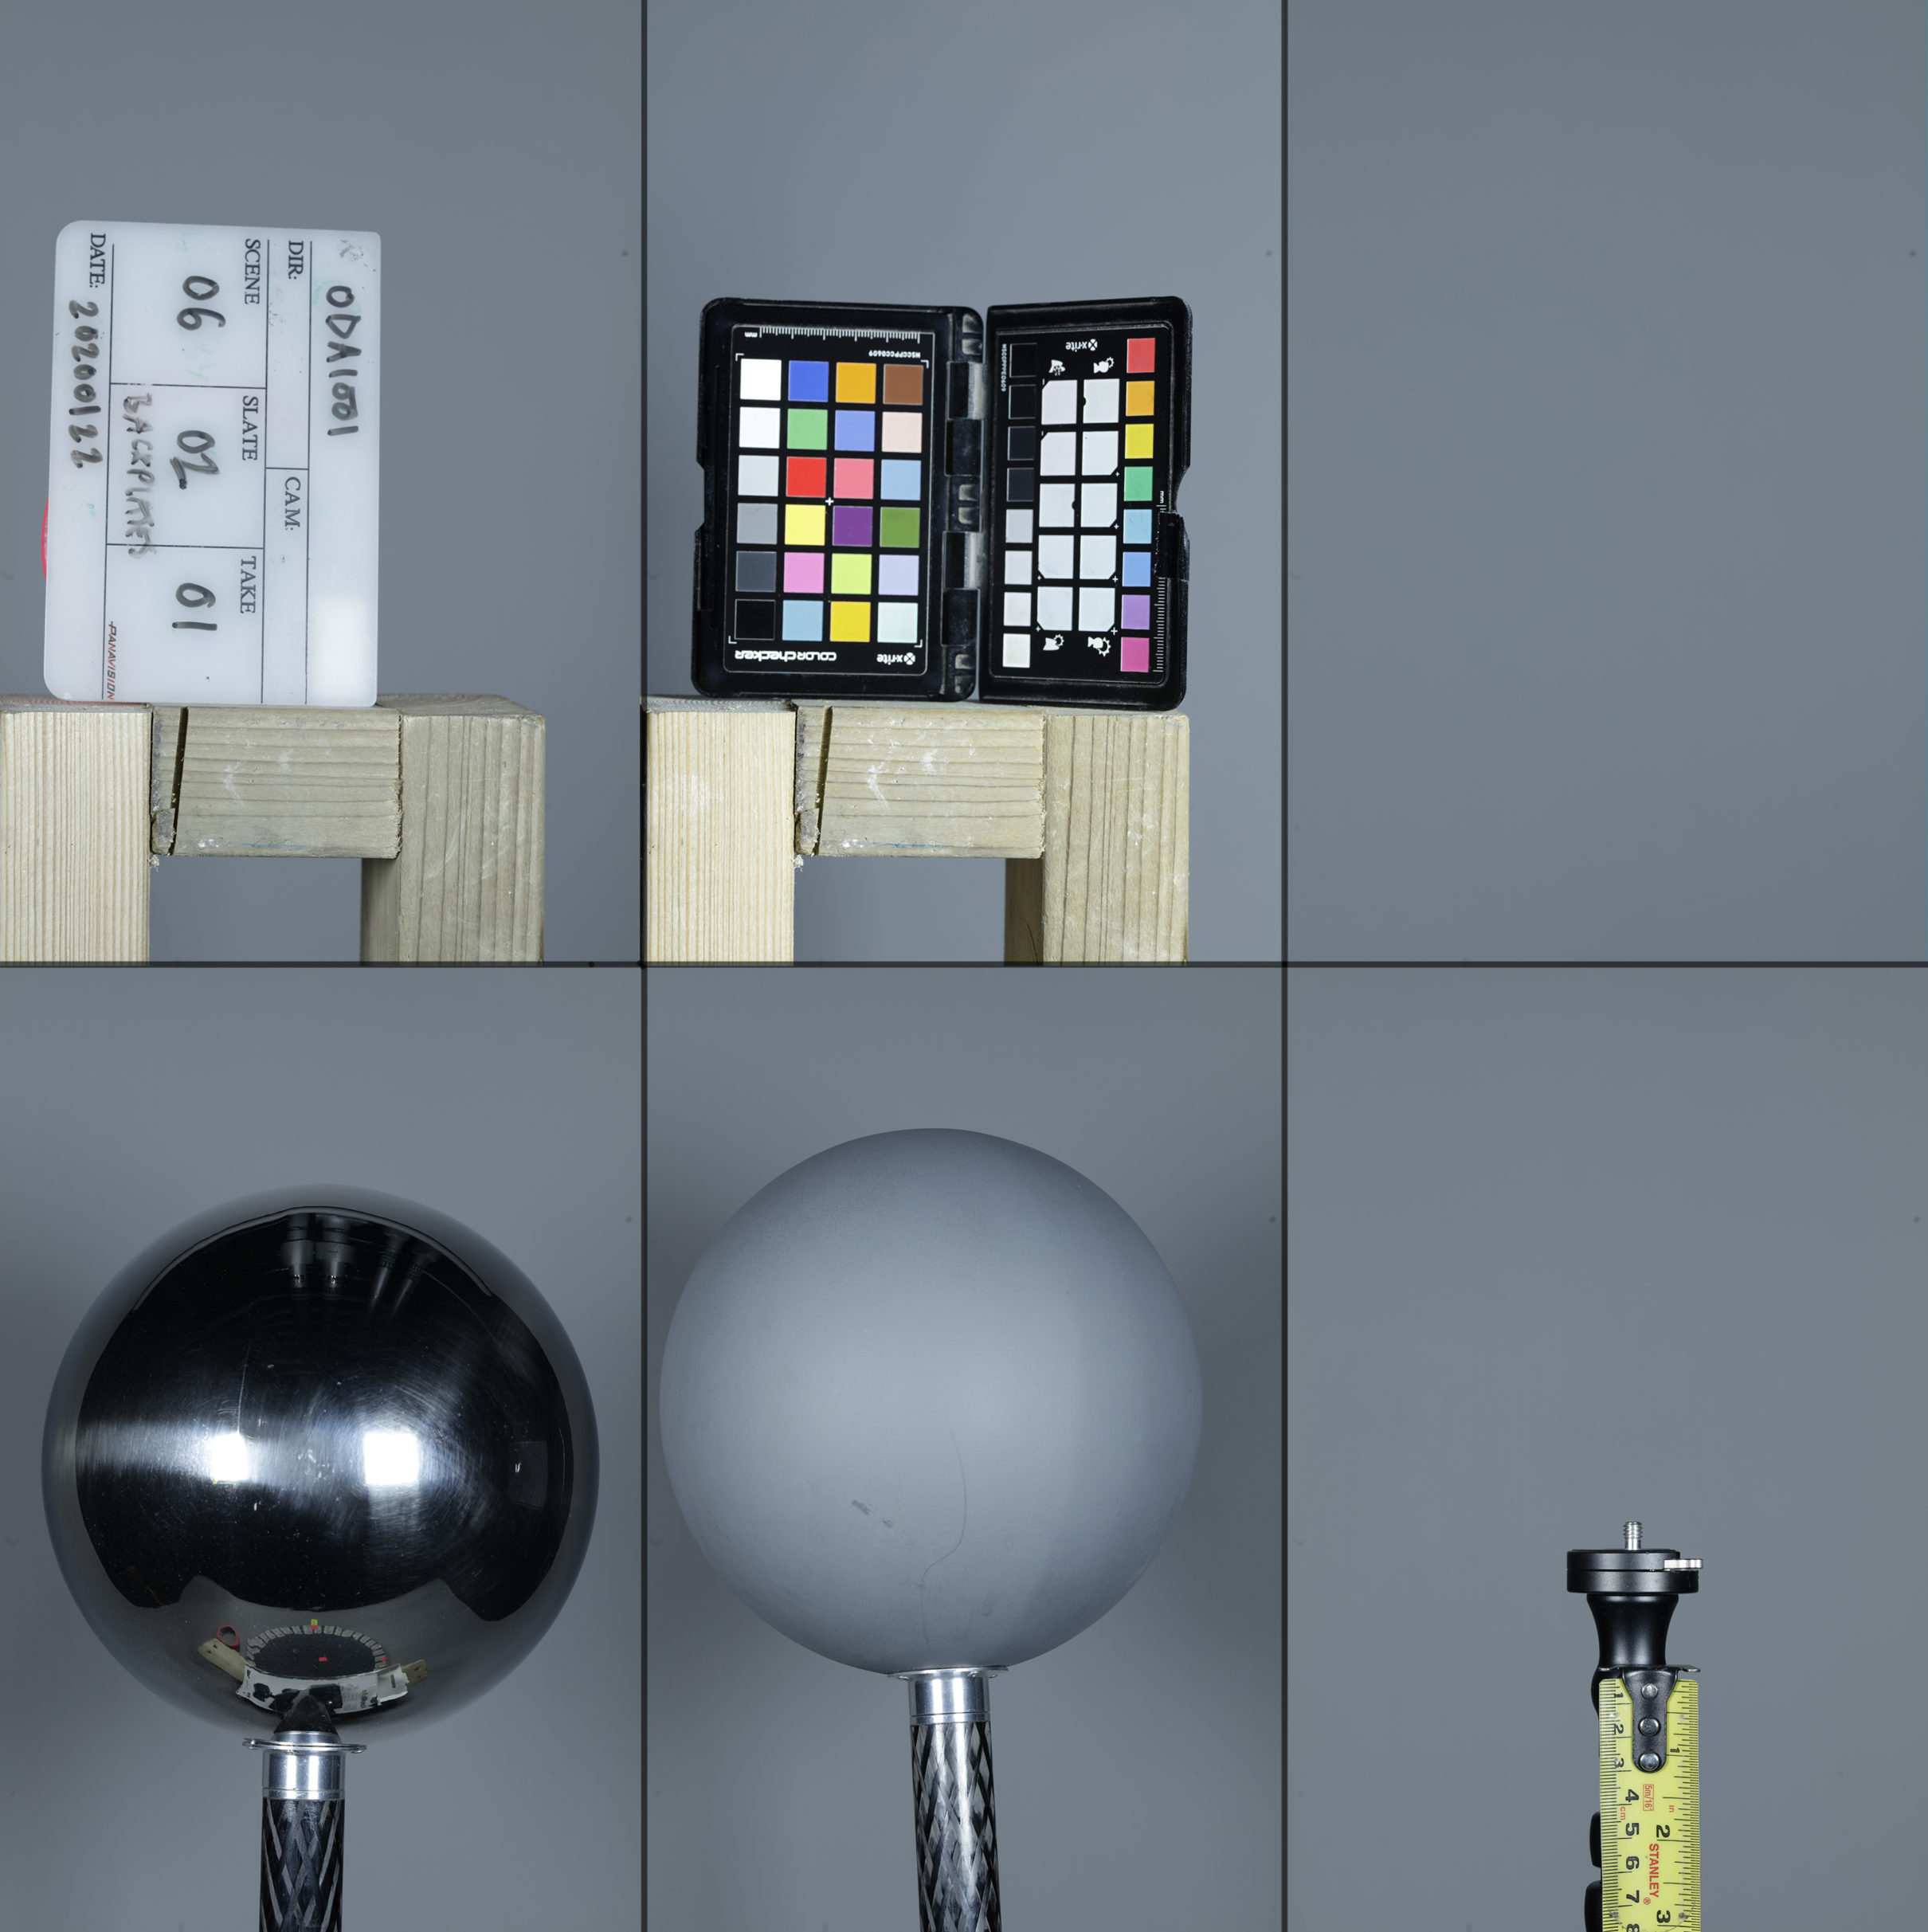
- Slate and calibration reference (Macbeth, Grey and Chrome Balls). To grade and expose your reference and match your digital lighting to the onset lighting.
- Lighting reference. To match your digital lighting to the onset lighting.
- Set measurements. To help rebuild your digital set.

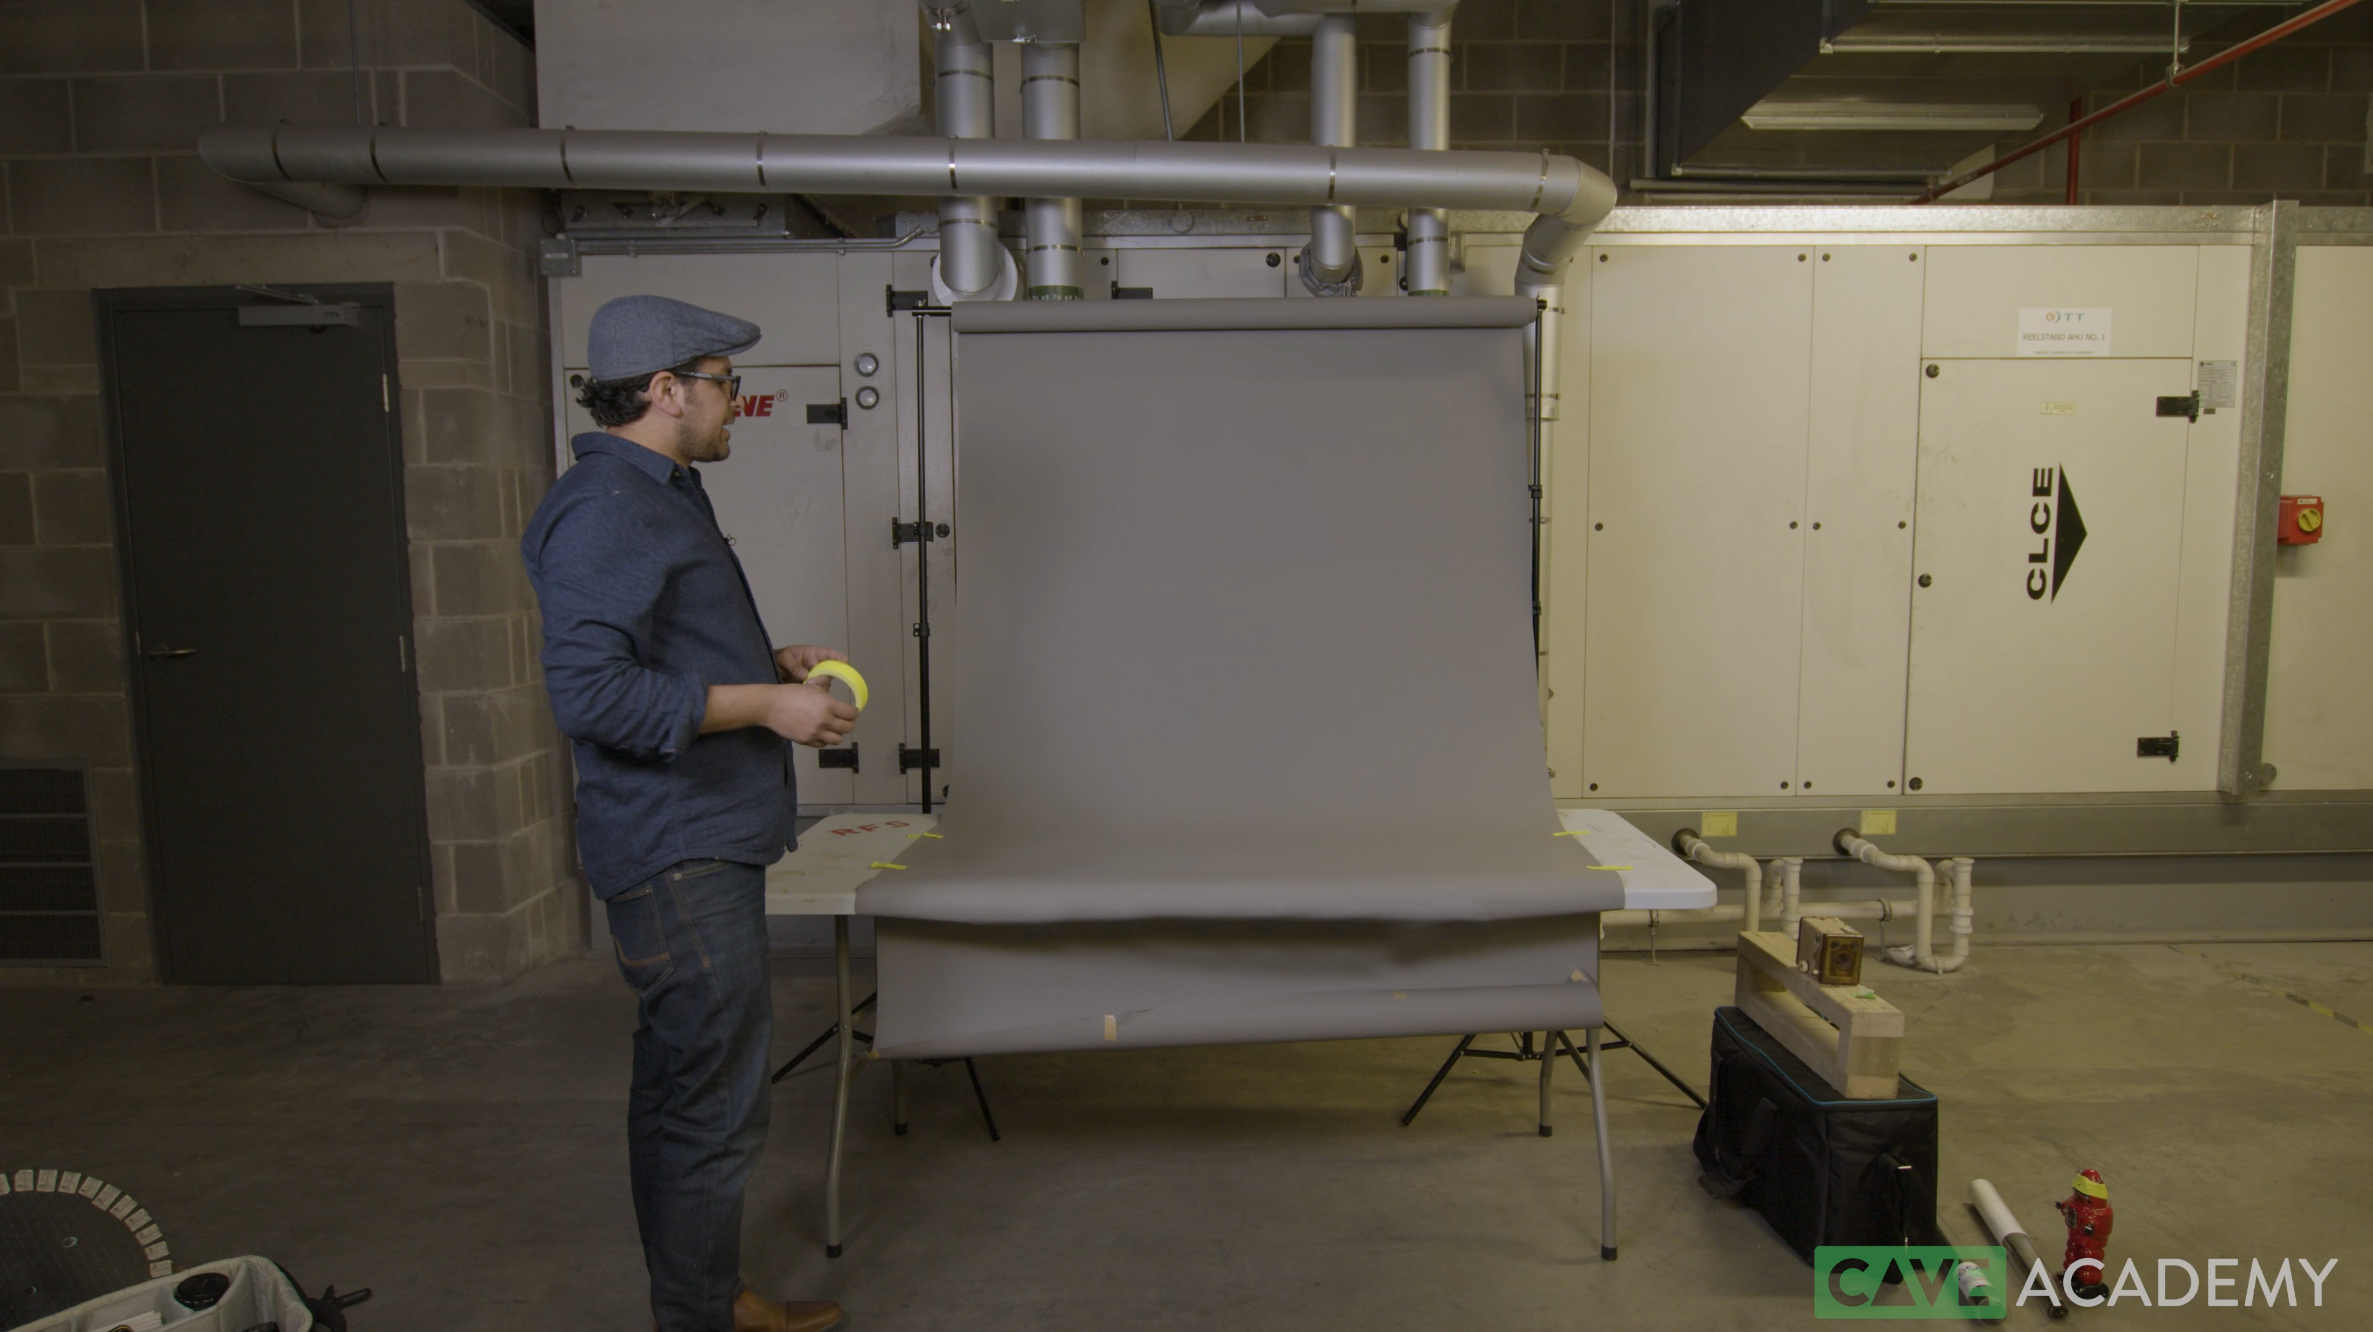
002. Setting up your Controlled Shoot Environment
It’s a good idea to plan your shoot setup based on the type of asset you’ll be shooting reference for. For example, if you are capturing data for a small prop then a couple of LED lights will do the trick. But if you are capturing data for a digi-double, or a vehicle, then the chances are you’ll need some larger lights, and more of them. For texture reference acquisition, the aim will be to try and evenly light your asset as much as possible. This will allow you to gather reference that does not require much clean-up in post (removing shadows for example). On the other hand, for look development reference, you’ll want to have something a little more dramatic, say a 3-point lighting setup. This will allow you to get a clearer idea of shape and form.

If you can, you’ll also be capturing your data in a room where you can control the lighting scenario. So ideally, no windows and ambient light sneaking in. This will allow you to fully control your lighting and polarise all the lights. For best results, polarising the lights and the camera lens is required.
On top of that, you’ll need a grey drape or paper, a table, a turntable, possibly an asset stand, and sandbags and gaffer tape to keep things together.
003. Setting up your Lights
For the lights, it will be important that you can set the temperature. I usually set this to 6500K (Daylight), and the same setting is applied to the camera. On top of that, it will be important that you add polarising filters to the lights, so you can capture parallel polarised and cross polarised reference.
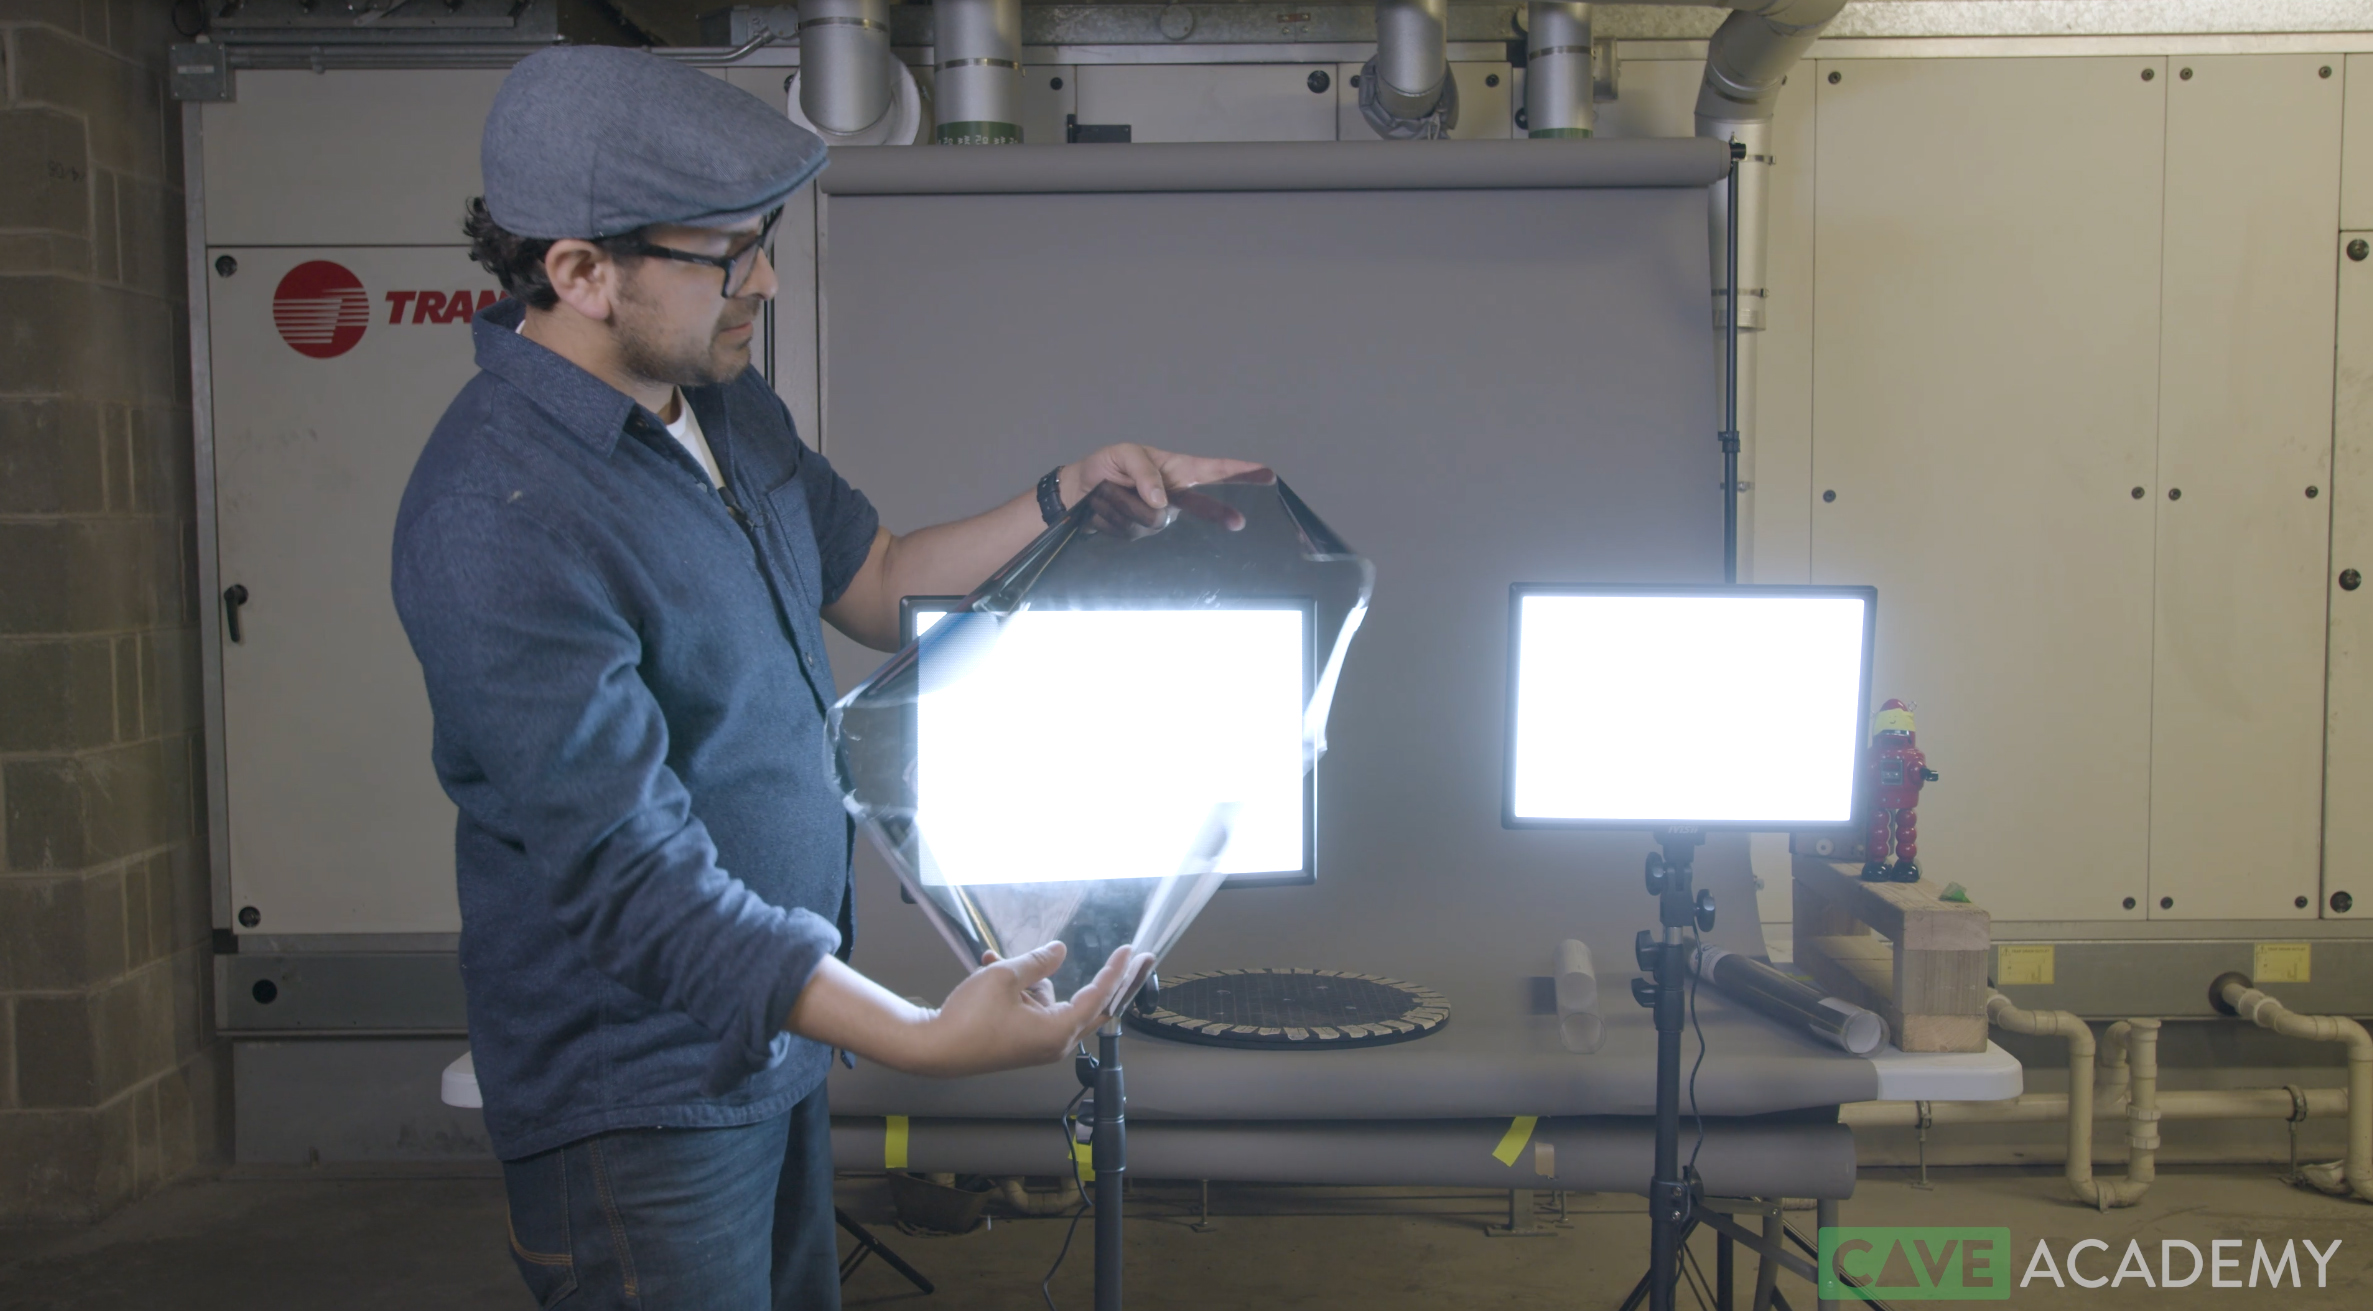
In terms of the placement of your lights, pop your asset into place and then position them so they evenly light your asset. You are looking to remove as much shadow as you can.

004. Framing the Asset
At this stage, you should have your lighting blocked out. The next thing to do is drop your asset in and frame it on camera. You may need to continue making minor tweaks to your lighting to ensure things look good on camera.
When framing as asset, I tend to start by framing the full asset, so when I turn the asset, I can see the whole thing. Then and if need be, I’ll work on close-ups and additional details (such as decals). It’s extremely important that you double check the focus too. Make sure to use the camera magnifier to do this. In terms of lenses, go for something that frames an asset in a way that fills the frame. For example, for a small prop, you may go for a 50mm or a 100mm lens.
It is also worth adding markers on the turntable and a start position on the table. This will allow you to easily rotate the asset in increments.

005. Setting your Camera Settings
Here, we’ll look at the camera settings I use for shooting textures. The settings will be for the Canon 5Ds but you should be able to match the settings to other cameras. Before you begin, make sure to set the camera to MANUAL mode, so we have full control of the shutter speed, the ISO and the F-Stop.
- Make sure to attach a CPL Filter to the lens.
- If your camera allows it, set the Color Space to Adobe RGB. It is more than likely set to sRGB by default.
- Shoot a minimum of 3 brackets per take
- Set the brackets to 2 stops apart
- Set the bracketing sequence to go from under to over exposed (- 0 +).
- Shoot in Manual mode
- Shoot RAW
- Check the White Balance
- Select an appropriate F-Stop (F8+)
- Set an appropriate ISO (100 – 400). Don’t set the ISO too high as we do not want any noise
- Set the shutter speed accordingly.
- Make sure to shoot a test image before you start

Taking all of the notes above, click on the MENU button and head to the Exposure menu and set the following:
- Exposure level increments: 1/3
- ISO speed setting increments: 1/3
- Bracketing auto cancel: 0n (never used/changed this)
- Bracketing sequence: – 0 +
- Number of bracketed shots: 3
- Safety shift: OFF (never used/changed this)
- Same expo. for new aperture: OFF (never used/changed this)
Now we’ll need to set some additional settings which I tend to set using the Q (quick) button on the back of the camera. So hit the Q button and set the following:
- F-Stop: F11 (this is just a starting point and will need to be modified depending on the lighting condition).
- ISO: 100 (this is just a starting point and will need to be modified depending on the lighting condition).
- Shutter speed mid exposure: ??? (this will be whatever it needs to be depending on your lighting environment)
- Exposure comp.AEB Setting: -2, 0, +2
- White balance: Daylight
- Single shooting: Self-timer: 2sec/remote (this will allow you to shoot 3 brackets with one click).
- Make sure to shoot RAW: This is extremely important as this will allow us to grade the images in post, and the RAW data contains a lot more information than jpegs. I usually shoot both RAW and JPEG as this will allow me to easily review the images when onset.
As you can see above, I’ve set some default starting settings for F-Stop, ISO and Shutter speed. Please do note that for every lighting condition, you will need to double check your settings to ensure you are getting the best possible result when shooting textures.
006. Capturing your Stills Texture Reference
At this stage, you should have your camera ready to go. What I like to do this stage is look through the camera at my start position and then at my end position and double check that the asset does not go out of frame. Next, double check that the CPL filter on the lens is working. In it’s default position, you should see both diffuse and specular reflectance. When you rotate the CPL filter 90 degrees, you should then notice that all the specular reflectance has been removed.

Once you’ve checked all is good. Come up with a shoot plan and stick to it. This is my process:
- Frame the asset
- Shoot the slate
- Shoot the Macbeth chart
- with CPL Filter off and shoot multiple brackets (-2, 0, + 2)
- with CPL Filter on and shoot multiple brackets (-2, 0, + 2)
- If you have time, shoot the grey and chrome ball too with
- with CPL Filter off and shoot multiple brackets (-2, 0, + 2)
- with CPL Filter on and shoot multiple brackets (-2, 0, + 2)
- Shoot a backplate
- with CPL Filter off and shoot multiple brackets (-2, 0, + 2)
- with CPL Filter on and shoot multiple brackets (-2, 0, + 2)
- Shoot the asset in position 001
- with CPL Filter off and shoot multiple brackets (-2, 0, + 2)
- with CPL Filter on and shoot multiple brackets (-2, 0, + 2)
- Rotate the turntable 10 degrees (or whatever makes sense depending on the asset)
- Shoot the asset in position 002
- with CPL Filter off and shoot multiple brackets (-2, 0, + 2)
- with CPL Filter on and shoot multiple brackets (-2, 0, + 2)
- Rotate the turntable 10 degrees (or whatever makes sense depending on the asset)
- Shoot the asset in position 003
- with CPL Filter off and shoot multiple brackets (-2, 0, + 2)
- with CPL Filter on and shoot multiple brackets (-2, 0, + 2)
- Rinse and repeat until you have a full 360 capture
- If need be, position the asset in other positions to capture the top and underside (shoot with CPL Filter off and on)
- Shoot close ups (with CPL Filter off and on)
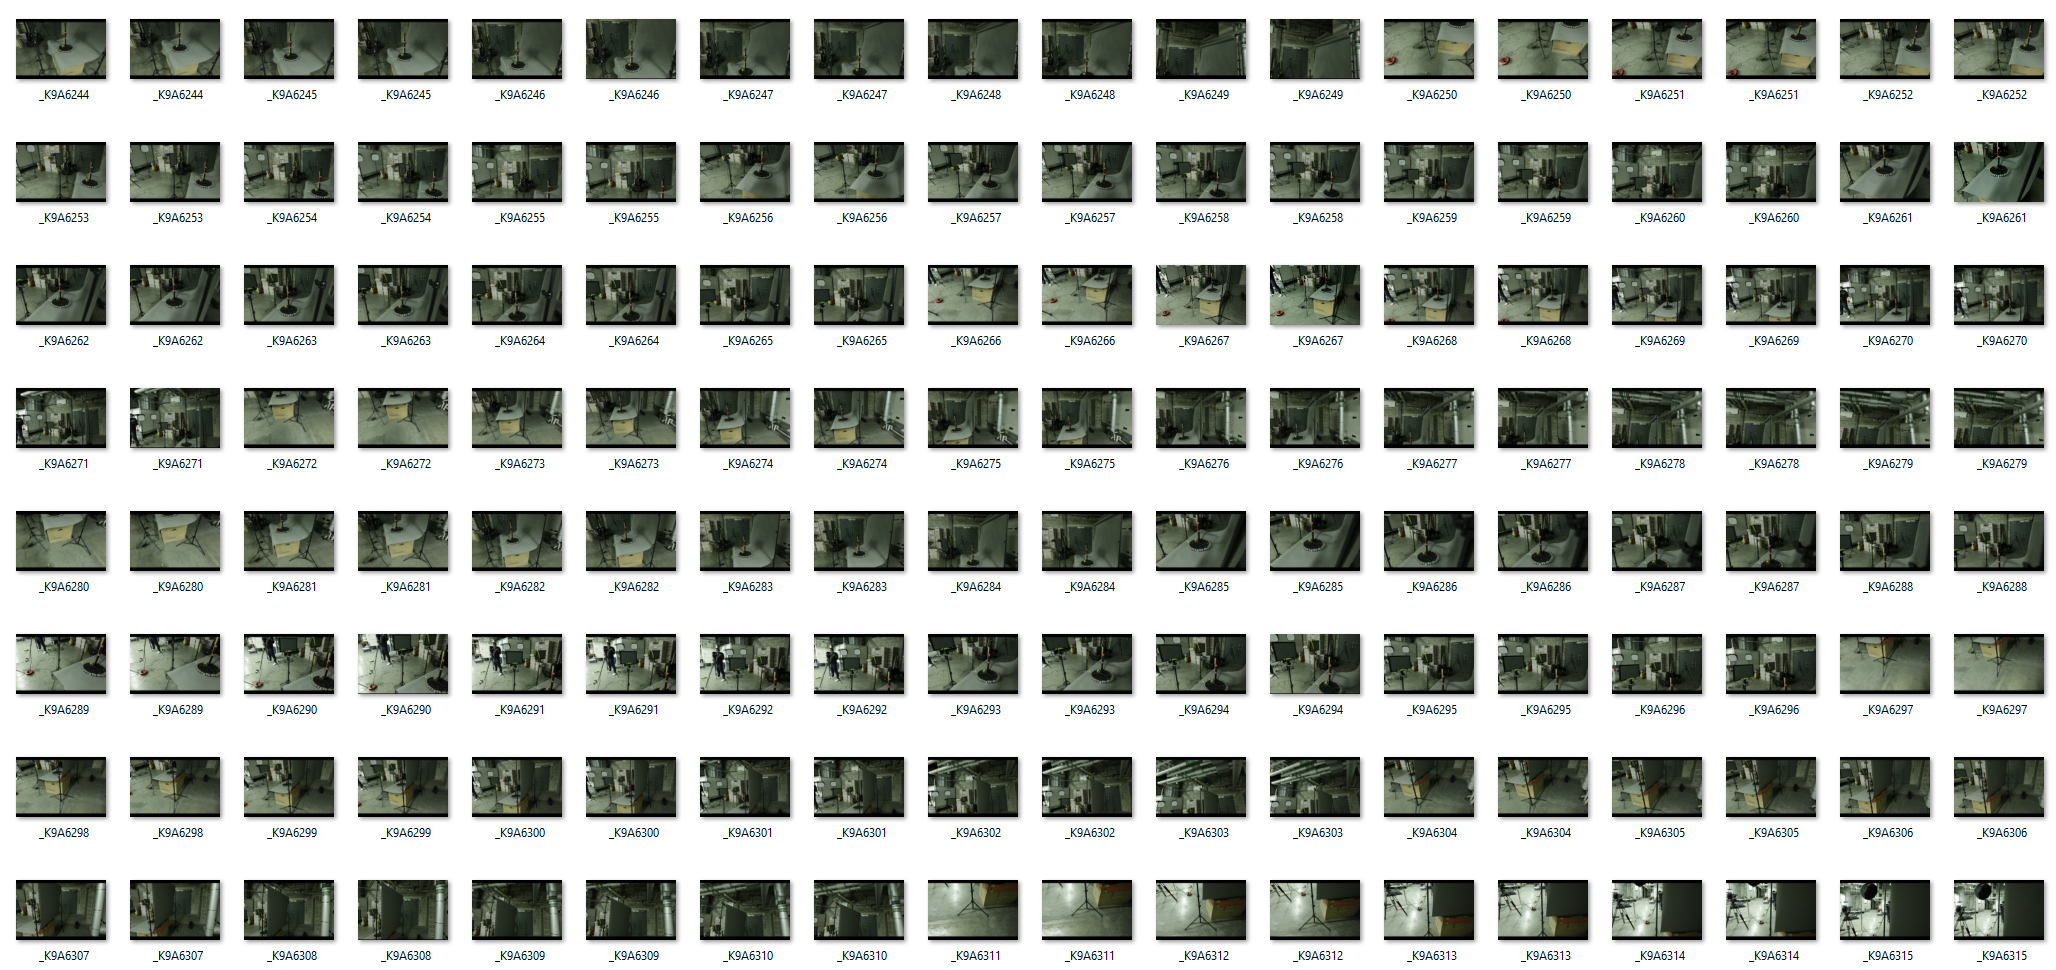
Using the above methodology, you should have something like this:

007. Capturing your Look Development Reference
Now that you have your stills, take some time to capture some look development reference. If you have an additional light, use it to create a 3-point lighting setup. If not, turn down the exposure (or turn it off completely) of one of the lights to create a more dramatic lighting setup. Then capture additional stills of the asset or a video. Make sure to also capture the calibration reference (slate, Macbeth, grey and chrome ball, and the backplate).

The video reference can be extremely useful as it easily allows a look dev artist to see how the asset responds to light and how the reflections roll around the asset. I usually capture video reference using the default lighting setup and then I turn one light off at a time and shoot again. I also shoot video reference with the CPL filter on and off.

008. Capturing the Lighting Reference
You should now have all the asset reference captured. To ensure that we can match the photography digitally, we will also need to capture the lighting, so it can be digitised. I usually capture a full 360 HDRI using a ninja nodal, and then I’ll use a 50mm lens and capture a HDRI of each light. This allows me to have a much higher resolution light map for lighting. For more information on shooting a HDRI, make sure to check out this doc:
- Shooting a HDRI Onset for CG Lighting – This tutorial will guide you through the process of shooting a HDRI onset for CG lighting.

009. Capturing Set Measurements
The final thing to do is capture as much set data as you can. If you have a Lidar scanner, then great – scan the set. If not, take images using photogrammetry techniques and additionally, take set measurements with good old pen and paper. What I tend to measure is:
- The height and width of the drape
- The height and width of the table
- The height of the lights
- The width/height of the light panels
- The distance from each light to the asset
- The height of the camera
- the distance of the camera from the asset
- The lens used and the camera used
010. Reviewing your Captured Data
You should now have everything you need. Before leaving the set, make sure to double check your data. And if you have time, capture more data. Use all the time you are given! If you have a laptop near by, plug the images in and check the RAW pics. If all looks good, you can pack up and hit the road 😉

Links
- Shooting a HDRI Onset for CG Lighting – This tutorial will guide you through the process of shooting a HDRI onset for CG lighting.
- Shooting a Panorama – This walkthrough will guide you on how to capture a panorama.
Shooting Texture and Look Development Reference Course
If you are looking for a more detailed step-by-step breakdown, you can check out our course on the topic here:
Support CAVE Academy
Here at CAVE Academy the beauty of giving and sharing is very close to our hearts. With that spirit, we gladly provide Masterclasses, Dailies, the Wiki, and many high-quality assets free of charge. To enable the team to create and release more free content, you can support us here: Support CAVE Academy
Is it possible to use a different company of polarising film?
here are its characteristics
Type: High contrast transmissive
Transmittance: single(42%) ; crossed(≦0.005%)
Color: neutral gray
Polarizing efficiency: 99.99%
Polarization axis (Transmission axis): 620mm
Wavelength: 380~700nm
UV blocking: Yes, 99.94%
Thickness: 0.19mm
Direction: linear
Durability: 60°C/90%RH/500Hours
Reliability: -30℃ ~ 80℃
Hi Александр, Yes of course you can. I have only used the Rosco polarising film but I would look for more local solutions for sure.
Thanks
J