
Search the wiki
02. Houdini Interface and Navigation

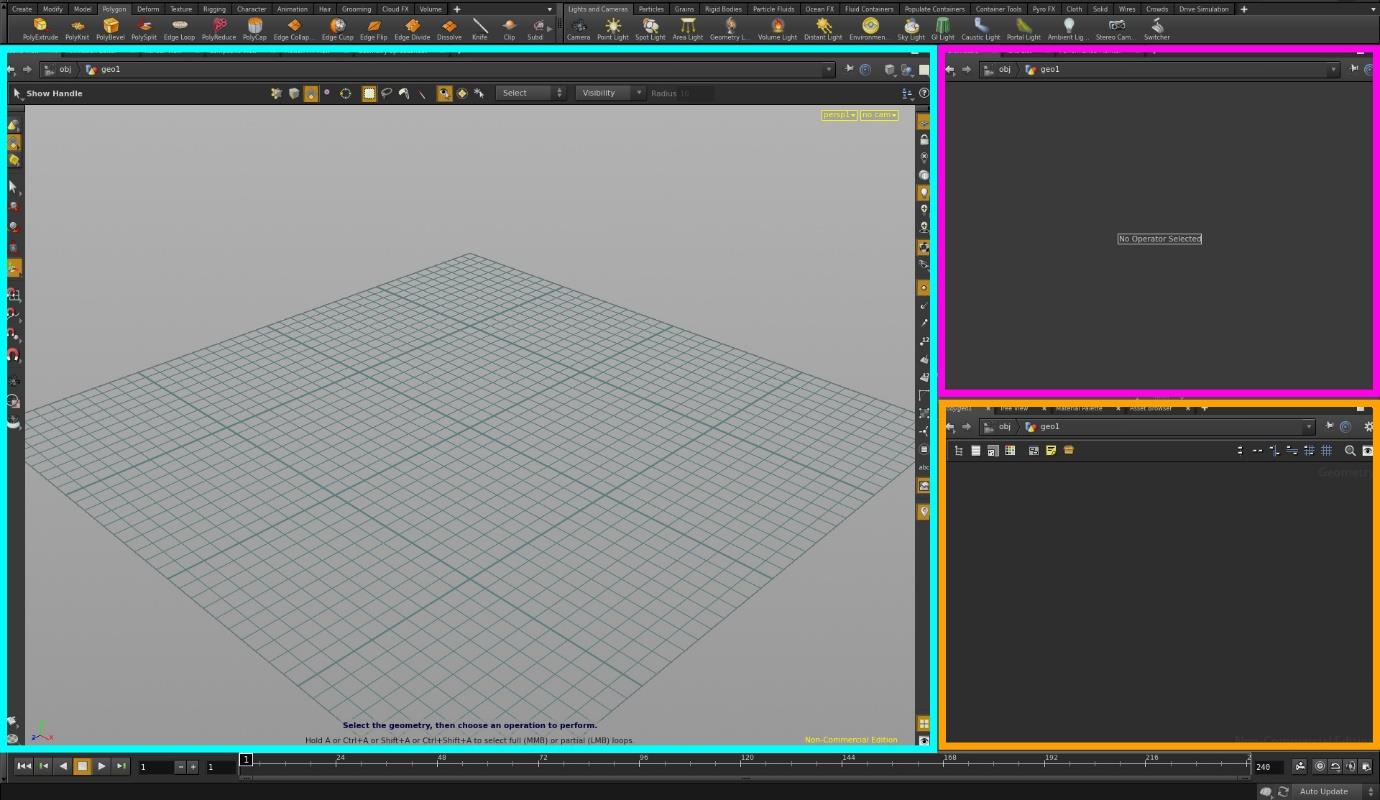
Interface and Navigation
Interface
- The Scene View Pane is your 3D viewport.
- The Parameters Pane is where you will edit the parameters for the selected node.
- The Network Pane is where you will construct your node network.
- To create new panes, you can click the + icon to the left of a pane window and go New Pane Tab or hit Ctrl+T.
- If you fancy switching an existing pane to a different pane (for example, the Scene View Pane to the Network Pane), you can use the keyboard shortcuts Alt+1 to 5.
- Alt+1 = Scene View
- Alt+2 = Network Pane
- Alt+3 = Parameters Pane
- Alt+4 = Tree View Pane
- Alt+5 = Textport Pane
- Alt+6 = Animation Editor Pane
- Alt+7 = Material Palette Pane
- Alt+8 = Details Pane
Along with the Panes, you will be presented with a series of. These shelves will give you access to SOP (Surface Operators), CHOPS (Channel) DOP (Dynamic) and others. If you have a node selected and then create another node via the Shelves, it will automatically connect them.
![]()
By default, you are presented with the Perspective viewport in a Single view (Ctrl+1). You can switch to other views by using the shortcuts Ctrl+1 to Ctrl+8. To synchronise panning and zooming in views, you can also enable Link Ortho Views.
- Ctrl+1 = Single View
- Ctrl+2 = Two Views
- Ctrl+3 = Three Views
- Ctrl+4 = Four Views
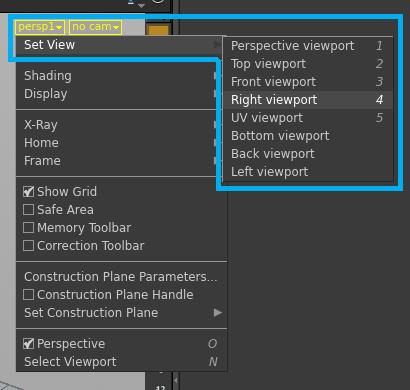
You can also switch viewports by clicking on the yellow ‘persp1’ box in the top-left corner of the viewport and going Set View. The keyboard shortcut to switch viewports is Space+1 to Space+5.
- Space+1 = Perspective viewport
- Space+2 = Top viewport
- Space+3 = Front viewport
- Space+4 = Right viewport
- Space+5 = UV viewport
 With an object selected, you will also find that you can edit some of its parameters in the top bar of the Scene View Pane. For now, hold down the Ctrl key and click on the Sphere tool on the Create Shelf.

Pressing Space+B on the keyboard will allow you to switch between a maximised viewport and a split view. You can also press Ctrl+B to fully maximise the viewport. Around the perimeter of the Scene View Pane, you will also find additional tools that will aid you in manipulating your objects, to view modes and display modes.
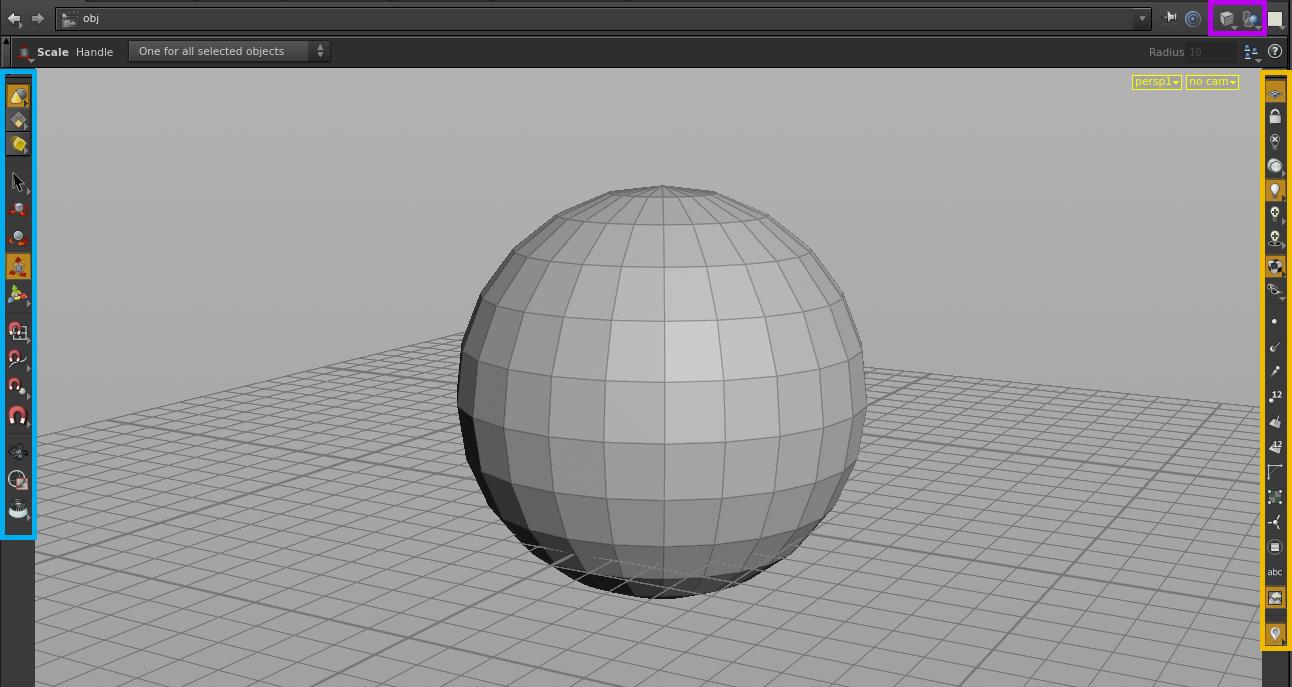
As illustrated on the image above, the tools in blue are primarily for manipulation (Rotate, Translate, Scale, Selection tools and Snapping tools). The tools in the pink box allow you to set your object display mode (Wireframe, Shaded, etc.) and visibility modes (Show All Objects, Ghost Other Objects, etc.). To quickly switch between Shaded and Wireframe mode, toggle the W key. And finally, the tools in orange and further display tools that allow you to view points, normal, show and hide the grid, and so on.
Navigation
Before we jump into the Network and the Parameter Pane, let’s focus on navigation in the Scene View. As Houdini is context sensitive, you will find that on most occasions, navigation will be handled in much the same way as in other views, however, there may be slight differences (which we look come to as we progress).
With no objects in the scene, by default, the View tool will be active (Esc). With this tool, you can use the following mouse keys to move around the 3d scene:
- LMB (click and drag) = Tumble
- MMB click and drag) = Pan
- RMB click and drag) = Zoom
With an object in the scene, the View tool will be disabled. To navigate, you will need to hold down either the Alt or the Space key and a combination of the above mouse keys. If you want to jump back to this tool, just press the Esc key on your keyboard.
As you navigate, there will be times where you will want to return the camera back to its home position, to do this, press Space+H.
You can also use Space+A to home all objects and Space+G to home a selected object. Another shortcut is Space+F which will frame a selected object(s).
Now you may think that both Space+G and Space+F do a similar thing, however, there are some slight differences. Navigate around a scene with multiple objects and use the shortcuts to home/frame in on them to see these differences.
Training
For more information on all things software related, you can check out our courses here:
- Introduction to Maya 1001
- Introduction to CG Tools and Techniques 1001
- Creating Digital Studio Look Development Environments
- Character Modelling for Feature Animation 1001
The Connection Programme
If you are a fan of mixing science with art, or maths with creative thinking, then join our Connection Programme, where we’ll be exploring VFX, animation and games from the core fundamentals:
Links
- SideFX learning resources – SideFX training bits and bobs.
- SideFX Houdini documentation – Documentation from the folks at SideFX.
- OdForce forums – Plenty of great information from the team at OdForce.
- cgwiki – A heap of amazing content from cgwiki.
Support CAVE Academy
Here at CAVE Academy the beauty of giving and sharing is very close to our hearts. With that spirit, we gladly provide Masterclasses, Dailies, the Wiki, and many high-quality assets free of charge. To enable the team to create and release more free content, you can support us here: Support CAVE Academy