
Search the wiki
04. Networks and Operators (Ops)
Networks and Operators (Ops)
Creating Objects
Before we dive into the Network and the Parameter Panes, let’s look at how we can create objects. We’ll start by using the shelves and then we will focus on using the TAB menu, which is where you are most likely to go for creating any nodes.
In a new Houdini scene, LMB click on the Sphere tool on the Create shelf. By doing this, you will be presented with a bounding box of the sphere and the ability to position the sphere along the X and Z axis. If you want to edit the spheres creation position on the Y axis, you can hold down the Shift key.

If you LMB click the Sphere tool but then wish to create the object at the world center, you can hit Enter on the keyboard to do so. Or, as we have done before-hand, you can hold down the Ctrl key and then select a tool to create the object at the world center.
Now delete the existing sphere and this time, in either the Scene View Pane or the Network Pane, hit the TAB key on the keyboard. From here, you can either navigate to the desired node via the menu, or you can start typing in the name of the node to filter down to it. For this example, start typing ‘sphere’ and then select the tool when you see it.
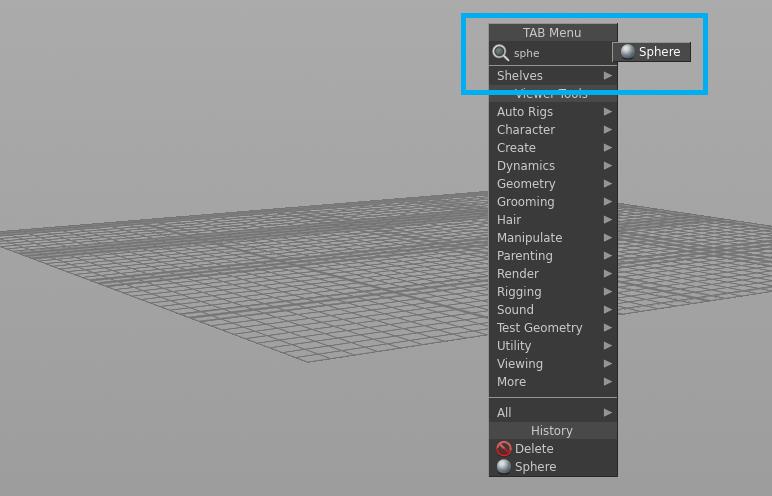
If you used the TAB menu in the Scene View Pane, you will be able to position the sphere or hit Enter to create the sphere in the world center. If, however, you used the TAB menu in the Network Pane, the sphere will automatically be created in the world center.
With an object selected, you can also use Ctrl+C and Ctrl+V to copy and paste respectively.
The Network Pane
Now that we have an object or two in the scene, let’s turn our attention to the Network Pane. The Network Pane reveals hierarchical structure for all the nodes in the scene and the order in which they will be calculated, or “Cooked” as the Houdini folks like to refer to is as.
As the Network Pane is a 2d window, only Panning (MMB) and Zooming (RMB) will be available. Here are a few other keyboard shortcuts to make using the Network Pane a little easier:
- L = Layout nodes.
- G = Frame selected node.
- H = Frame all node.
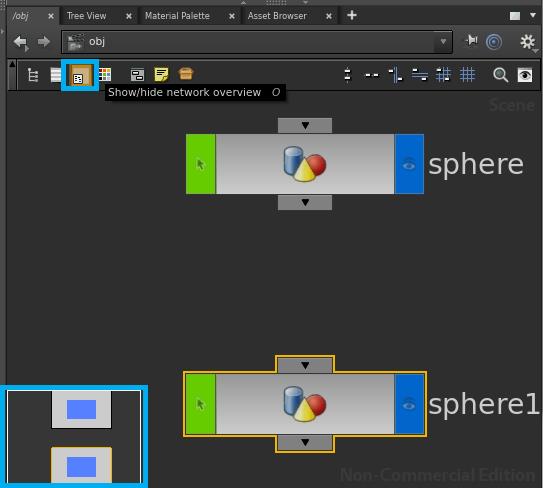
- O = Overview.
- Shift+W = Tree View
- Shift+T = List View
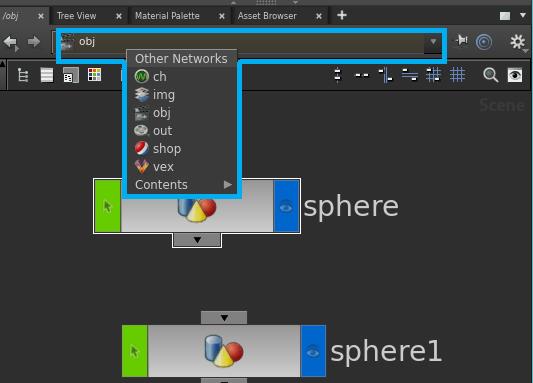
By default, you will be in the obj (also referred to as Scene) network. Here is a breakdown of what each network is primarily used for:
- obj = Network of objects to represent your scene (geometry, lights, cameras, etc.).
- ch = Networks to represent how values change over time.
- img = Networks for image manipulation and compositing.
- out = Networks to represent render settings and passes.
- shop = Networks to create and edit shaders.
- vex = Networks for visual programming using Houdini’s VEX programming language.
Operators
Nodes in Houdini are known as Operators (Ops). You’ll find that I’ll use the two terms, nodes and Operators, however, do take note that in actuality, Operators is the official term for these building blocks. As we create networks of nodes, each node will generate or edit some data and then pass it down to the next node in the hierarchy. In Houdini, there are several main groups of Operators:
- OBJS = Nodes that pass transformation data. Traditionally, these nodes contain SOPS.
- SOPS = Surface Operators. Primarily used for procedural modelling or editing an objects shape.
- CHOPS = Channel Operators. For procedural animation and audio manipulation.
- COPS = Composite Operators. For image manipulation and compositing.
- DOPS = Dynamic Operators. For fluids, RBD, cloth, etc.
- SHOPS = Shading Operators. For creating and editing shaders.
- ROPS = Render Operators. To represent render layers, passes, etc.
- VOPS = Vex Operators. For building nodes of any of the above using visual programming.
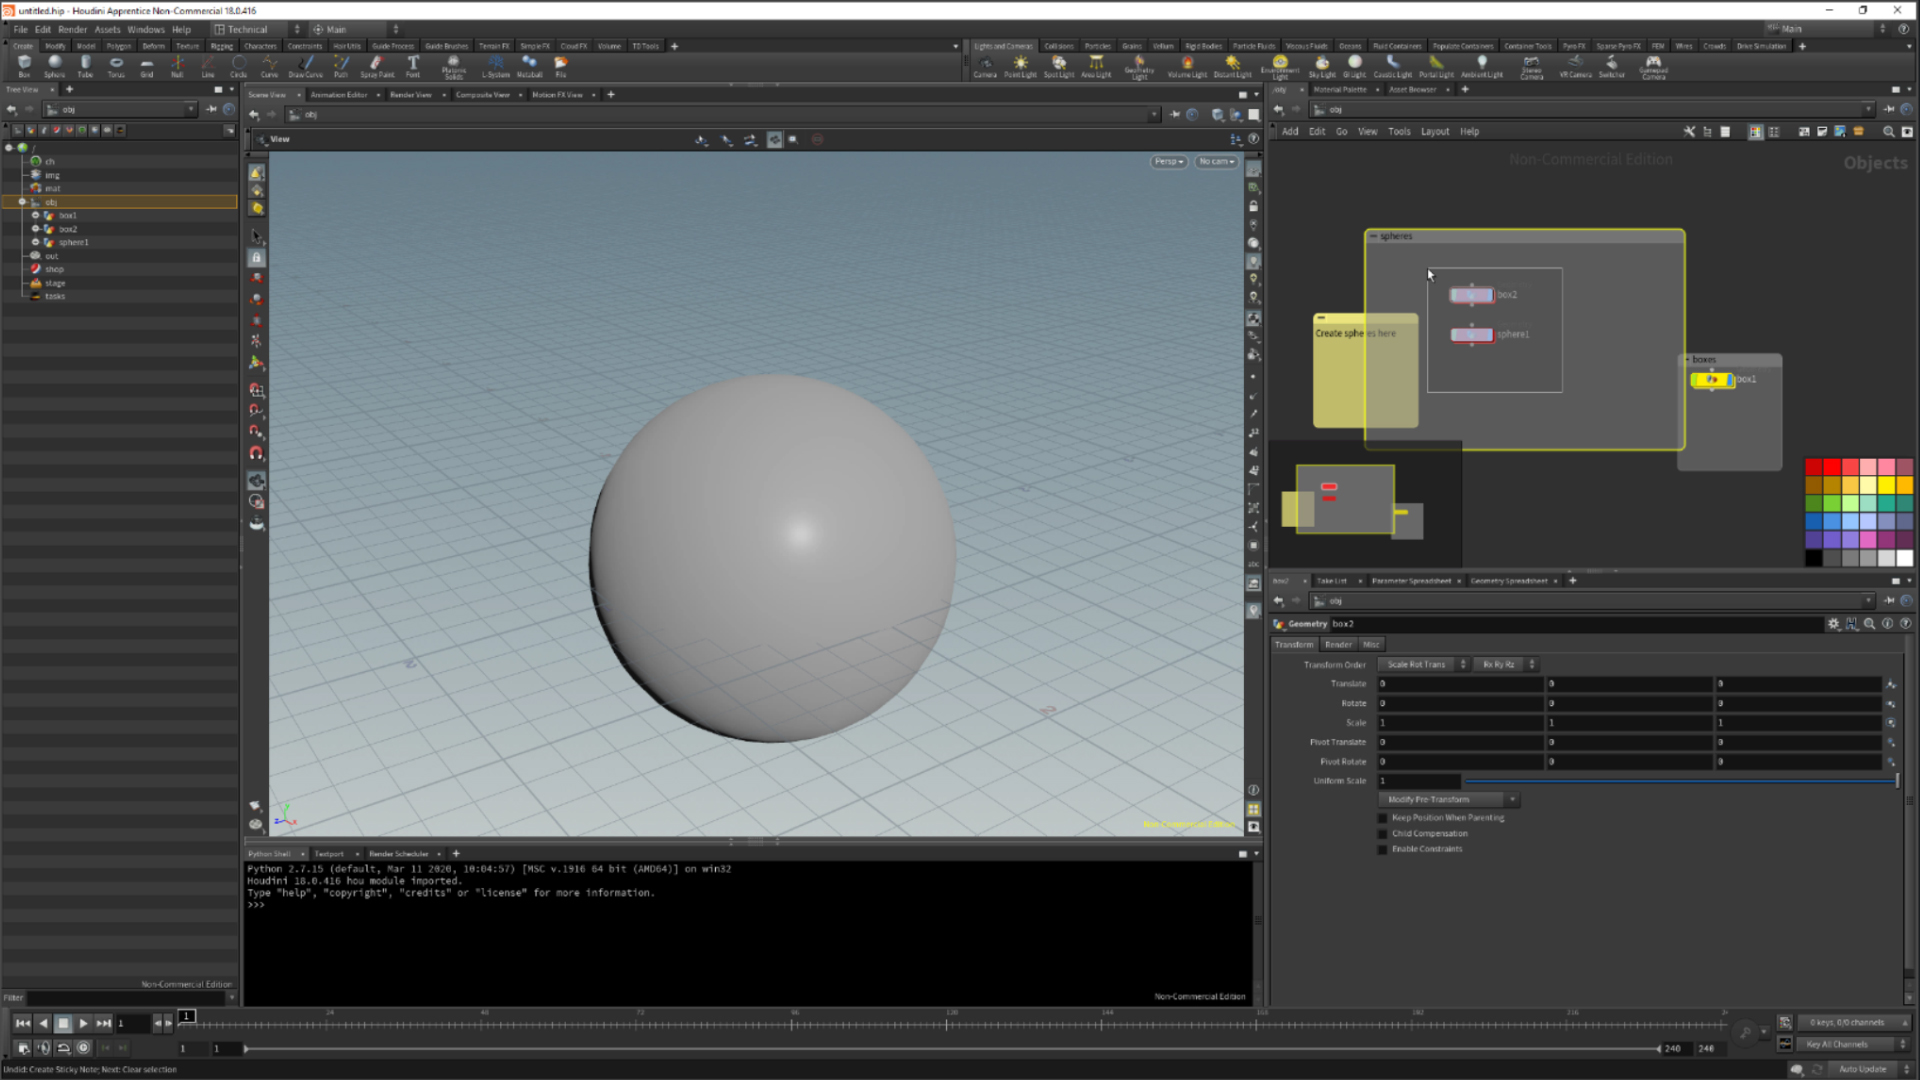
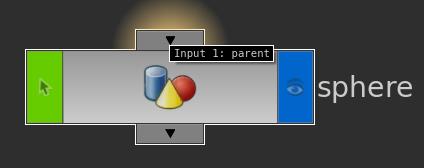
Currently, in our scene we have an OBJ Operator (sphere). The Operator has two flags (the green box and the blue box) and an input and an output. The blue box refers to the Display. You can toggle the display on and off by clicking on it. The green flag represents if the Operator is Selectable or not. If you MMB click over the input arrow, you will also be given some information on what can be fed into the Operator.
If you MMB click over the body of the Operator, you can also reveal further information about then node (a little like the Heads Up Display in Maya). This is very useful when debugging a scene or examining the attributes of a node.
Jumping “In” and “Up” of Operators
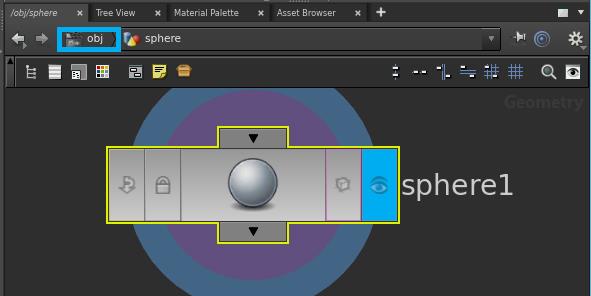
If you LMB double-click the node or press the I button on the keyboard with the node selected, you can dive “in” to the node to jump down to its Geometry level. At this level, you can start to edit the object at a component level (in Maya, this would be referred to as the Shape node) by adding and manipulating additional SOPs (Surface Operators). You will also notice that the node has additional flags that can be enabled or disabled. From left to right, we have:
- Bypass = Enabling this flag will bypass the action of the Operator.
- Lock/Unlock = This flag will lock and unlock the node and its parameters.
- Template/Selectable = With other objects in the scene, you can template nodes to make them visible in the viewport but not selectable.
- Display/Render = Controls the visibility of the node and if the node is renderable.
To jump back “up” to the obj/Scene level, either press the U key on the keyboard or click on obj in the Network menu.
Keeping a Clean Node Network
As you progress, without a doubt, your node networks will become larger and more complex. In order to make your networks easier to work with, understand and debug (for both you and for others), there are a few things you can do.
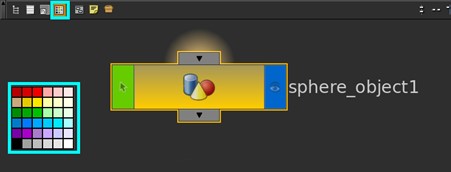
Firstly, you can colour code your nodes. To do this, in the Network Pane window, hit the C key to bring up the colour palette. Then you can simply select a node or a selection of related nodes and select a click on a colour swatch to colour them.
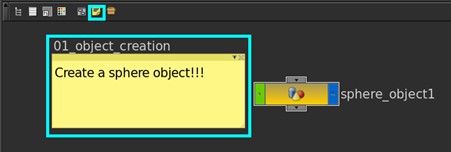
The next thing you can do is add Sticky Notes. To do this, simply hit Ctrl+P. Add a note and then drop it close to the relevant node. You can also minimise the sticky notes if they start to clutter your network.
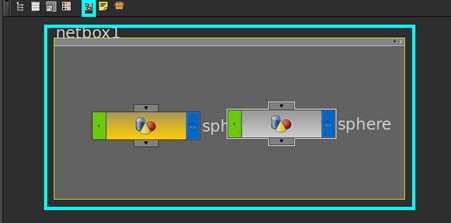
Another thing you can do is use Netboxes to keep your nodes organised. To do this, select some nodes and hit Ctrl+N. Or, if you want to add additional nods to an existing Netbox, simply drag and drop them into the box.
Lastly, you can drop your nodes into a SubNet. This will collapse your nodes down into a container. To do this, select your holds and press Shift+C. You may find that by using SubNets, you may need to do a little re-wiring.

Training
For more information on all things software related, you can check out our courses here:
- Introduction to Maya 1001
- Introduction to CG Tools and Techniques 1001
- Creating Digital Studio Look Development Environments
- Character Modelling for Feature Animation 1001
The Connection Programme
If you are a fan of mixing science with art, or maths with creative thinking, then join our Connection Programme, where we’ll be exploring VFX, animation and games from the core fundamentals:
Links
- SideFX learning resources – SideFX training bits and bobs.
- SideFX Houdini documentation – Documentation from the folks at SideFX.
- OdForce forums – Plenty of great information from the team at OdForce.
- cgwiki – A heap of amazing content from cgwiki.
Support CAVE Academy
Here at CAVE Academy the beauty of giving and sharing is very close to our hearts. With that spirit, we gladly provide Masterclasses, Dailies, the Wiki, and many high-quality assets free of charge. To enable the team to create and release more free content, you can support us here: Support CAVE Academy