
Search the wiki
Modelling a Character for Feature Animation – Overview

Introduction
Like many things, there is no ‘one-way’ to approach any task, however, this document should give you a broad overview on how you could approach the creation of a character model for the purposes of CG Animation.
If you are looking for a more detailed step-by-step breakdown, you can check out our course on modelling characters by Jan Jinda here:
Asset Requirements
Before you begin any model, you should first establish the model requirements and then align your build to best hit those targets. For this project, it was important that:
- The model was suitable for animation and deformation (with some hard-surface elements)
- Damage states would be required
- Multiple LODs would be required to ensure fast animation playback (lowest LOD) and final rendering (highest LOD)
- The model would need to be groom friendly
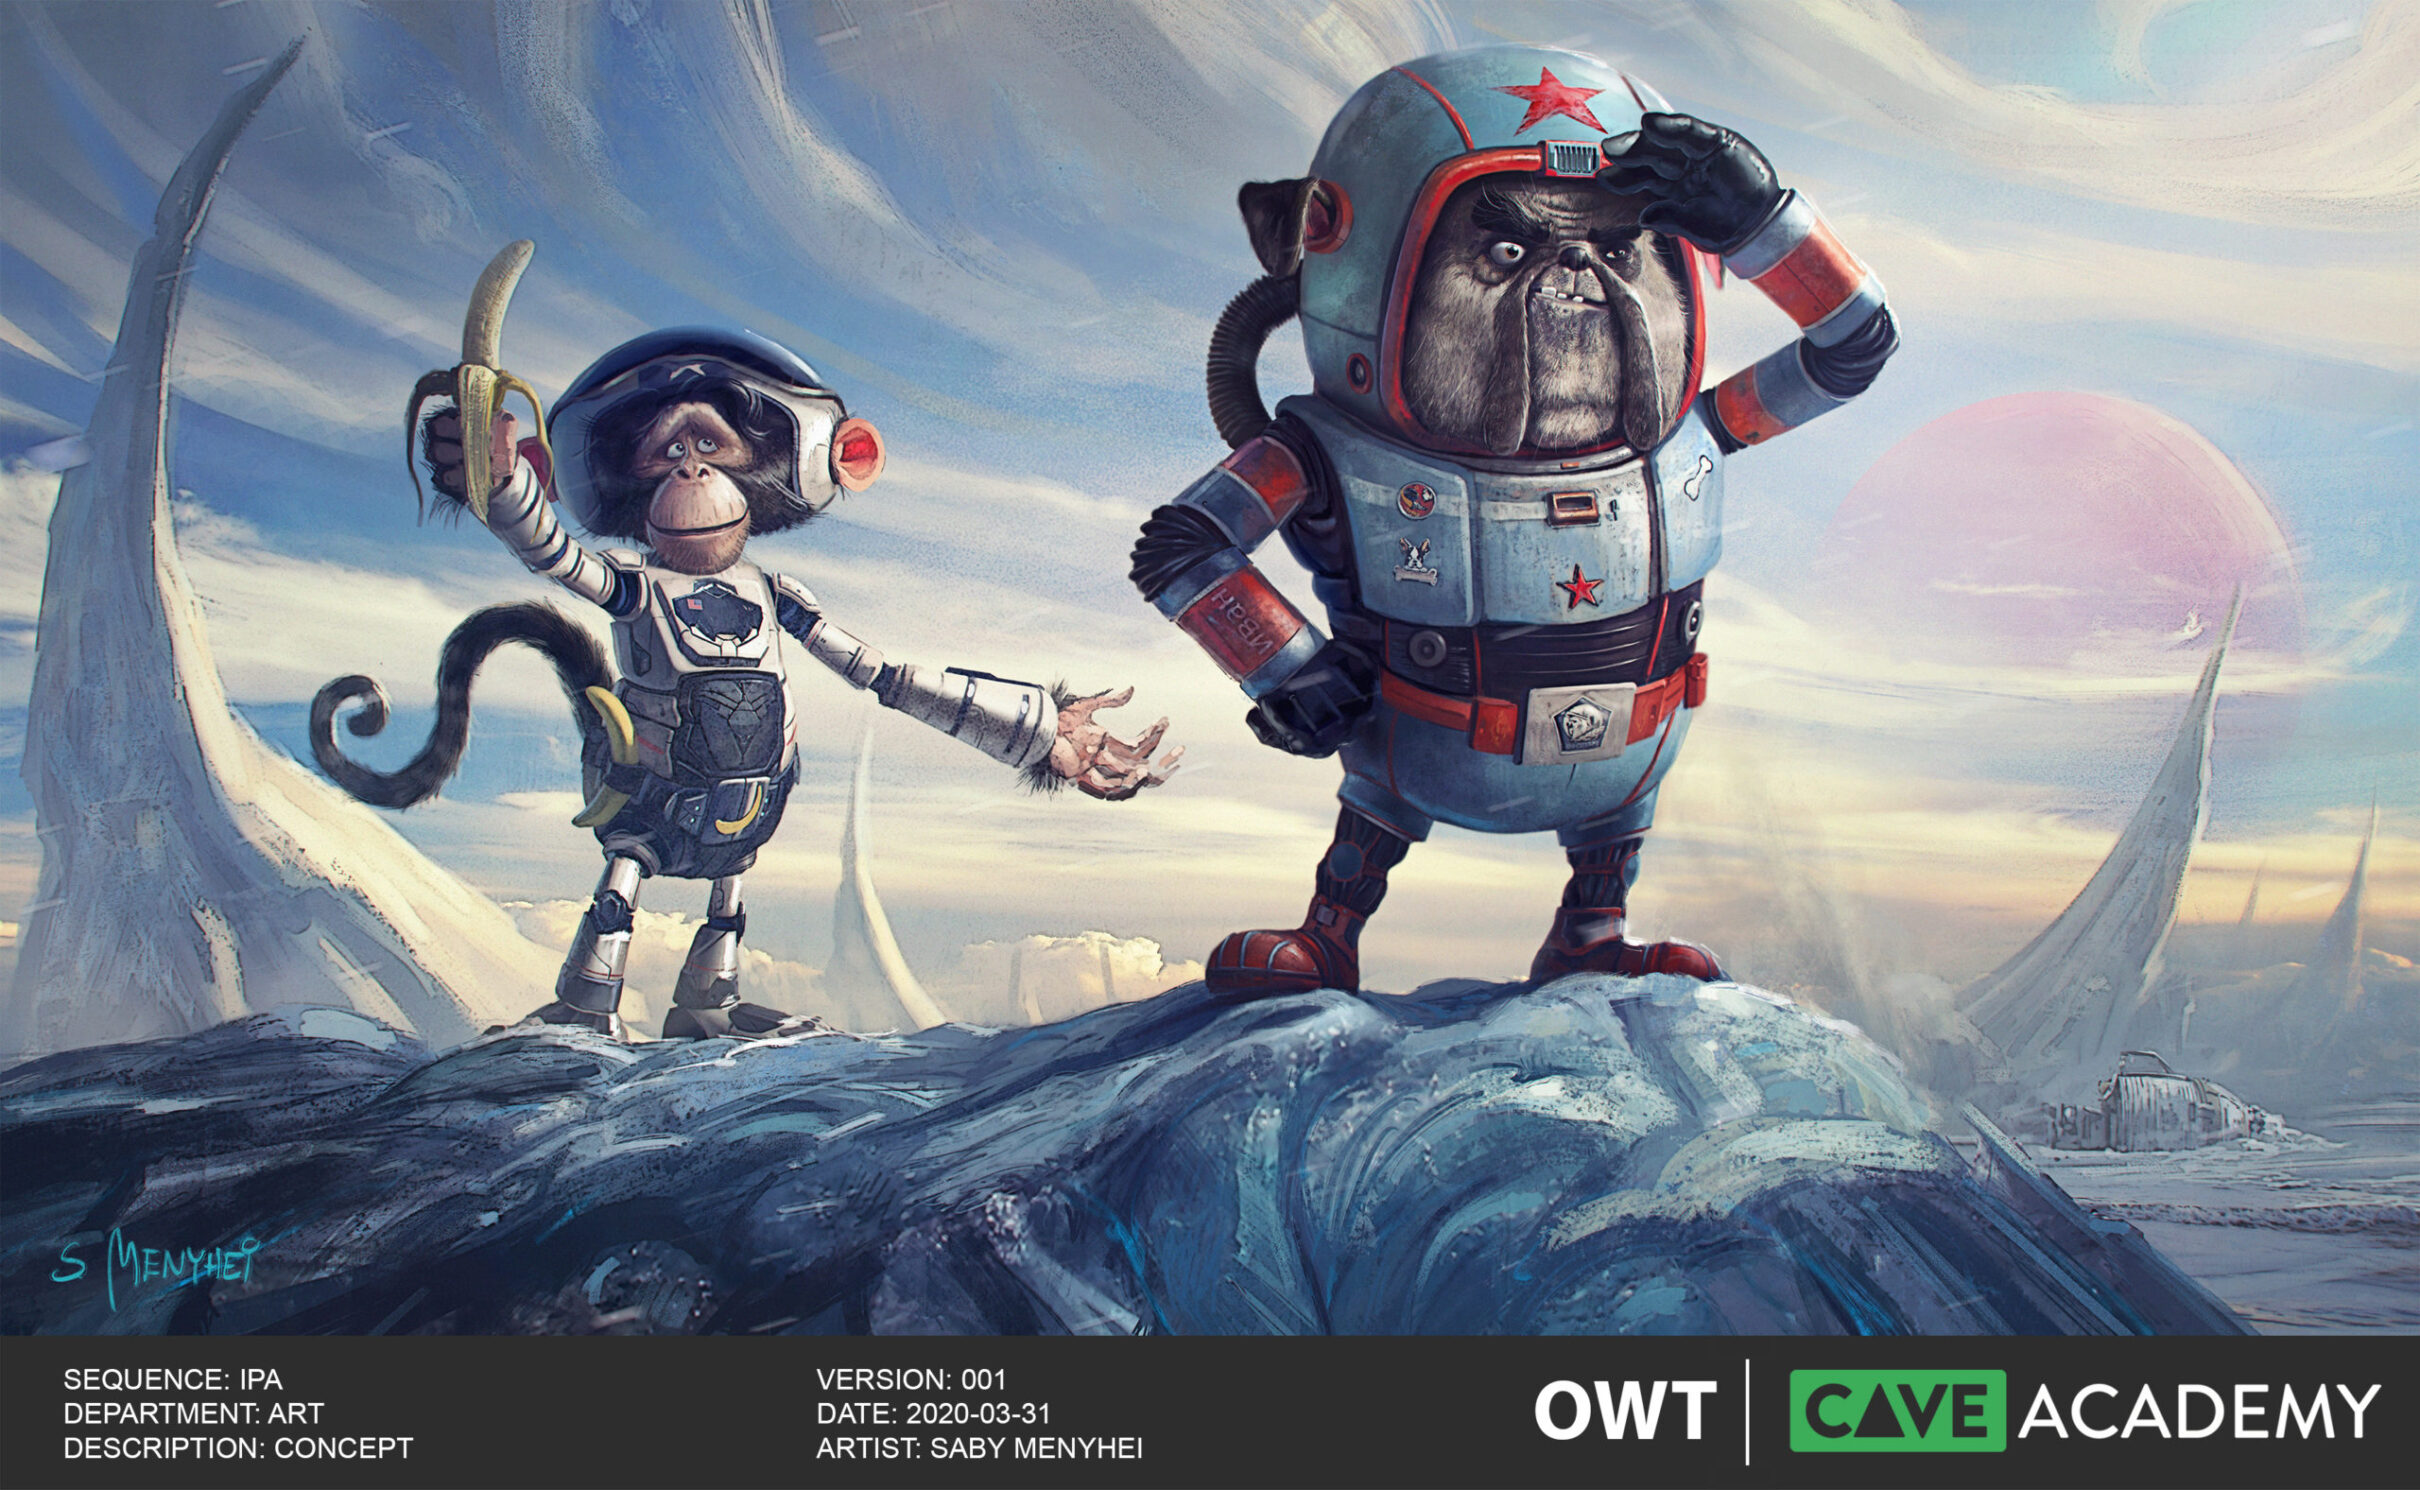
- The model would be created based on concept designs
Just a quick note before we dive in. In a production environment, you should be prepared for any changes at any stage of the asset modelling process. You could be halfway in and then may change the concept design, or you could be 74% complete and they want to add a cape, or a flat cap! Maybe they change the asset requirements and it needs to be destruction-friendly. So as you go through this process, be ready for such tweaks. Changes are not a comment on your skills and the work you’ve done, they are part of the creative journey the team goes through to get to the desired look and feel that the client is after. Yes – it can be painful and yes, usually you always end up going back to V002 or V003, but sometimes you’ll have to knock out 30 versions to double-check that an idea does or does not work.

Lastly, the modelling stage itself does not have to be as linear as I’ve described below. You should try to get as many stages up and running simultaneously. For example, quickly block out the model and throw it into Zbrush to further push the forms. Then retopo and UV the arm and test how the displacement looks. Then do the same for the torso, or the head. The more you can work, test, refine, work, test, refine, the better. Everything is connected and one stage relates to the next. This will also keep things more fluid and you’ll be open to making changes, rather than fully completing a stage, having a request come in, and then having to take many, many steps back to hit the notes.
Analysing the Reference and the Concept
Before starting any model, it is important to analyse your reference and the concept.
Skipping this step is a no-no. And it is important to also note that when analysing the client reference, it should not simply be a case of having a quick look and then cracking on with the task. You should dig deeper to get a real understanding of the asset.
In this case, it is important to analyse where the fabric seams are, to get an understanding of what interior armature would look like, to figure out where the crease lines are and areas of high deformation. All these questions and more should be going through your mind. You need to know your asset inside out and have a clear understanding of how it was practically crafted. As a modeller, you are essentially taking on the role of a toymaker, a carmaker, a builder, so it is important to really understand the craftsmanship of the asset you intend to build. The only difference is instead of crafting your asset out of wood, metal or stone, you are using polygons.
For this asset, we have a mix of hard surface elements (the helmet and interior armature) and soft elements (the body) and some stuff in-between (the boots). So as we approach the asset, we’ll also need to ensure our geometry has a feeling of being hard and soft, so controlling the edge loops will be important.
We also need to break down the asset into logical parts. The body will be one mesh, the visor another, the helmet another and so on. Again – think about how the asset has been manufactured in the real-world and try to stick to this process. It may not always be best to work with that logic in mind, but it is usually a good starting point.
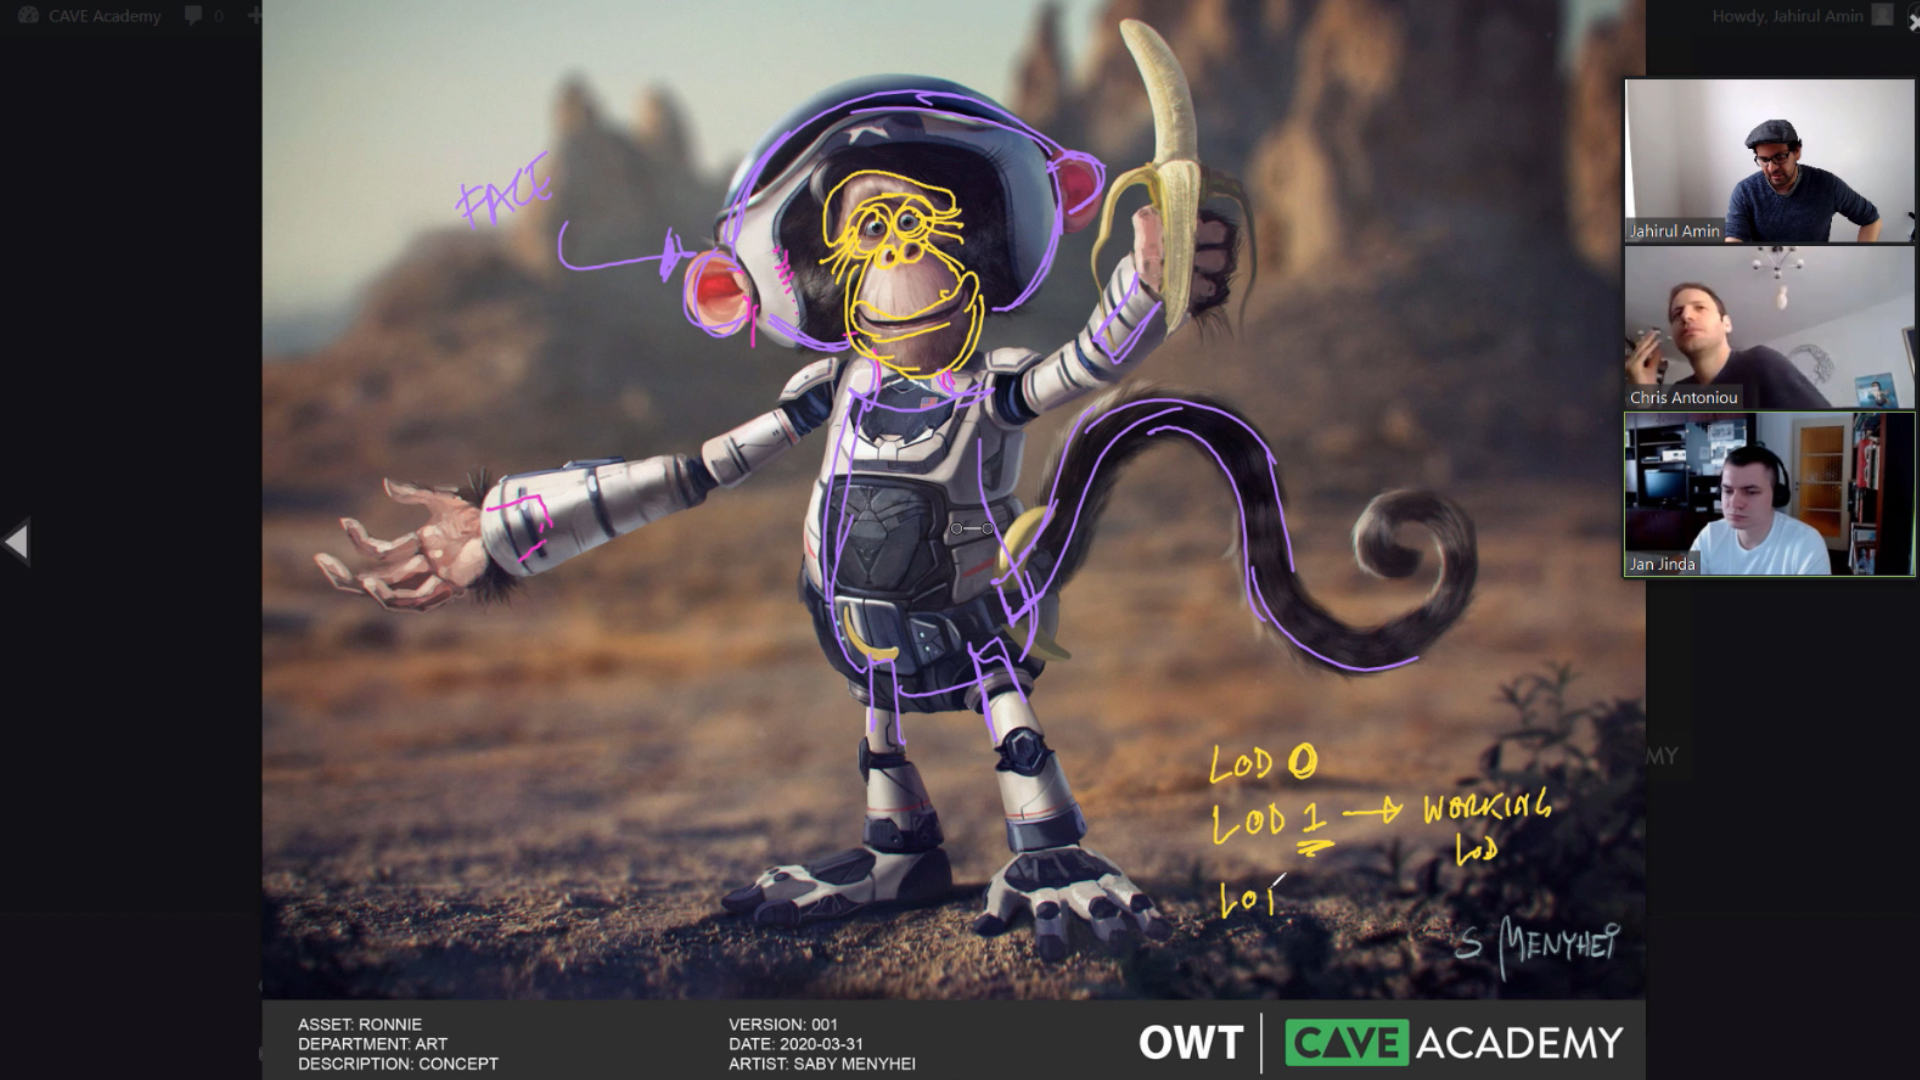
Blocking out the Model
Once you are comfortable with the design of the asset, it’s good to start establishing shape, form and scale. The topology at this stage is not critical as we only need something workable that will allow us to continue the 3d concept in a sculpting application such as Zbrush or Mudbox.
On some projects, you may be provided with a 3d scanned maquette from the art department, and if so, great, you can generally skip this step, and the sculpting stage and move directly to retopologising the mesh. In this example, we are working from concept drawings, so essentially, we are part of the art department and translating the sketch from 2D to 3D.

If you have model sheets for reference (front/side sketches), you could load them into your modelling application and work from that but just remember that most contact sheet sketches (especially a 3/4 view) won’t have a camera focal length established whereas 3D application cameras have cameras set with a known focal length. For example, the default Maya camera is set to 35mm. So as you work around and block out your asset, consider the camera focal length and aim to capture the overall characteristics and the essence of the design. I would also recommend changing your application camera focal length to 50mm as the 35mm can create some distortion as you work around the asset.
At this stage, you could work on a single piece of geo or split things out into multiple parts. It’s up to you. My preference is to split things up, but each to their own and you should work in a manner that best suits your modelling style.

Developing the Sculpt
With the basic blocking up and running, we can now export the model to a sculpting application, so we can continue pushing the design. Here we can establish primary and secondary forms more easily and start to loosely lay in where specific details will go. For example, where will the toy fabric seams go and patches go.
We can also sculpt in the sole of the boot. Don’t get too carried away with the finer details, unless requested, as there may be some back and forth with the supervisor/client to get final sign off. If you are adding finer details, try to use procedurals, so you can easily change them if requested.
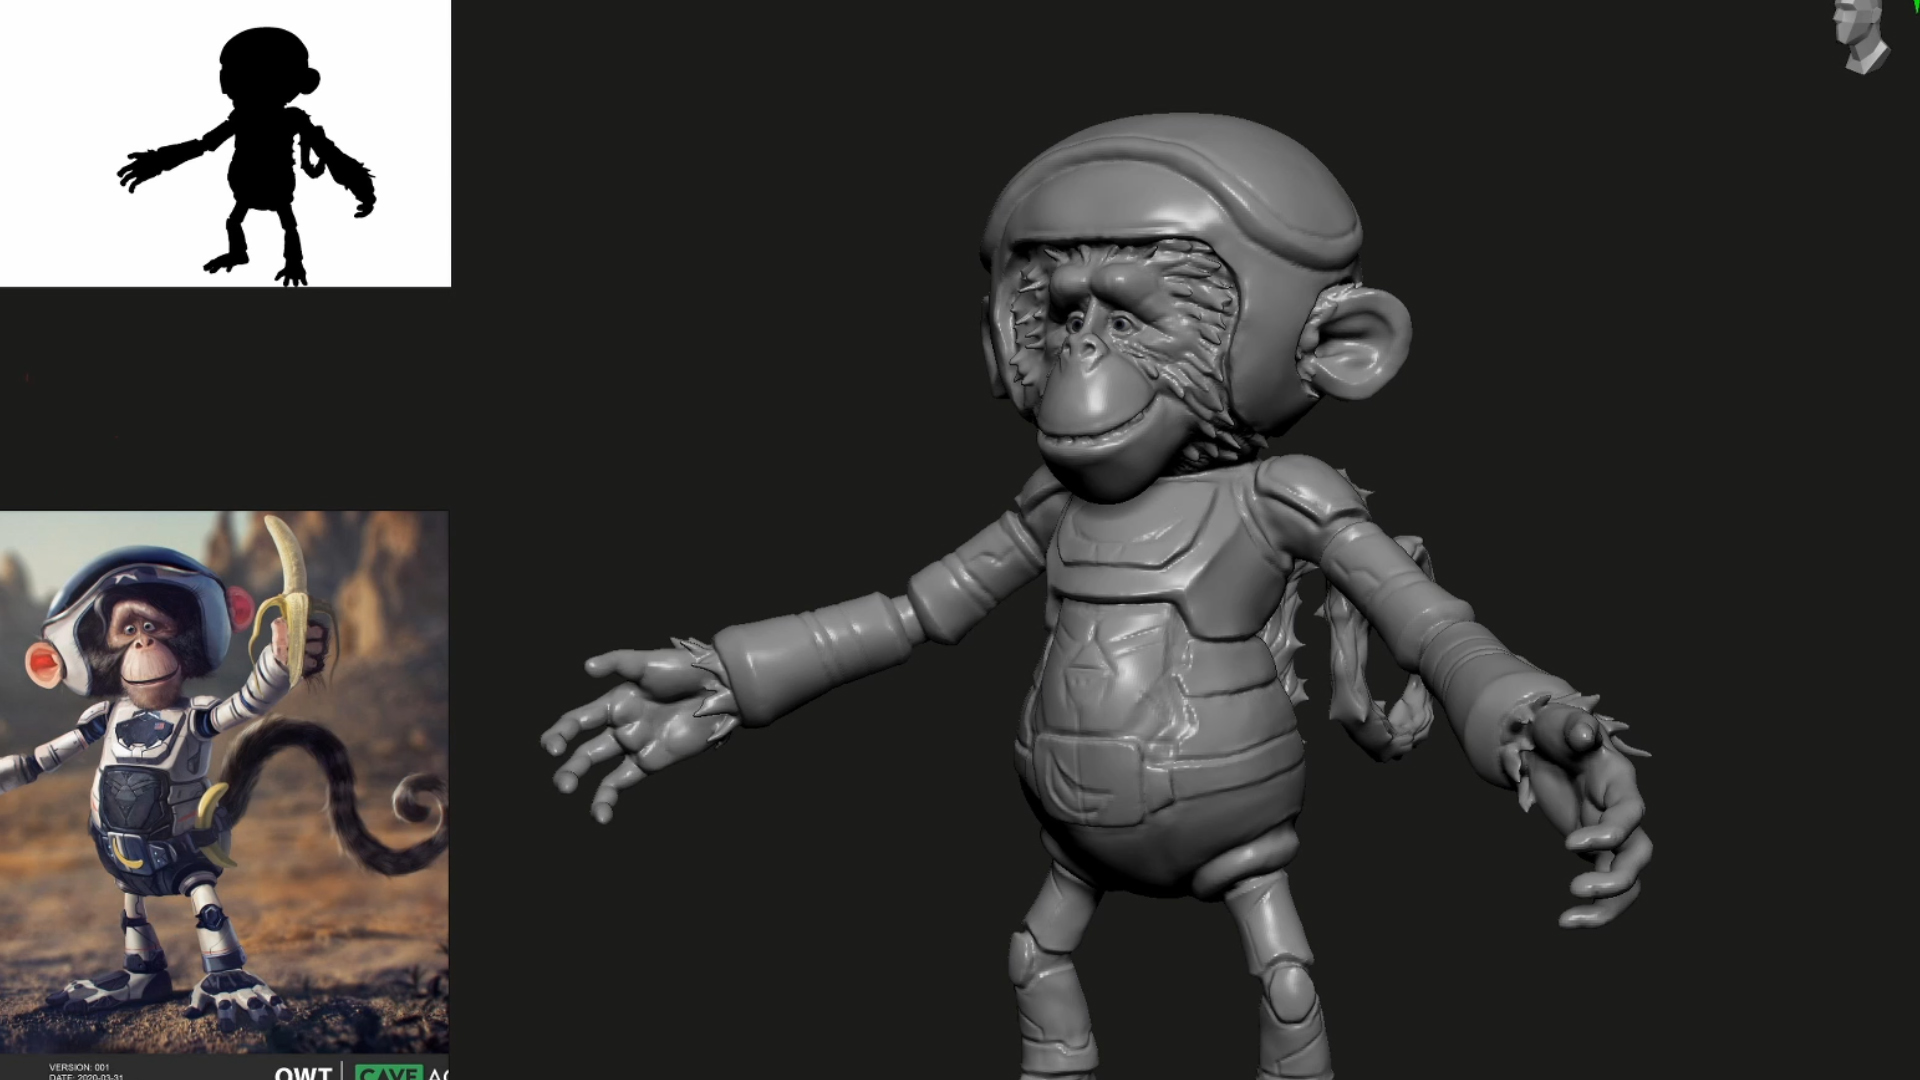
If need be, you could also use tools such as Zremesher and Dynamesh to continually update the topology so you get a clean mesh that best describes the design of the character. Again, we should not be concerned about topology at this stage. The main aim is to create a digital maquette that demonstrates that you are able to take a 2d design and convert it to 3d whilst maintaining the concept key features. To bring things closer, have a crack at adding some colour to the model too.
Once you are happy with your digital maquette, you should render it out for your supervisor, and if approved, you can move on to the topology.

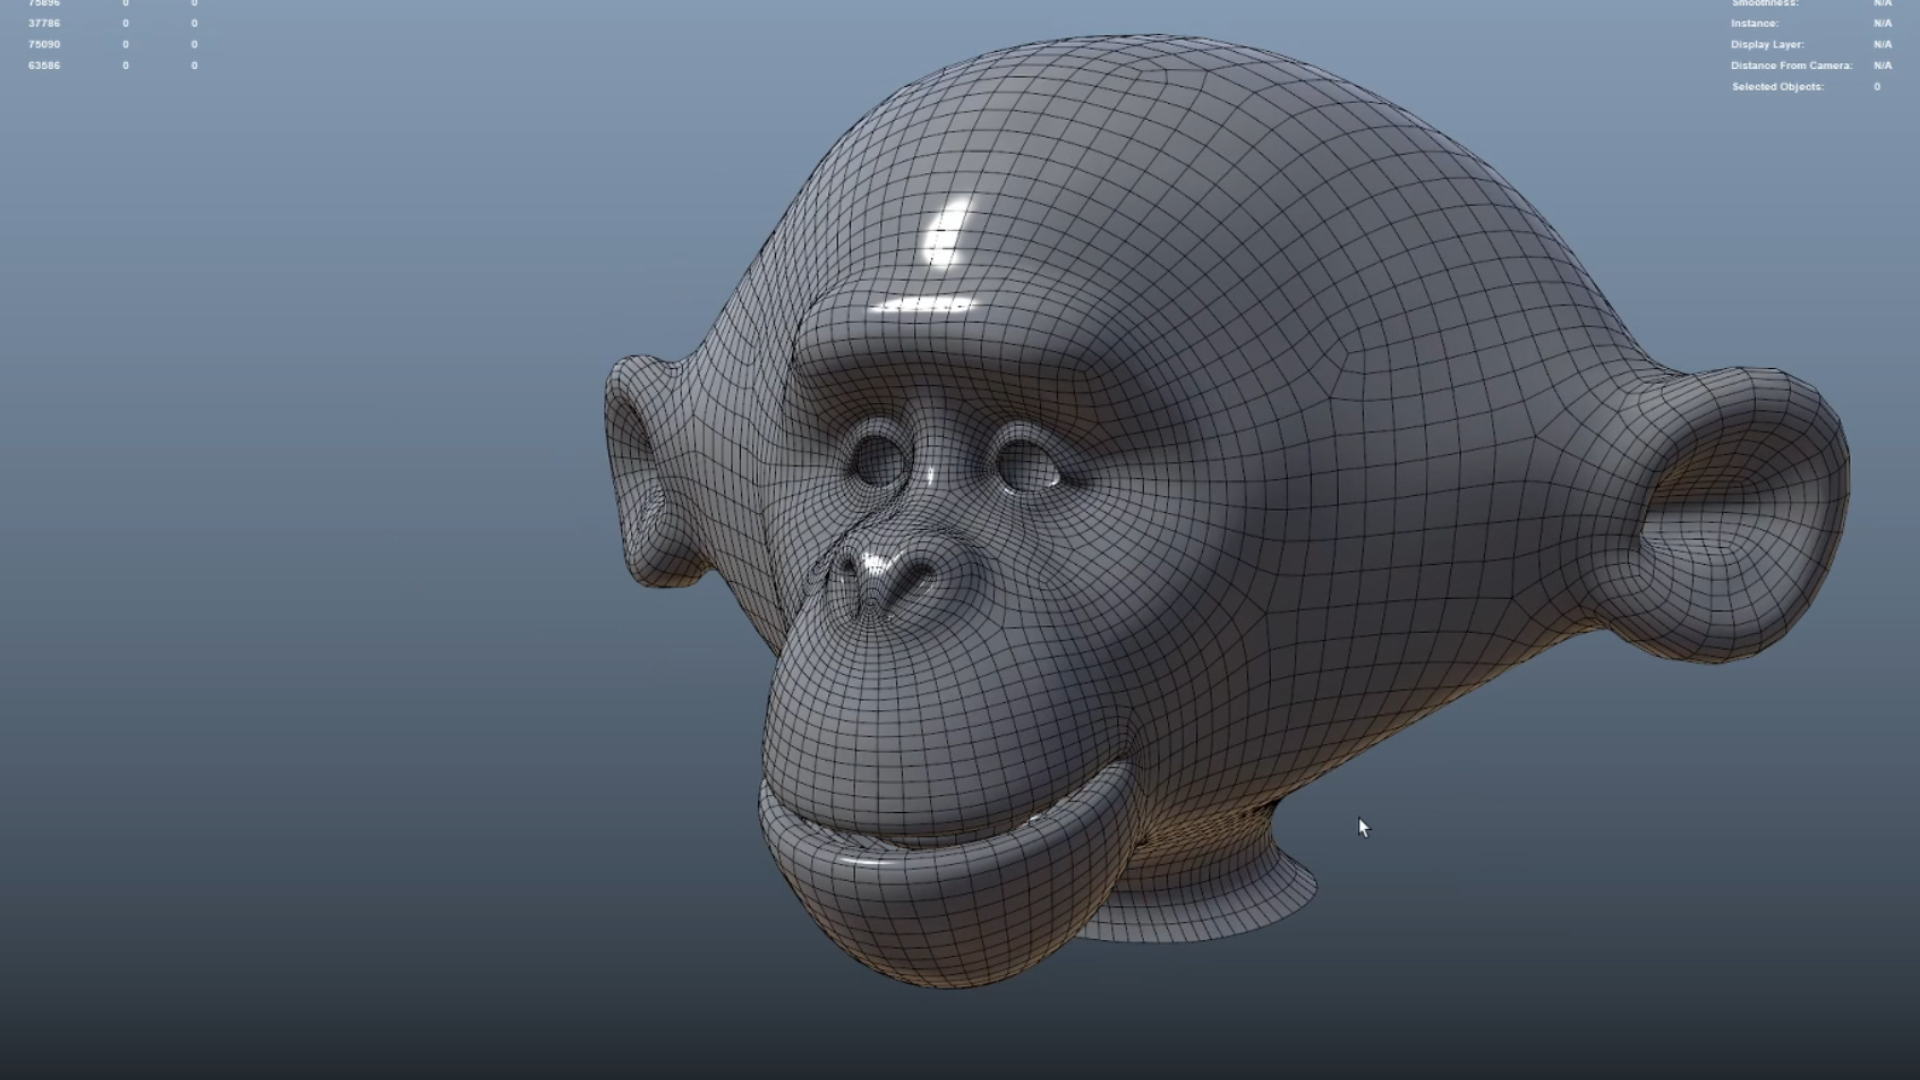
Retopologising the Sculpt
With your digital maquette approved (although never consider ‘final’ final until the project is complete), you can now work on the topology.
When considering topology, always think about deformation. For example, if the asset is static (like a statue) and it does not bend its limbs, torso or head, then you don’t need to spend that much time to make it work. If that is the case, then it will be important that you can generate a high-quality displacement map for your topology model and the forms stick. You’ll also need to consider UVs for texturing. But other than that, you should be good to go.

On the other hand, if your asset is to walk, run, jump, emote, then that is a whole different kettle of fish. For such a performance, you’ll need to make sure you’ve played close attention to where the wrinkle lines need to go, where areas bulge and compress. Is your character old and wrinkly? If so – you need to consider the flow lines around the eyes and the mouth. The topology should work with the skin flow and muscle flow, and you’ll need to work back and forth with the rigging team to ensure your topology is deformation friendly. If as a modeller, you can test things out yourself, then great, do so as you model. Bend the arm to see if the characters elbow maintains volume. Go from a default neutral face to a smile and see if your edge loops around the mouth and eyes support the performance. Or does your topology create artefacts and faceting on the model when push and pulled?
For this model, we’ll want to follow the stitch pattern of the toy and ensure we have topology and supporting edges to hold the form.
For the boots, we’ll want to work the topology around the details of the sole, and if we can, we’ll want to separate the sole from the main portion of the boot.
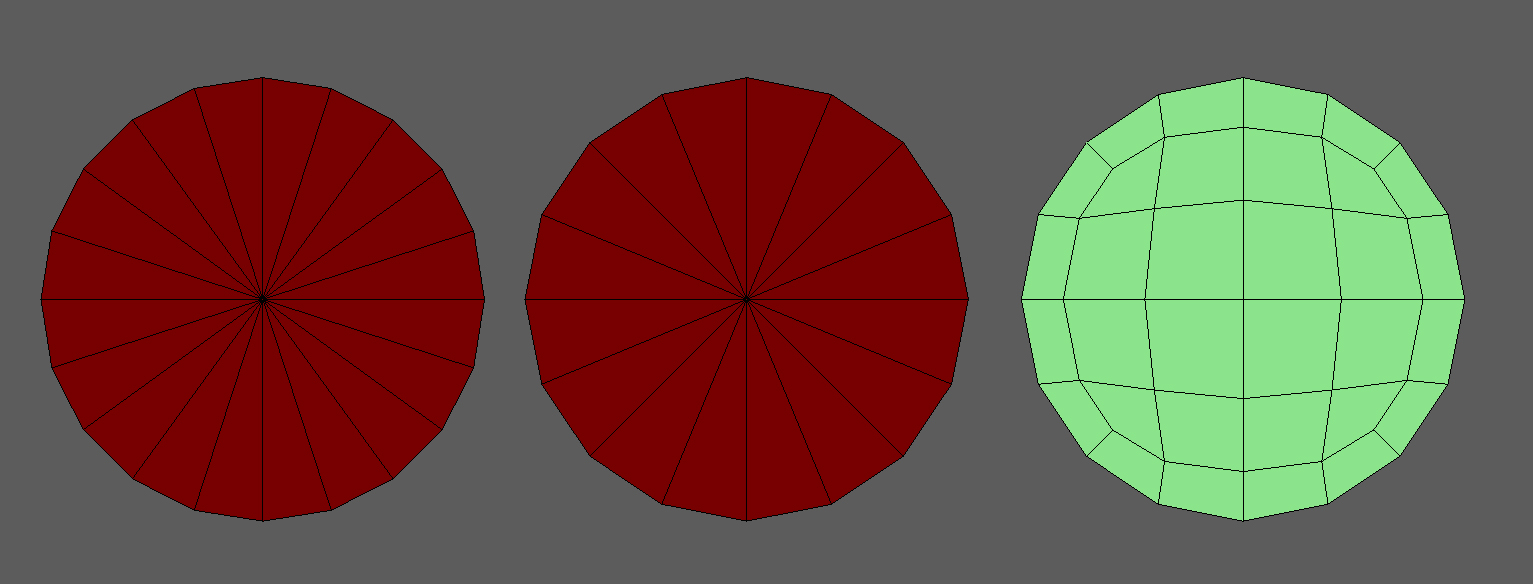
The helmet will be created using hard-surface modelling techniques and throughout the process of creating the full model, we’ll want to ensure an even spread of topology, and to maintain each face is square-shaped, as opposed to rectangular.

More importantly, model the asset as if it existed in the real-world and keep the elements seperate where it makes sense. And double check that your objects are not penetrating each other and parts of the mesh are not floating above other meshes. Try to get things as watertight as possible.
For more info on modelling best practices, check out this doc here:
When you’ve completed your first pass of topology, I’d recommend exporting the model back into Zbrush and transferring the high-res details from the sculpt over to the retopologised model. Subdivide the model as need be as you re-project the details and check that the topology supports the flow of the broad and mid-level details. For the very fine level detail, such as fabric grain or skin pores, I would not worry about the topology flowing with each and every grain/pore. Such detail will be rendered using a normal or bump map, so don’t let the finer details hold you back.

If all looks good with your topology, once you’ve projected all the details from your original sculpt to your new retopologised base model, I’d now use that base model as your LOD0 (lowest resolution model). The reason to use this model is because when you reproject details in Zbrush, the original vertices of the model will be push and pulled to better line up with the sculpt. And when generating a displacement map, it is from this base LOD0 to the highest subdivided LOD, that a displacement map will be generated from.
For more information on model LODs, check out this doc here:
UVing your Model
At this stage, UVing your asset is a good idea as it will allow you to test the model in texturing applications such as Painter and Mari but also check the displacement map renders in your application/renderer of choice.
Before creating your UVs, speak to your supervisor about how the asset will be framed on the projects. Close-ups? Wide shots? Extreme close ups? And at what resolution will the project be presented in? 4K? HD?

All of these will impact the number of UDIMs you will require for your model. A good approach to texturing, and just like model LODs, is to create a series of UV texture sets. For example, you could create a single UDIM set (LOD0), which could be used for rigging, groom and crowd related tasks. You could then create a UV set for when your model is rendered at full screen height, and for this, maybe you have 2 UDIMs (LOD1). And then for close ups, you have a UV set that consists of 10 UDIMs (LOD5), and for extreme close ups, 26+ UDIMS (LOD0).
Here is an example for a digi-double.

As long as your textures can be used on all the UV sets by transferring texture maps or rescaling from a higher LOD to a lower LOD, then you should be good to go.
We’ll be releasing a doc on UV best practices soon, covering topics such as organising your UVs, orientation, consistency in UV shell scale, etc. so look out for that soon.

Once you’ve created your UVs, it is a good idea to drop them back into your Zbrush file and then export out a displacement map for your model.
Model Hierarchy and Naming
Part of the task of the modeller is to also set the model hierarchy and naming of the asset. When it comes to this, I’d recommend working closely with the rigging and surfacing team to ensure your asset naming and hierarchy works for other departments. Rigging for example may want a certain hierarchy as this will support how they rig the character, and some studios use material tagging as part of the naming convention, so the surfacing team may get involved.
We’ll be putting up a doc on model hierarchies in the coming weeks but to get an idea of our CAVE model naming conventions, check out this doc:
Submitting your Model for Review
With your model good to go, your UVs and UV sets looking great, and with your fancy displacement map, it’s a good time to render out a model turntable for review.
We’d recommend presenting the greyscale model turntable lit using a 3-point lighting setup in a neutral environment, followed be a contact sheet that has the same model turntable alongside the photographic reference images or concept art. When rendering out your asset, you should always use the same locked off camera and lighting setup. Comparing model iterations when the lighting and background/camera constantly changes is very irritating.
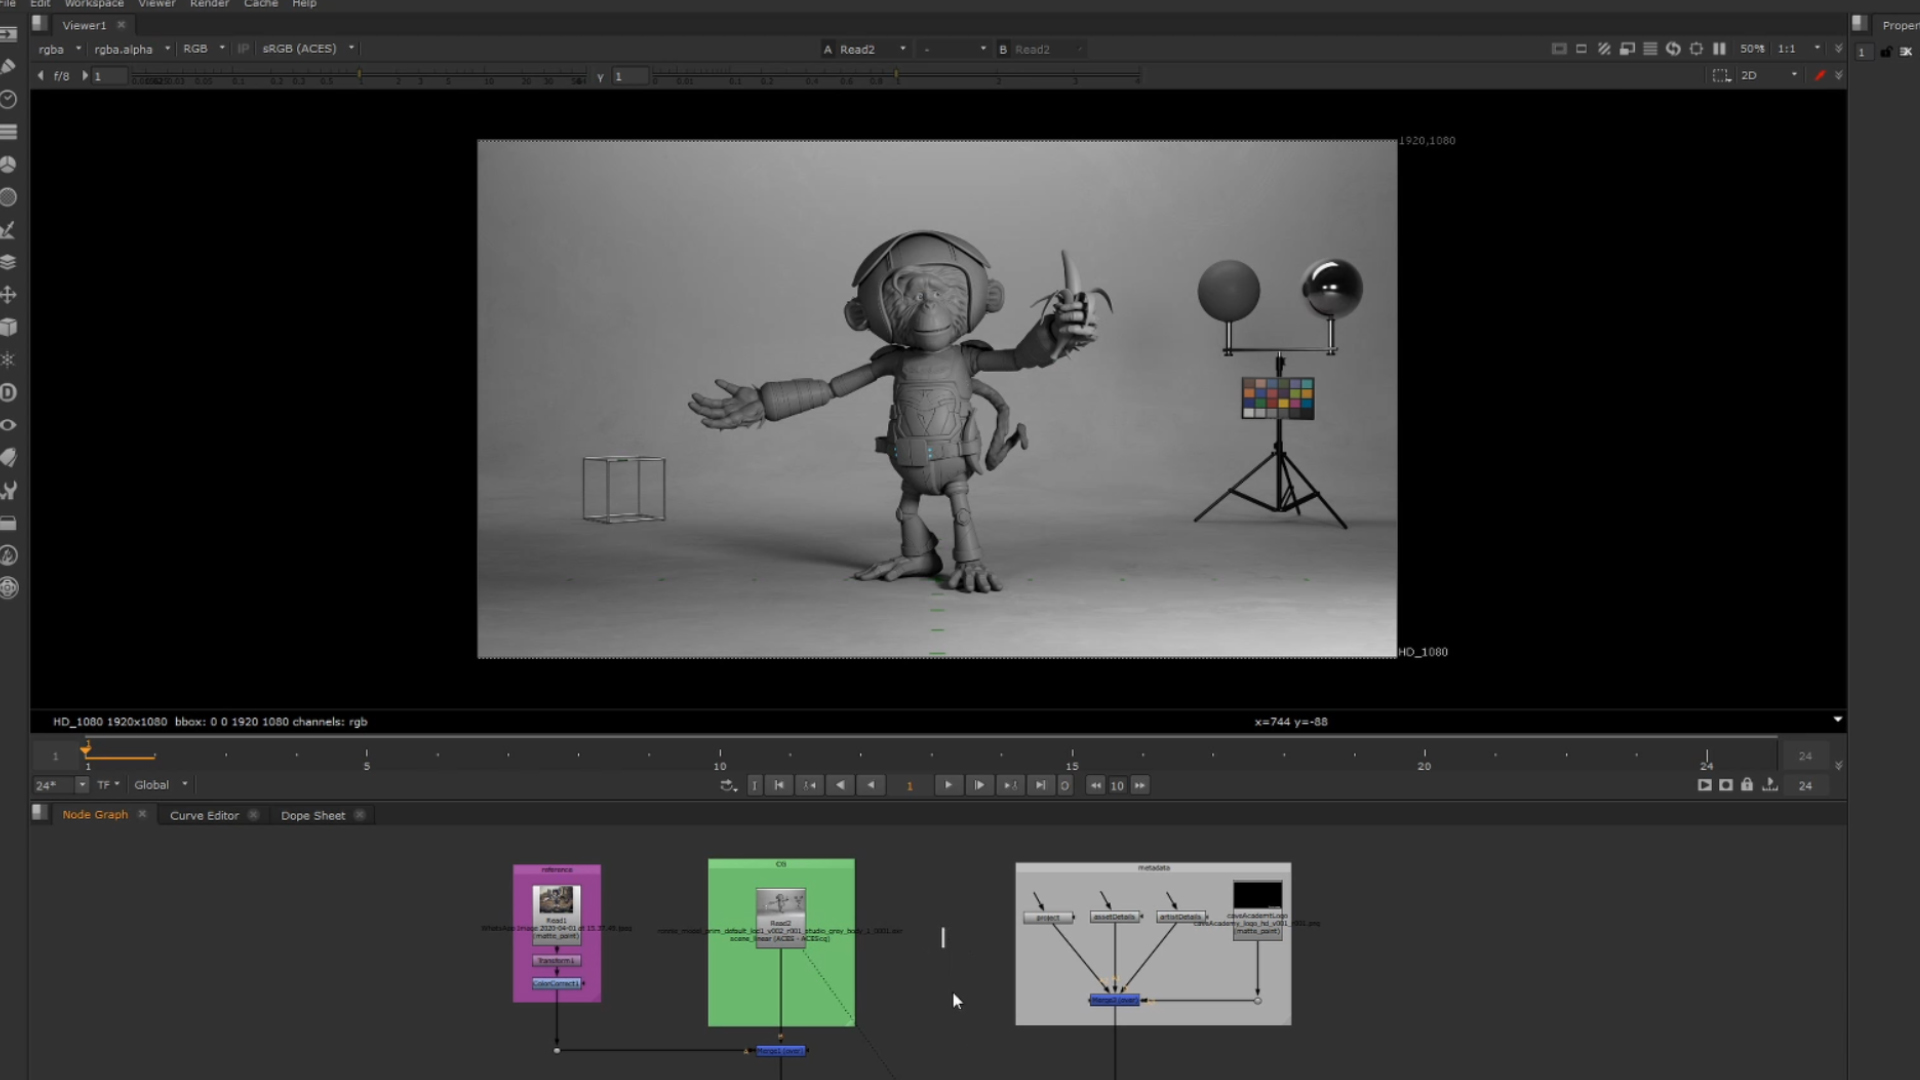
The first turn of the asset should be shaded and with the displacement map. You can then follow up with a wireframe overlay on the asset.
You can also add some additional metadata to the image, so it is clear who created the model, when they created the model and what version of the model has been submitted. This will allow your supervisor to A/B between the different versions.
Alongside the model viewables, you should also submit the 3d file for your supervisor to assess and review. The render may look great but it is super important that they check the topology and any other issues that may have been missed. For example, any dodgy Ngons? Any holes in the mesh? Intersecting geo? Faces on top of faces?

It’s no good just to have a supe look at a turntable and go “yup – approved!”. The VFX supe has a right to do that as they are generally looking at things from a visual perspective, but your model/asset supe should also be giving your work a technical review, which involves properly scrutinising your model.
Conclusion
If you’ve got to this stage, I’m guessing your supe is happy with your work and it has all been approved. Rigging have picked things up and started testing. Surfacing have started making the asset look fancy. All is good. But…just be prepared for kickbacks and further tweaks to be made. Maybe rigging are getting some strange deformation around the hips, or maybe surfacing need more UDIMs as the model does not hold up for extreme close ups.
Being part of a project that involves multiple departments is a team sport, so enjoy the collaboration and be prepared to have the ball passed back to you if need be.
Introduction to Character Modelling Course
If you are looking for a more detailed step-by-step breakdown, you can check out our course on modelling characters by Jan Jinda here:
Support CAVE Academy
Here at CAVE Academy the beauty of giving and sharing is very close to our hearts. With that spirit, we gladly provide Masterclasses, Dailies, the Wiki, and many high-quality assets free of charge. To enable the team to create and release more free content, you can support us here: Support CAVE Academy