
Search the wiki
Setting your Mid-Grey Value
Introduction
Just a quick note that although this document is hosted under ‘Surfacing’ (Texturing, Look Development and Groom), it is very much relevant to Grading, Lighting and Compositing too (any department that deals with colour really).
This particular lesson is a snippet from the following course:
The mid-grey value allows us to set a standard in which we can go about neutralising our images, and just as importantly, it allows us to take a series of Macbeth charts, all shot with different cameras and under different lighting conditions, and align them. This in turn will allow us to more consistently grade and expose shots, textures, and shaders.
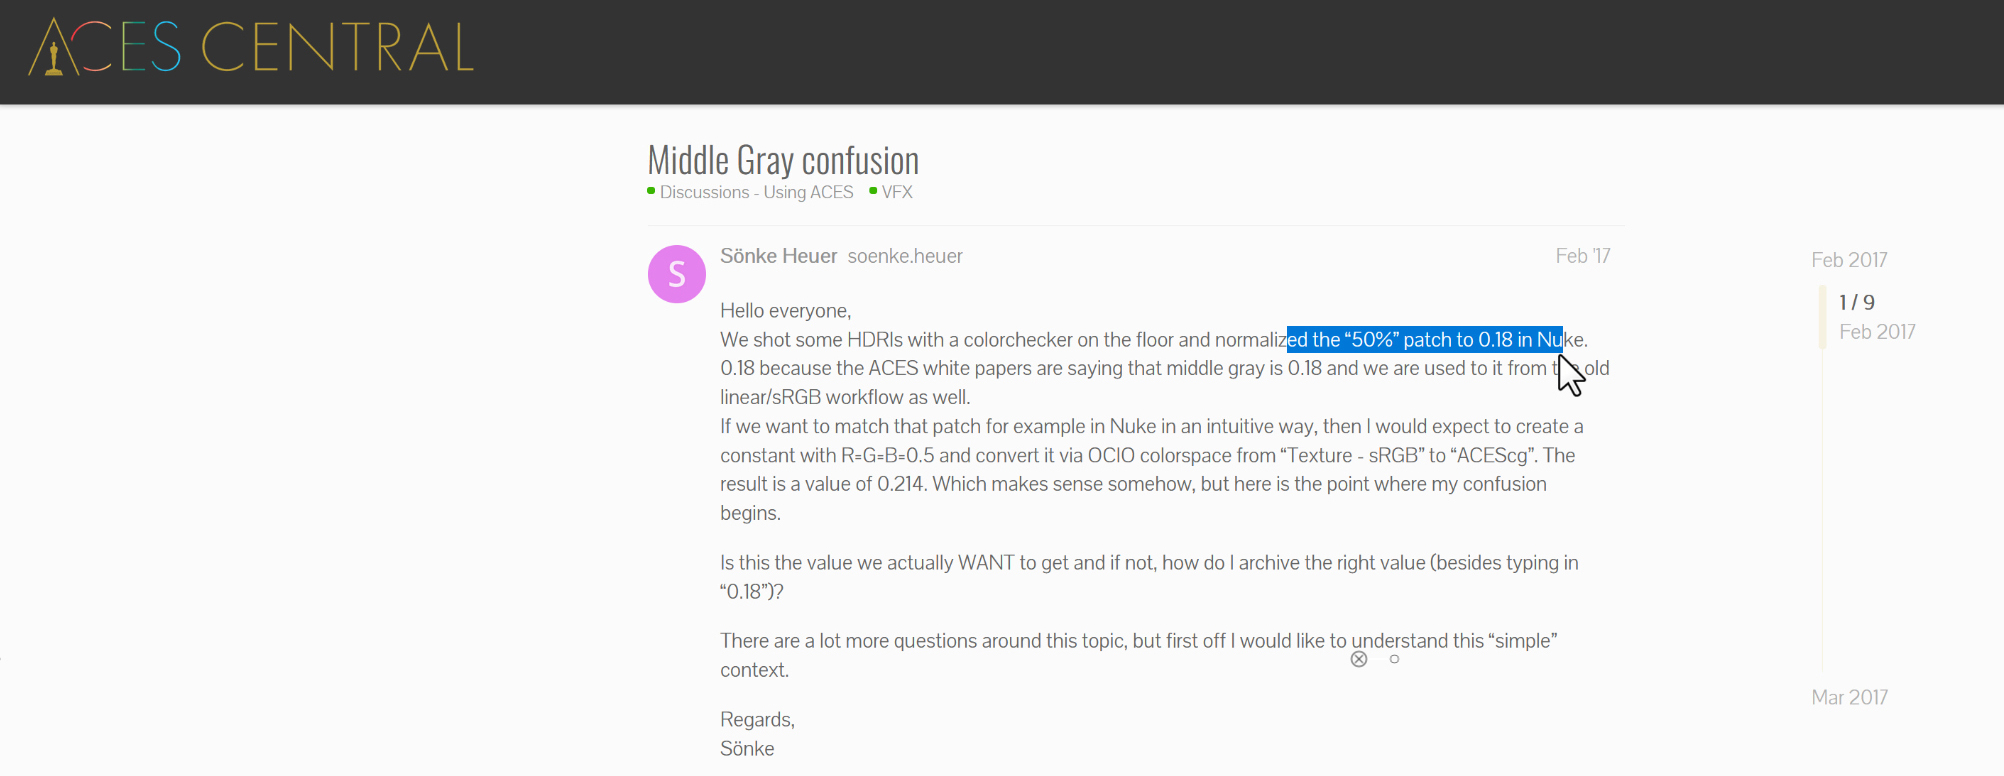
Before we begin, I highly recommend you read through the following conversation:
If you want to test this yourself, you’ll need the following data:
- X-Rite Colorchecker Classic 2005 GretagMacbeth v2.0
- ColourChecker Charts (I’ll be using the ACEScg_Labels_ColorChecker2014.exr)
The above data has been provided by the wonderful team at Colour Science, so a huge thanks to them. If you can, I highly encourage you to support them, so they can provide us with even more fancy tools and training. There is a reason why so many colour-related headaches have been reduced over the years, and they, along with ACES Central, have been instrumental in pushing for consistency and standardisation.
…and you’ll also need a HDRI, of which I am using the following:
..but again, you can use any HDRI, or even stick with the Sun and Sky setup.
If you are looking for a more detailed step-by-step breakdown on all things onset related, you can check out our courses on the topic here:
- Onset Data Acquisition 1001
- Introduction to Cameras and Lenses 1001
- Shooting HDRIs and Panoramas 1001
- Shooting Texture and Look Development Reference 1001
Setting up your Applications
Before we begin, you’ll need to ensure your applications (Maya, Nuke, etc.) are all working within an ACEScg colour space. For guidance on setting this up, please take a look at this document (or check out the intro portion of the main video on this page):
Defining the Mid-Grey Value
The first thing we need to do is set a mid-Grey value as our ‘standard’ on which we can ensure consistency across the board. In your studio, you might be sticking with 0.18 or 0.21. For us at CAVE, we are going with 0.19, and here is why…
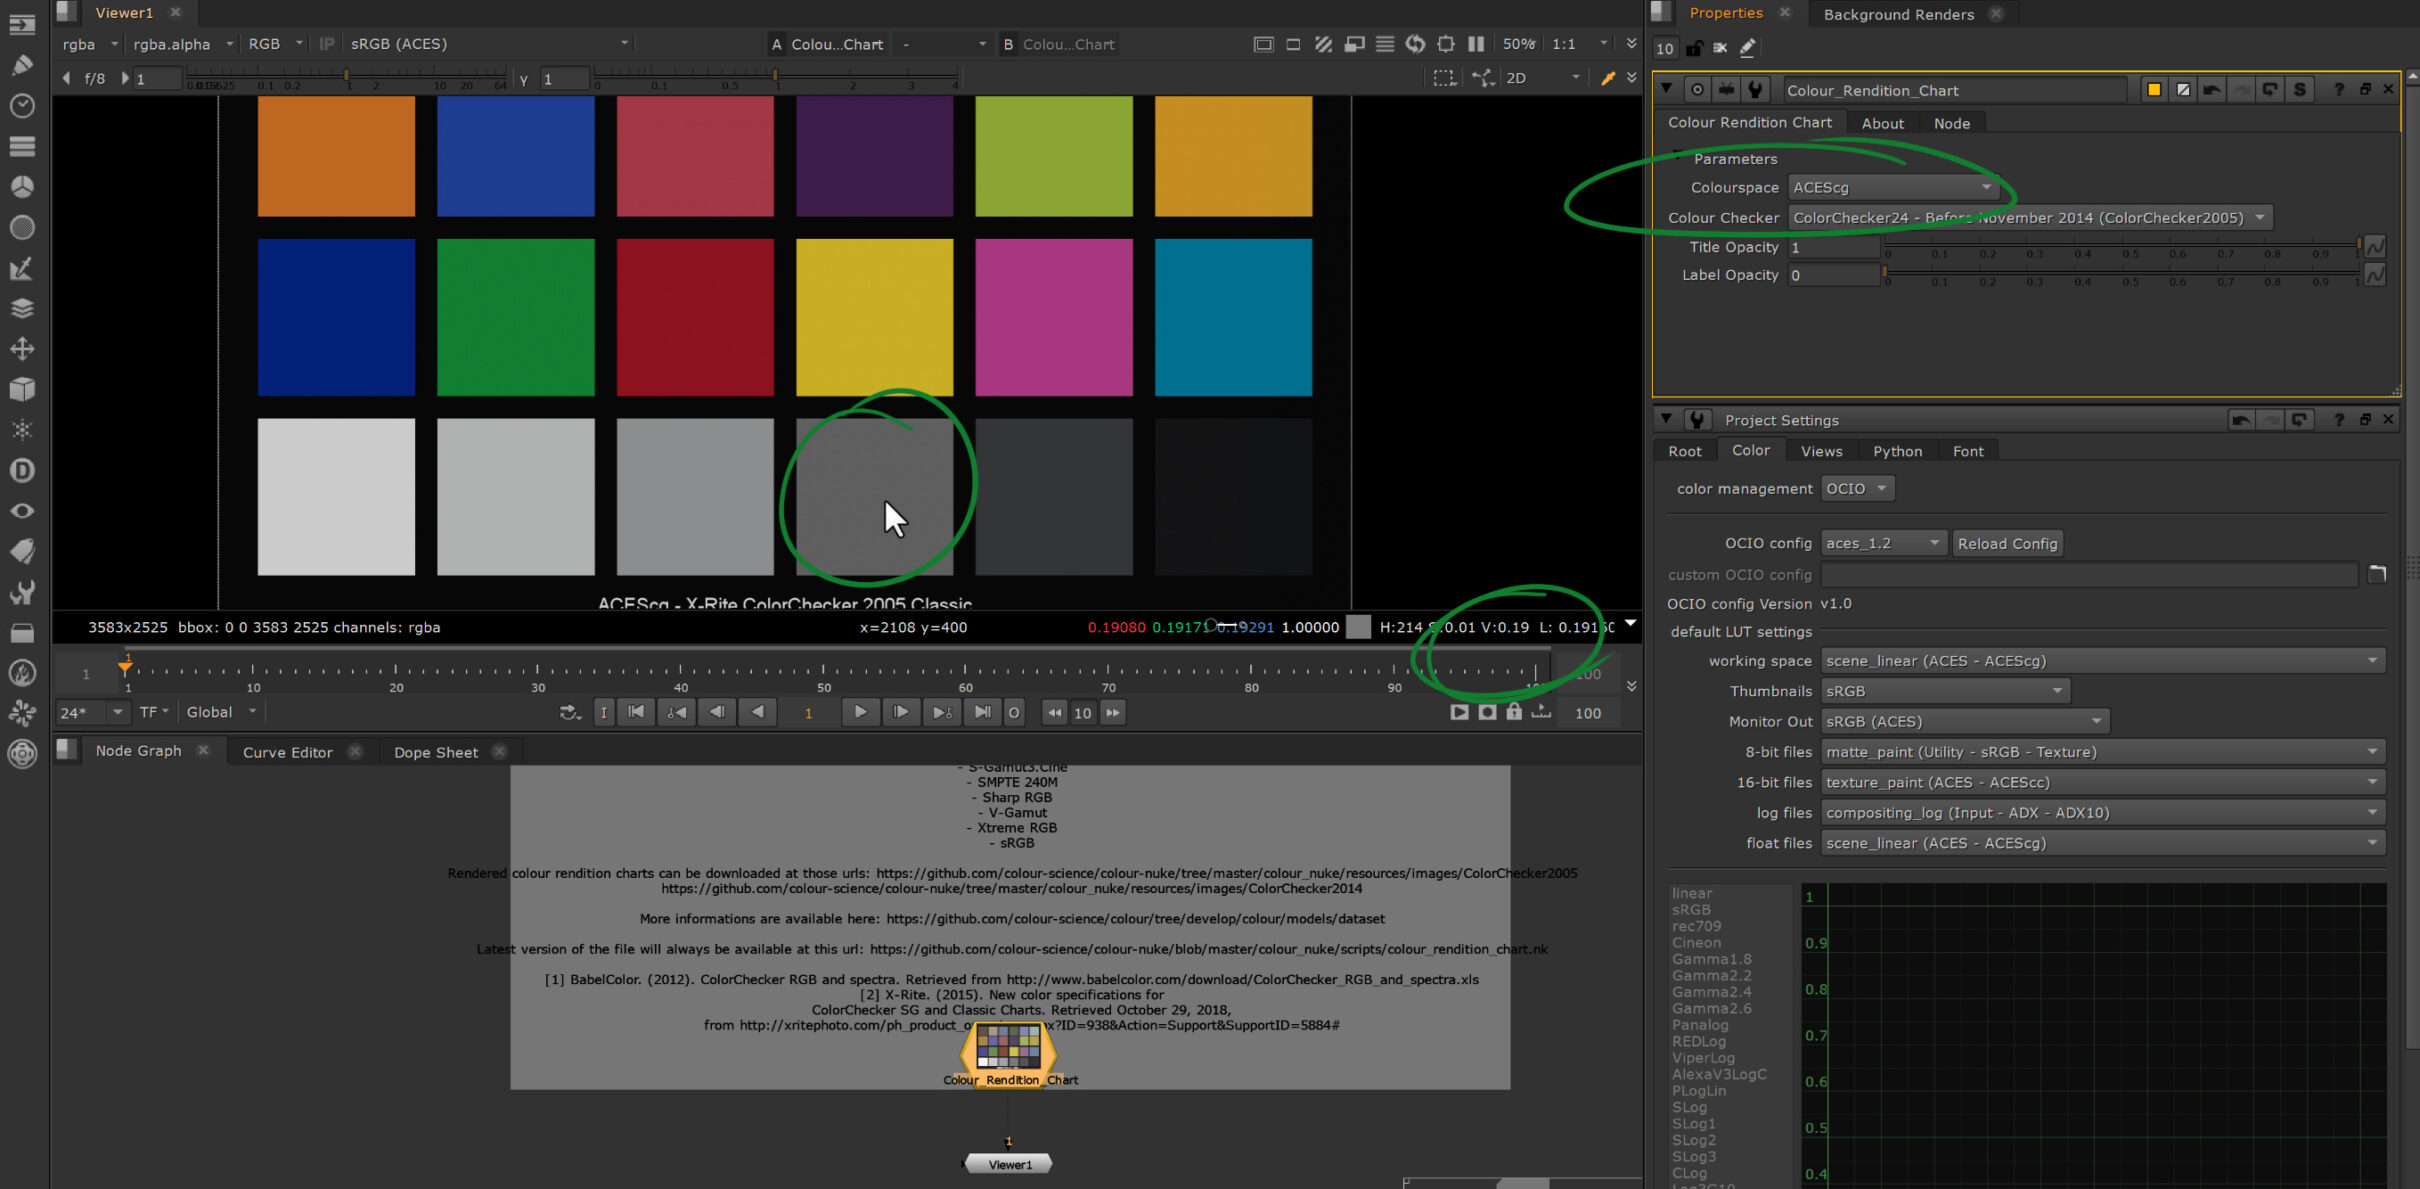
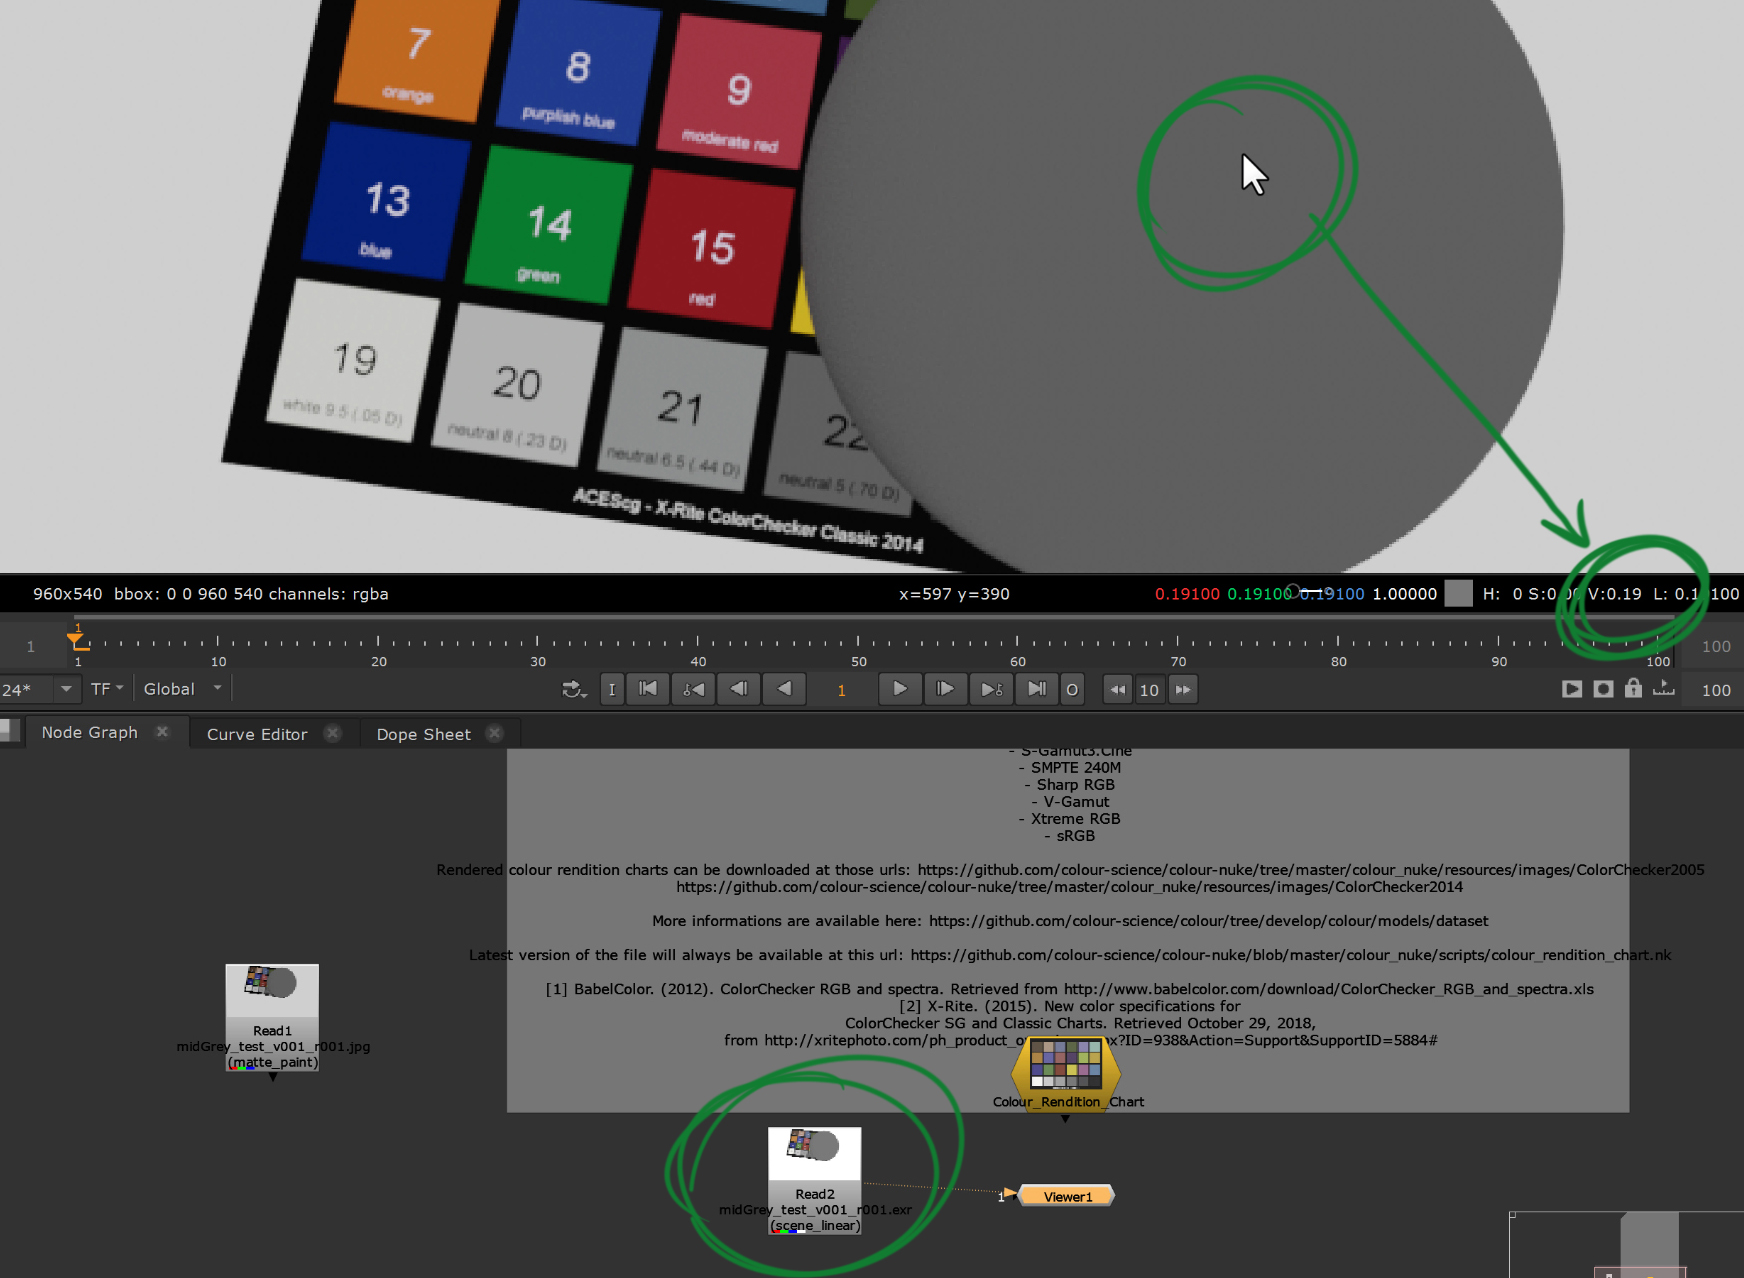
If we load the X-Rite Colorchecker Classic 2005 GretagMacbeth v2.0 script in Nuke, we can pick from a selection of Macbeth charts that have been calibrated. And when hovering over the mid-Grey swatch (swatch 22), we can see that the result is a value of 0.19. It is also important to note that the mid-grey value is the result of both diffuse and specular reflection. The sum total.
Therefore, in your shader, your baseColour value may indeed be slightly lower (say 0.18) and then once you add your specular reflection into the mix, you get a sum total value of 0.19.
What you should NEVER do is hold up a Macbeth chart in your current environment against the image you see on the screen.
Why? Because, on most occasions, the Macbeth chart will have been shot under a specific lighting setup (the image you are seeing on the screen), and you will be existing in a different lighting setup (whevever you are in the real-world at that specific moment in time). So they will never match.
On the odd occasion, it could be that you are lit in the exact same lighting environment as the image of the Macbeth chart (especially as we head into more immersive experiences and shoot conditions) but until then, DON’T DO IT!
Lighting is key to everything. Please remember that.

Testing the Mid-Grey Value in Maya on the Colour Chart
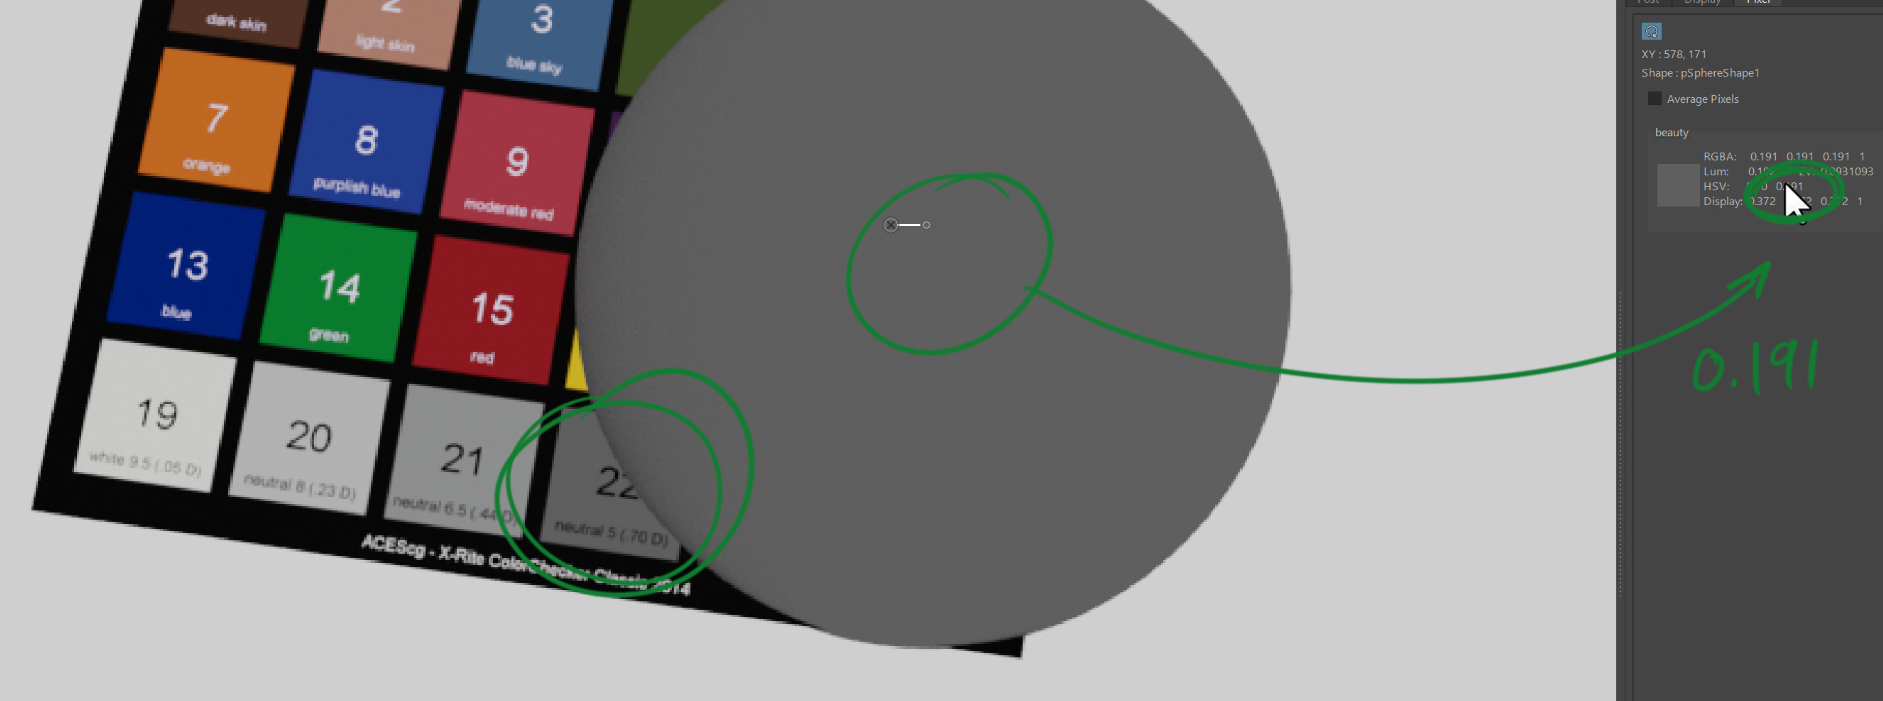
Now that we’ve defined our Mid-Grey and we have a ‘standard’ we can always refer to. Let’s test this in Maya (and you can use any application you like that supports an ACEScg colour space). Start by creating a simple polygon plane and apply s Surface Shader (essentially a ‘constant’ shader where lighting does not affect the results). The apply the following exr into the colour input of the shader: ACEScg_Labels_ColorChecker2014.exr

If you render this out, you should see something like so. You won’t need any lights as this is again, just flat colour. If you review the values of swatch 22, you will see that you get a value of 0.191. Whoop! Whoop! But again, it is impotant to remember that this value is really the sum total of diffuse and spec.

Creating a Neutral Grey Ball Shader
With the Macbeth chart up and running (and we’ll switch the shader so it responds to light later on), let’s get a Grey ball created. Do this by creating a sphere. Easy 😉
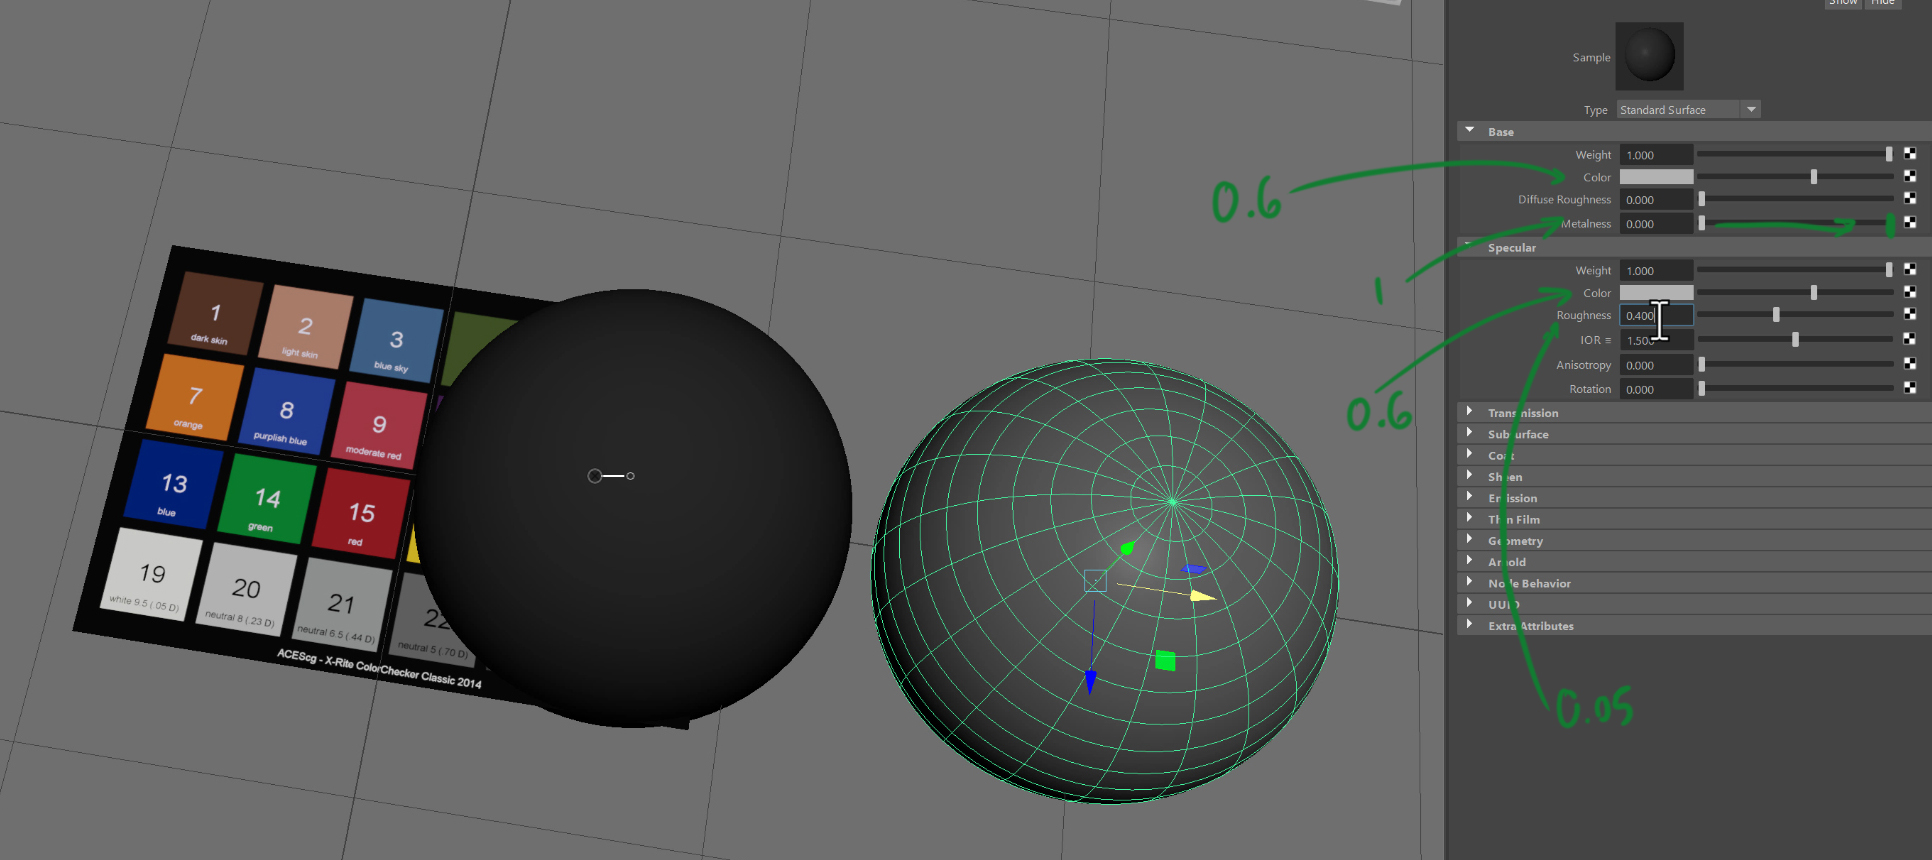
Apply a Standard Surface material and call this material grey_MAT. Then set the following values:
- Base Color (HSV): 0, 0 , 0.18 (make sure to do this in Rendering Space)
- Base Metalness: 0
- Specular Weight: 0 (we will turn this on later)

Next, create an Arnold SkyDome (Arnold > Lights > Skydome Light), which will be a 360 white dome of light, and hit render. You should see something like so, and again, when reviewing the values, all should be 0.18.
So all good and as expected. Now, please do remember that the mid-grey value of 0.19 should be the result of both diffuse and specular reflection.
Currently our Grey ball has no specularity, which is not how things would be in the real-world. So tweak the following parameters on the shader:
- Specular Weight: 1
- Specular Color: 0.35 (or something similar)
- Specular Roughness: 0.4 – 0.6 (I start with 0.45 but you’ll need to tweak this to match your real-world ball)
You will want the above values to match your physical real-world grey ball. If you do not have one (maybe you are working on a full CG project), then the above values should do the trick. Or else, look at some real-world paint reflection values.
With the addition of the specular component, you should now have a combined (diffuse and spec) value of 0.19 in render.
If you export the renders (as EXR and JPG – just for the fun of it), and load them into Nuke, comparing the values, all should remain consistent.
One final note (and apologies if I’ve already repeated this), if you are matching a real-world physical ball, then unless you’ve used a fancy paint (links at the bottom of this page), then you may find that your real-world grey is not quite grey-grey but leans more towards the warm-grey or cool-grey side of things. Soooooo….you may want to tweak your shader to match your real-world ball. The best thing to do is actually measure the reflectance of your grey ball and then create a digital shader to match that. This is something we’ll document later on.
Here is a great description of the above from Munsell:
Not all greys are neutral! A “neutral” gray is not simply a black-white mix, but an equal mixture of all the spectrum (r-o-y-g-b-i-v) colors. A spectrophotometric measurement of such a grey will show it to contain approximately equal amounts of those spectrum colors. Non-neutral grays, however, have unequal amounts of the spectrum colors, causing a cold or warm color shift under differing lighting conditions.
Creating a Neutral Chrome Ball Shader
For the Chrome ball, create another sphere, and apply a new Standard Surface material and this time, call this material chrome_MAT. Then set the following values:
- Base Color (HSV): 0, 0 , 0.7 (make sure to do this in Rendering Space)
- Base Metalness: 1
- Specular Weight: 1
- Specular Color (HSV): 0, 0 , 0.7 (make sure to do this in Rendering Space)
- Specular Roughness: 0.06
To find out more about chromium and its characteristics, check out this page:
Doing a quick render, we get something like so. The mid-Grey value may change slightly. That is all good and expected as we’ve added some specularity to the shader.

Creating a Mid-Grey Colour Chart Shader
For the Colour Chart, I’ll be using the geometry available here:
You could do a similar thing using a simple plane. However, I like something a bit more in line with the real-world asset.
So… as we’ve found, the image of the colour chart is of both diffuse and spec (repeat, repeat: the sum total). Therefore, if we plug this image directly into our Base Colour input for the shader, it will be 0.191, which is brighter than it should be. Mix a bit of spec on top, and you’ll get values of 0.2+. Instead, what we’ll be doing is taking the colour chart into Nuke and using an exposure node to drop the brightness down slightly, so the mid-grey value equals 0.18 (as similar to the grey ball, this will be our Base Colour).

Apply a Standard Surface material and call this material colourChart_MAT. Then set the following values:
- Base Color (HSV): Plug in our new colour chart image
- Base Metalness: 0
- Specular Weight: 1
- Specular Color: 0.35 (or something similar)
- Specular Roughness: 0.4 – 0.6 (alternatively, plug in a texture into this input to break up the roughness)


Grey/Chrome Response to Lighting
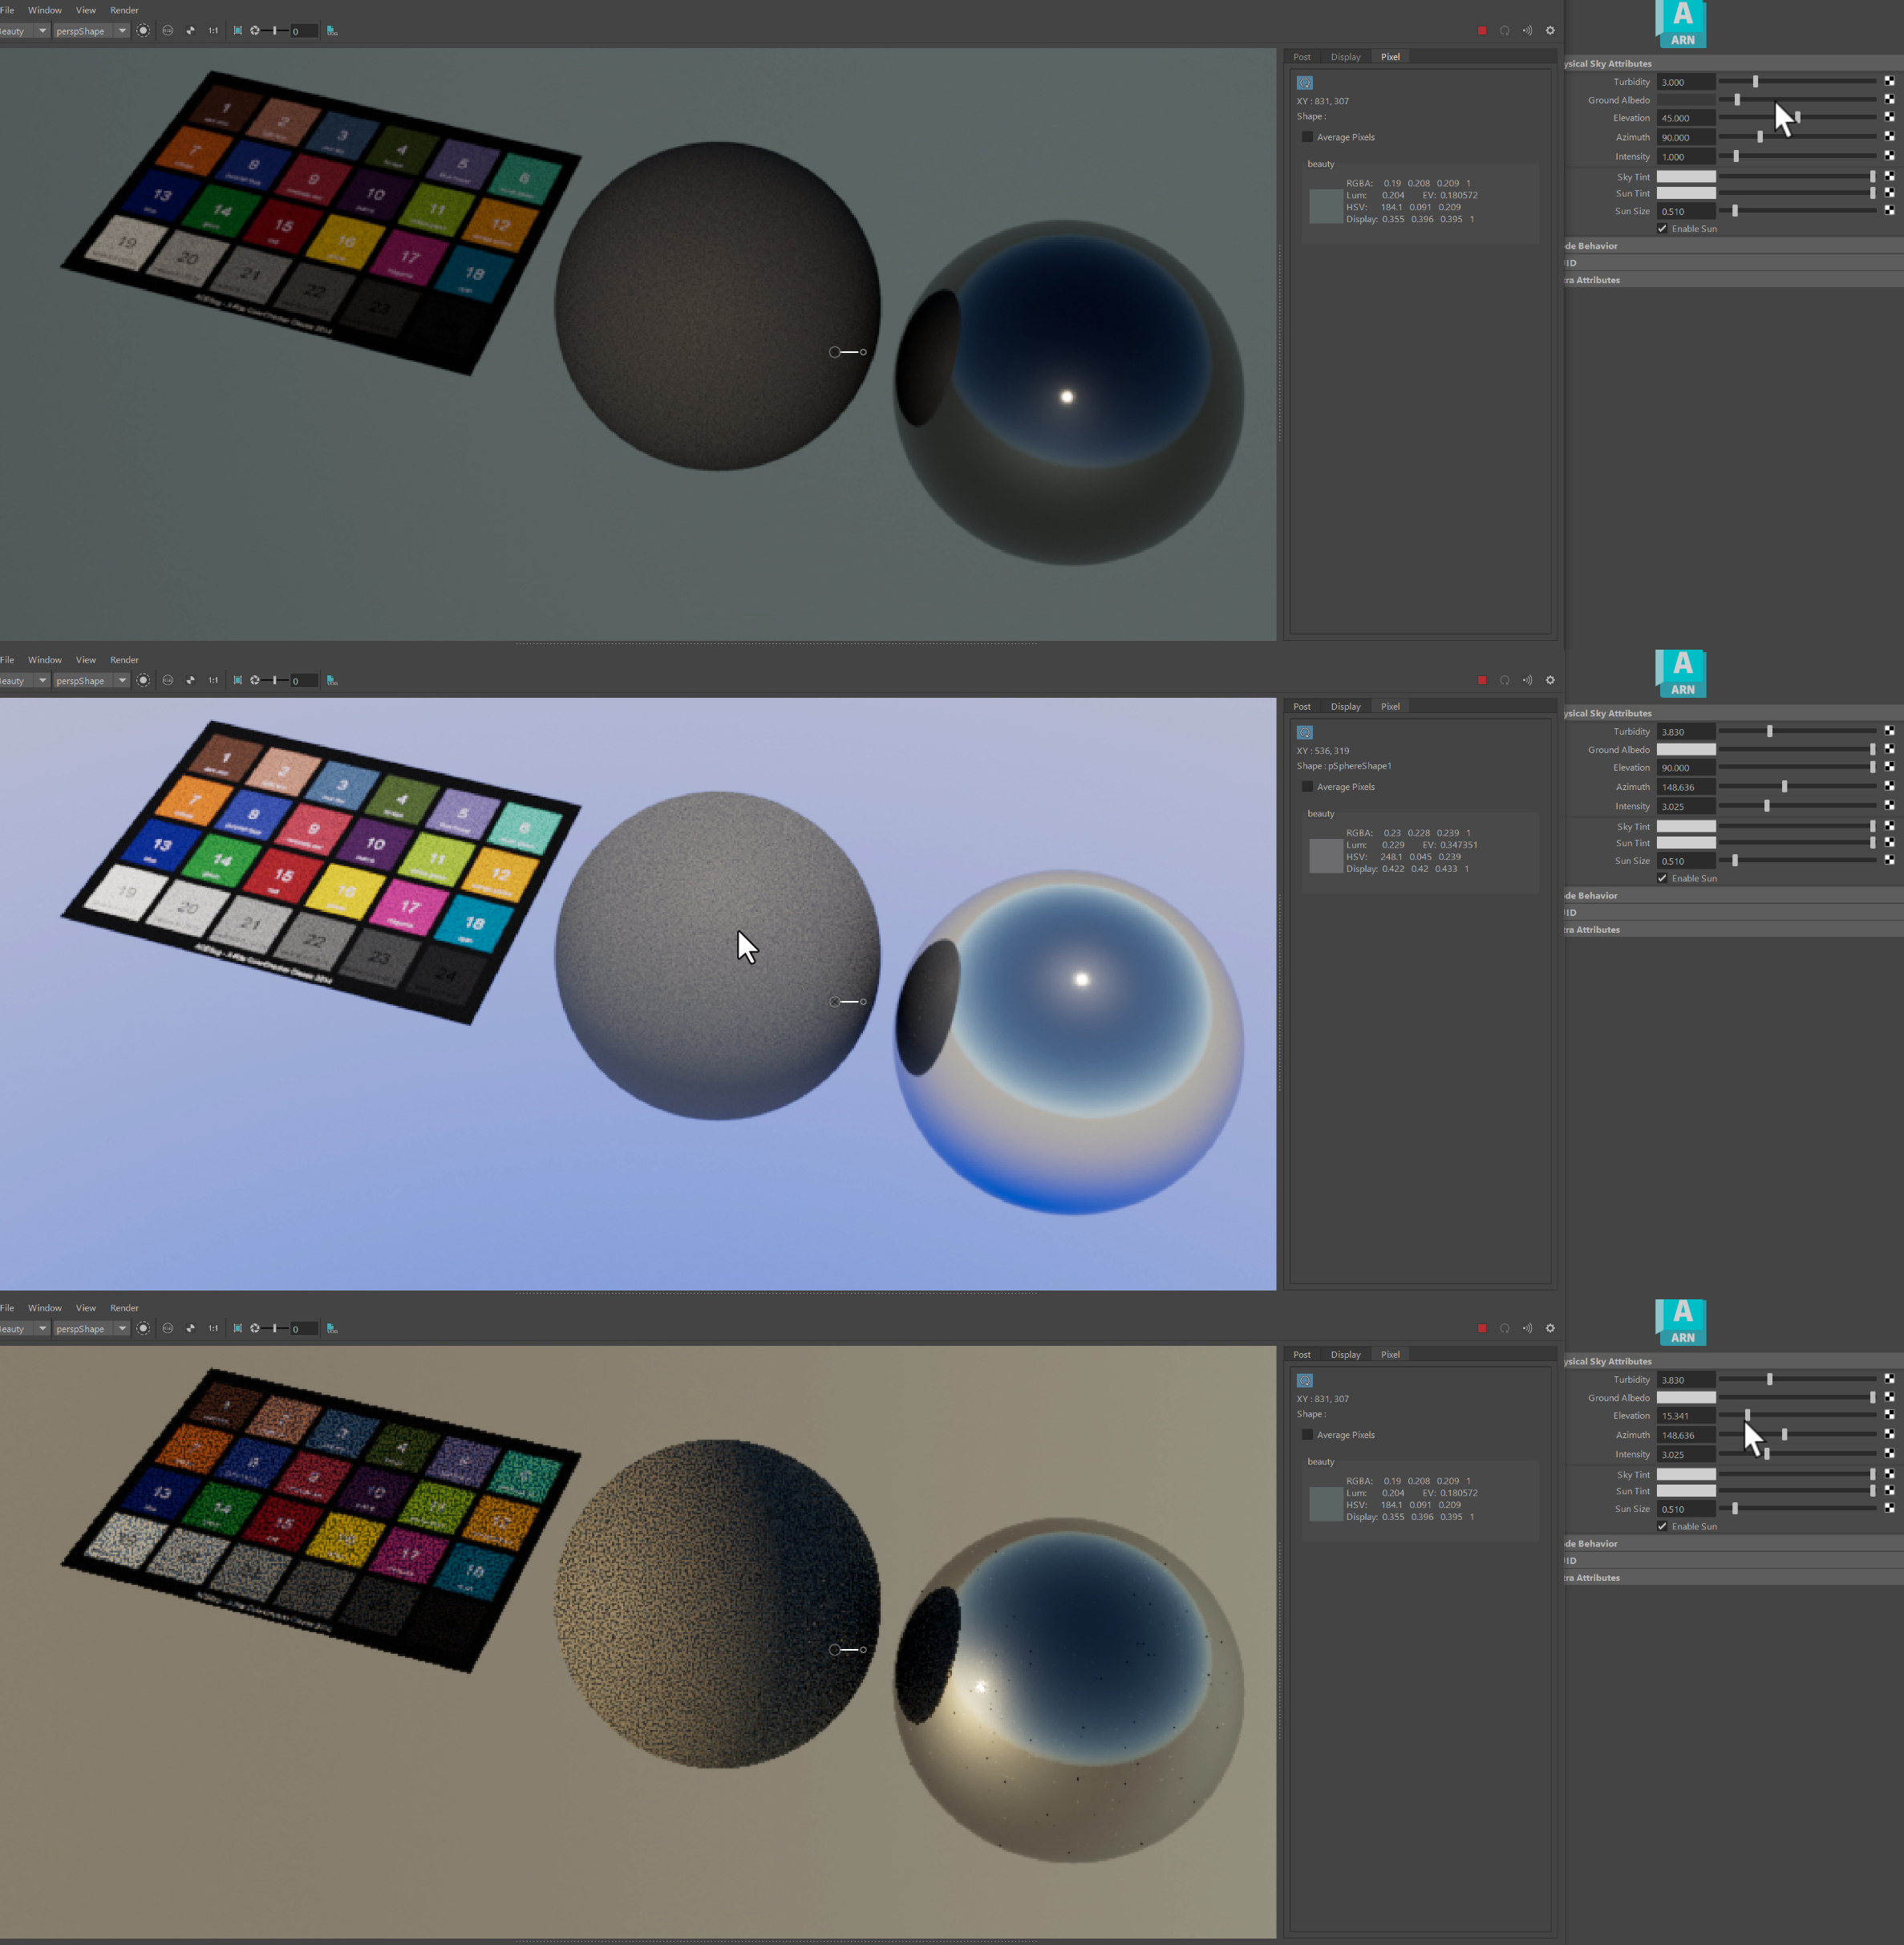
Currently, things look a little flat. And that makes sense as we’ve surrounded the spheres with constant white light. We are in The Construct! Sorry, Matrix reference. I hope you got that.
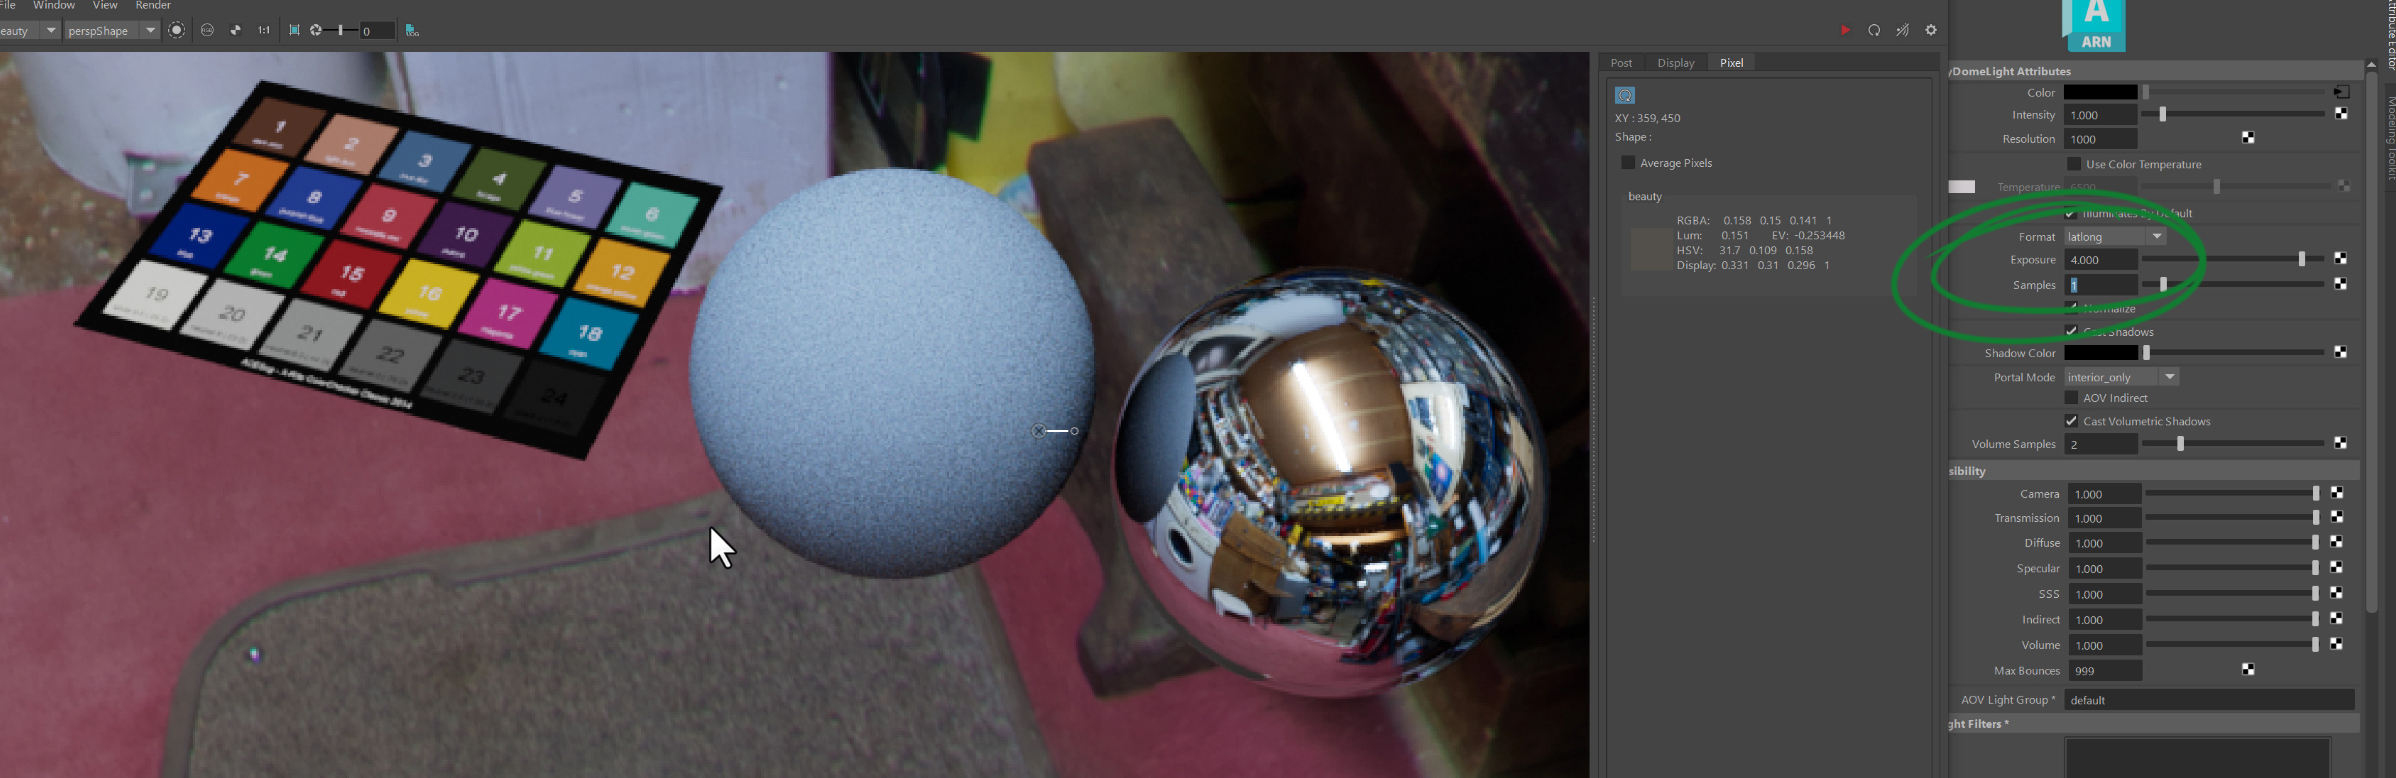
And that is how the spheres should look in such an environment. Now add a HDRI to the Skydome and check out the results. Again, I am using the following (but you can use any HDRI):
You can see from the result that the spheres are very dark but the Macbeth is constant (due to the constant shader that is still applied to it). We’ll fix the Macbeth shader but DO NOT change the sphere shaders. We have set them to be correctly calibrated.

What you need to change is the lighting. Our shaders for the spheres should stay consistent. And now we can see our balls! Great. But now you might say:
“The ball has gone ‘blue-ish’, and the Macbeth is looking correct. Aggghhhh!!!”
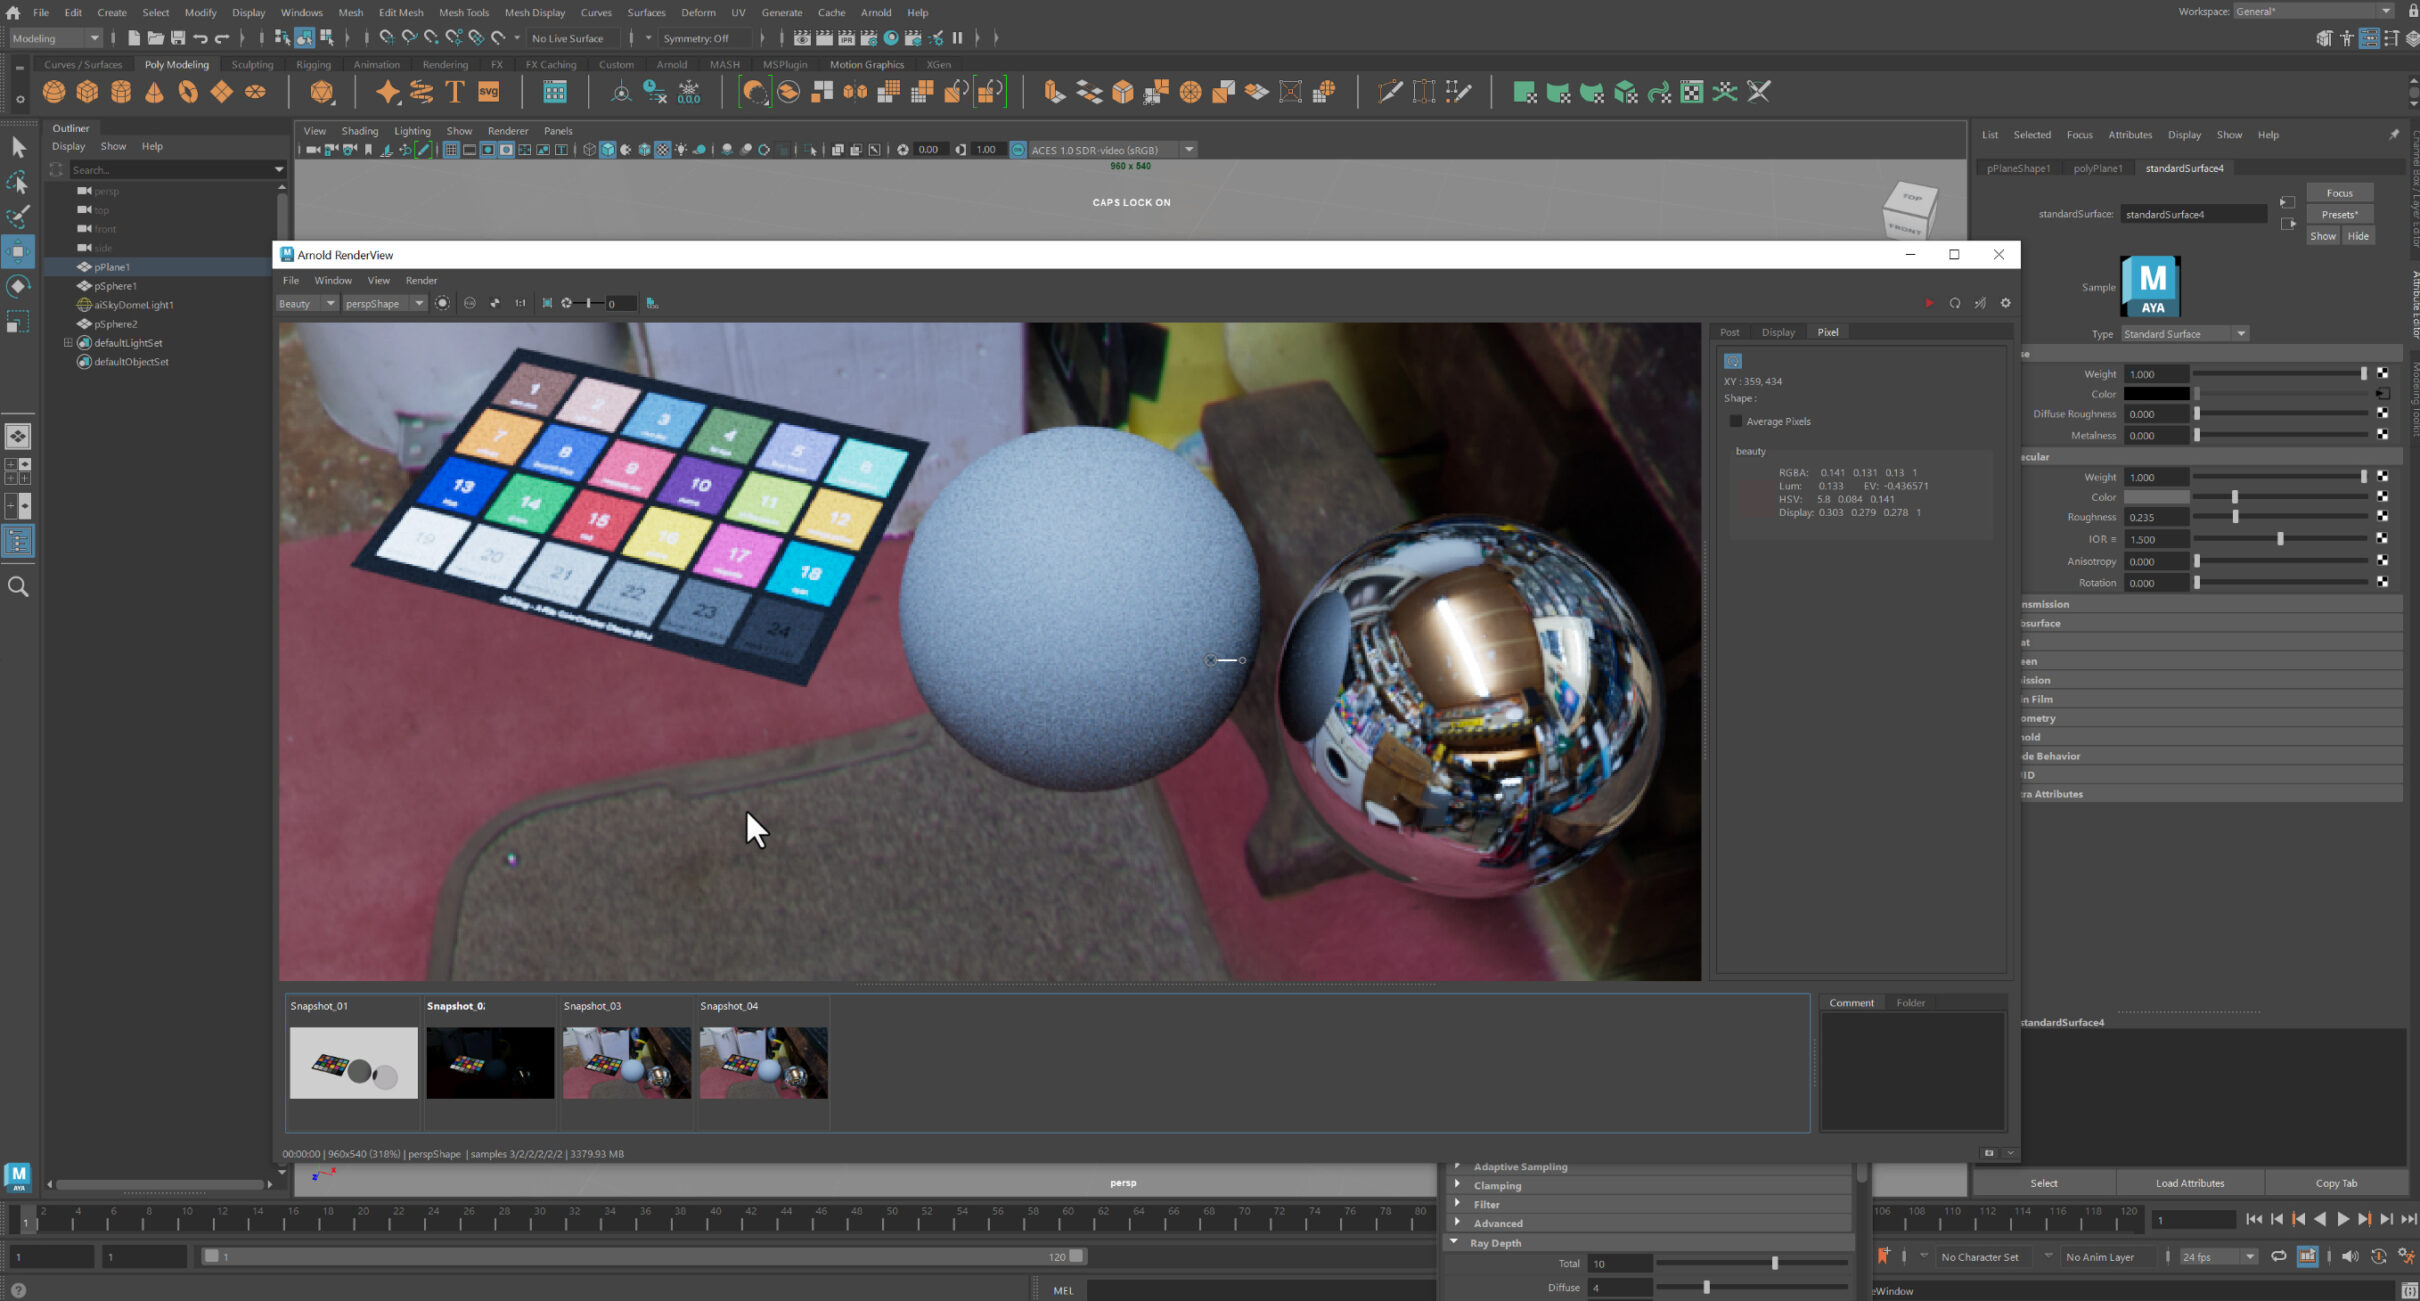
Don’t worry – this is as expected. The grey ball looks ‘blue-ish’ becuase the light has blue in it. It is still grey. The Macbeth chart looks as it does because the current shader does not respond to light (in this example, it is not currently the shader as created above). So apply a Standard Surface to the Macbeth chart geo, plug in the texture, and waa-laa, you should have something like so:
And now you might start crying and go:
“Aggghhhh!!!! Now it all looks blue-ish”
But fear not. That is how it should look. Because now the Macbeth chart and the balls are responding to light. You shine a coloured light on something, you get a different result. That is the magic of the universe! Don’t believe me? Then watch the film, In the Valley of Elah with Tommy Lee Jones and Charlize Theron, and tell me what colour the car is (drop your answer into the comments).

Experiment with changing the HDRI or play with the Sun and Sky setup to see how the reference objects respond to light.
What is the Deal with Photoshop
So if you take your image into Photoshop, you’ll find that the result for mid-Grey will result in a value of around 95-ish. Not around the 122, 122, 122 mark (for RGB).

This is because in Maya and Nuke, we are using the ACES 1.0 SDR-video (sRGB) View Transform. But if you flip this to Un-tone-mapped (sRGB), you should be good to go.

…and this should bring you more in-line with what you expect. Nice 😉

Conclusion
So in a nutshell, at CAVE Academy, we’ll be setting the mid-Grey value across the board on all shaders/applications in ACEScg colour space to equal 0.19 (sum total of diffuse and spec).

Real-World Paint
If you are looking for a paint closer to the mid-grey on the Macbeth chart, you could use the Munsell NG Neutral Grey Paint:
- https://www.graphictec.co.uk/product_p/n5-g.htm
- https://www.vfx-store.com/product-page/grey-paint
- https://www.kodak.com/en/motion/page/gray-cards
Training
For more information on all things onset related and look development, you can check out our courses here:
- Creating Digital Studio Look Development Environments
- Onset Data Acquisition 1001
- Introduction to Cameras and Lenses 1001
- Shooting HDRIs and Panoramas 1001
- Shooting Texture and Look Development Reference 1001
The Connection Programme
If you are a fan of mixing science with art, or maths with creative thinking, then join our Connection Programme, where we’ll be exploring VFX, animation and games from the core fundamentals:
Links
- Colour Science – Colour is an open-source Python package providing a comprehensive number of algorithms and datasets for colour science.
- ACES Central – The ACES Online Community.
- CG Cinematography, Albedo and Pointer’s Gamut – Great info on colour, albedo colours and more.
Support CAVE Academy
Here at CAVE Academy the beauty of giving and sharing is very close to our hearts. With that spirit, we gladly provide Masterclasses, Dailies, the Wiki, and many high-quality assets free of charge. To enable the team to create and release more free content, you can support us here: Support CAVE Academy
Do you know where is best to buy VFX chrome and grey ball kits in the UK.
Hi Rachel, I’d go with VFX Store (https://www.vfx-store.com/). You could also try this bunch but I’ve not seen or used their balls: https://www.vfxball.com