
Search the wiki
07. Animate an action move: the tornado kick
Resources
The following zip file contains all the Maya scene files and some reference videos.
Introduction
This tutorial will be the last in this series on animation, and it will be our first experience of doing an action move: the tornado kick. This 540 degree move practised in Tae Kwon Do and other martial arts sees the body at its finest. It is, without doubt, a very challenging piece to animate, but it brings together the work that we have already done to a pretty impressive crescendo. There’s so much here: timing, spacing, anticipation, weight, path of action, arcs – you name it. The poses are very dynamic and there are opposing tilts between hips and shoulders as well as twists in the spine. We will be using the principles of the bouncing ball which we saw in the first tutorial, and our timing for this piece can be established by using the ball as the hips of this character. However, the obvious addition of limbs, not to mention the spin, will give us plenty to get our teeth into.
As ever, firstly a moment or two that must be devoted to reference. There is an abundance of excellent reference online and when you find some examples that you like, analyse them over and over. It’s a very complex move and you’ll need to focus carefully on weight-shift, the spacing of the feet as they move through the air, and the natural arcs and flow. Listen to martial arts trainers online talking about the move: how weight shifts and which parts of the body lead and which follow. I guess you’ll always be against the clock when animating, but it’s always worthwhile doing the prep as once you’ve started the animation process, having to go back on yourself is even more time-consuming, not to mention dispiriting. Make use of the tools such as Kinovea (www.kinovea.org) to make your life easier.
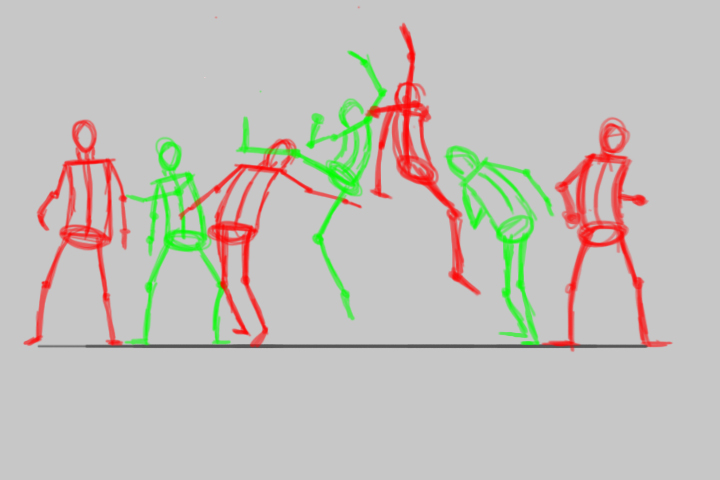
In previous tutorials I’ve encouraged you to actually try the moves you’re intending to animate. However, in this case it may not be so wise if procreation interests you in any way. In place of this, I’ve provided some 2D reference that can be taken into Maya. It’s a series of loose drawings using a stick man which can mainly be used to figure out your timing. When it comes to the poses, these can be pushed further to make the whole piece more dynamic and watchable. In the drawings, the Key poses are in red and the Breakdown poses are in green. The images also each have a frame number to help you work out where to put the initial poses, although this rough timing can and will change.

Because there’s so much going on in this piece, it becomes imperative that we decide before starting which kinematic mode the limbs will be in. It’s pretty simple with regard to the arms: the hands do not make contact with anything, they only follow the motion of the rest of the body, so forward kinematics will enable us to utilise the naturally occurring arcs.
Your decision about the legs is harder, however. Your first and last poses have the feet in contact with the floor, which would suggest IK. While the fact that the legs often follow the hips suggests FK. If we opt for IK, we’ll have to add the natural arcs are provided by the FK mode, and manually move the controls to allow the legs to follow the rotation of the hips. Whereas if we use FK, we’ll be obliged to counter-animate the legs, as any changes to the hips will result in sometimes undesirable changes to the legs.
A third option would be to use FK/IK blending, but if there are no features in the rig which allow us to match the positions and orientations of one mode to another, this could lead to popping. Of course you could wing it and do it by eye, but I’m so OCD about avoiding any popping that I’d advise against this.
My decision was to go IK as my major priority was to get the feet touching the floor without having to counter-animate. The price of this decision was having to force the arcs and getting the legs to follow the hips, even if it meant sometimes animating the legs frame by frame. You have to weigh up your own personal pros and cons, but I think opting for IK legs results in less arduous reworking.
So let’s get the admin out the way so we can start animating: I’ll be working in PAL (25fps) and as we will be animating using the pose to pose method to begin with, I will set my Default out tangents to Stepped.
Step 01: Bringing in the reference
Open up ‘01_start.ma’ to find the Box Boy in his default pose. Let’s start by bringing in our reference so we can work alongside it in Maya. Go to Panels>Orthographic>New>Front to create a new camera. Call it ‘referenceCam’ and in that active viewport, go View>Image Plane>Import Image and select ‘frame_01.jpg’ from the ‘referenceImages’ folder that accompanies this tutorial Under Image Plane Attributes, edit the Display to ‘looking through camera’ and also check Attached to Camera. Now translate the reference camera away from the main scene and also have the view as a floating window by going Panels>Tear Off.
Step 02: The Key poses
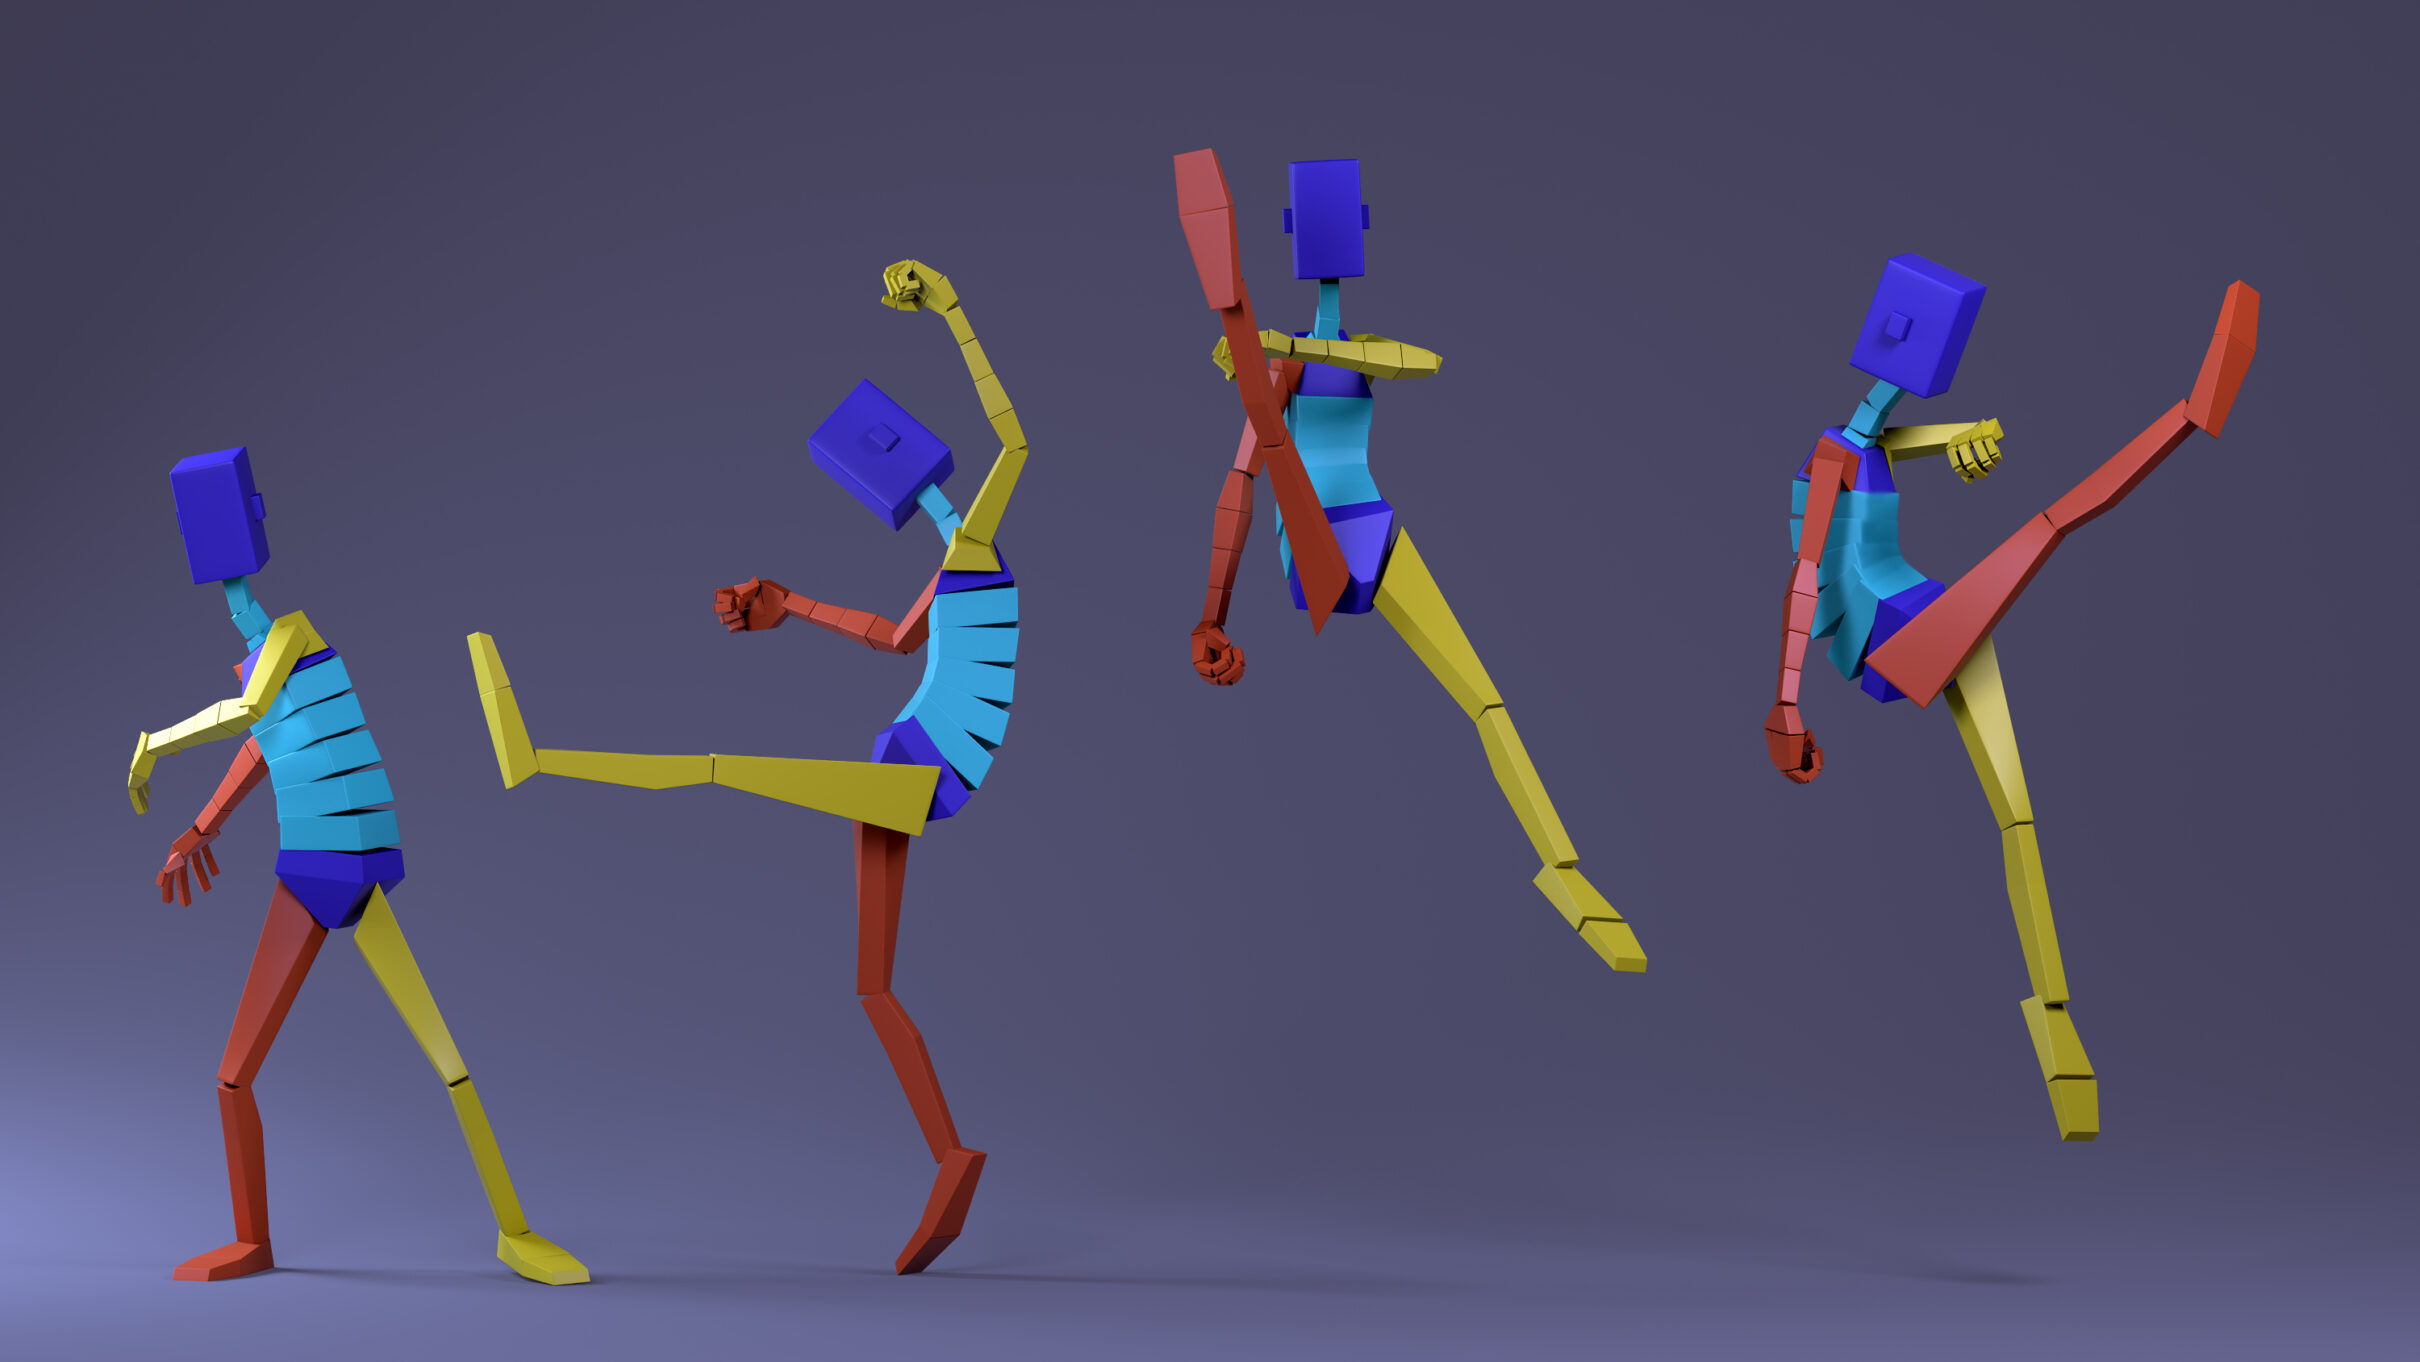
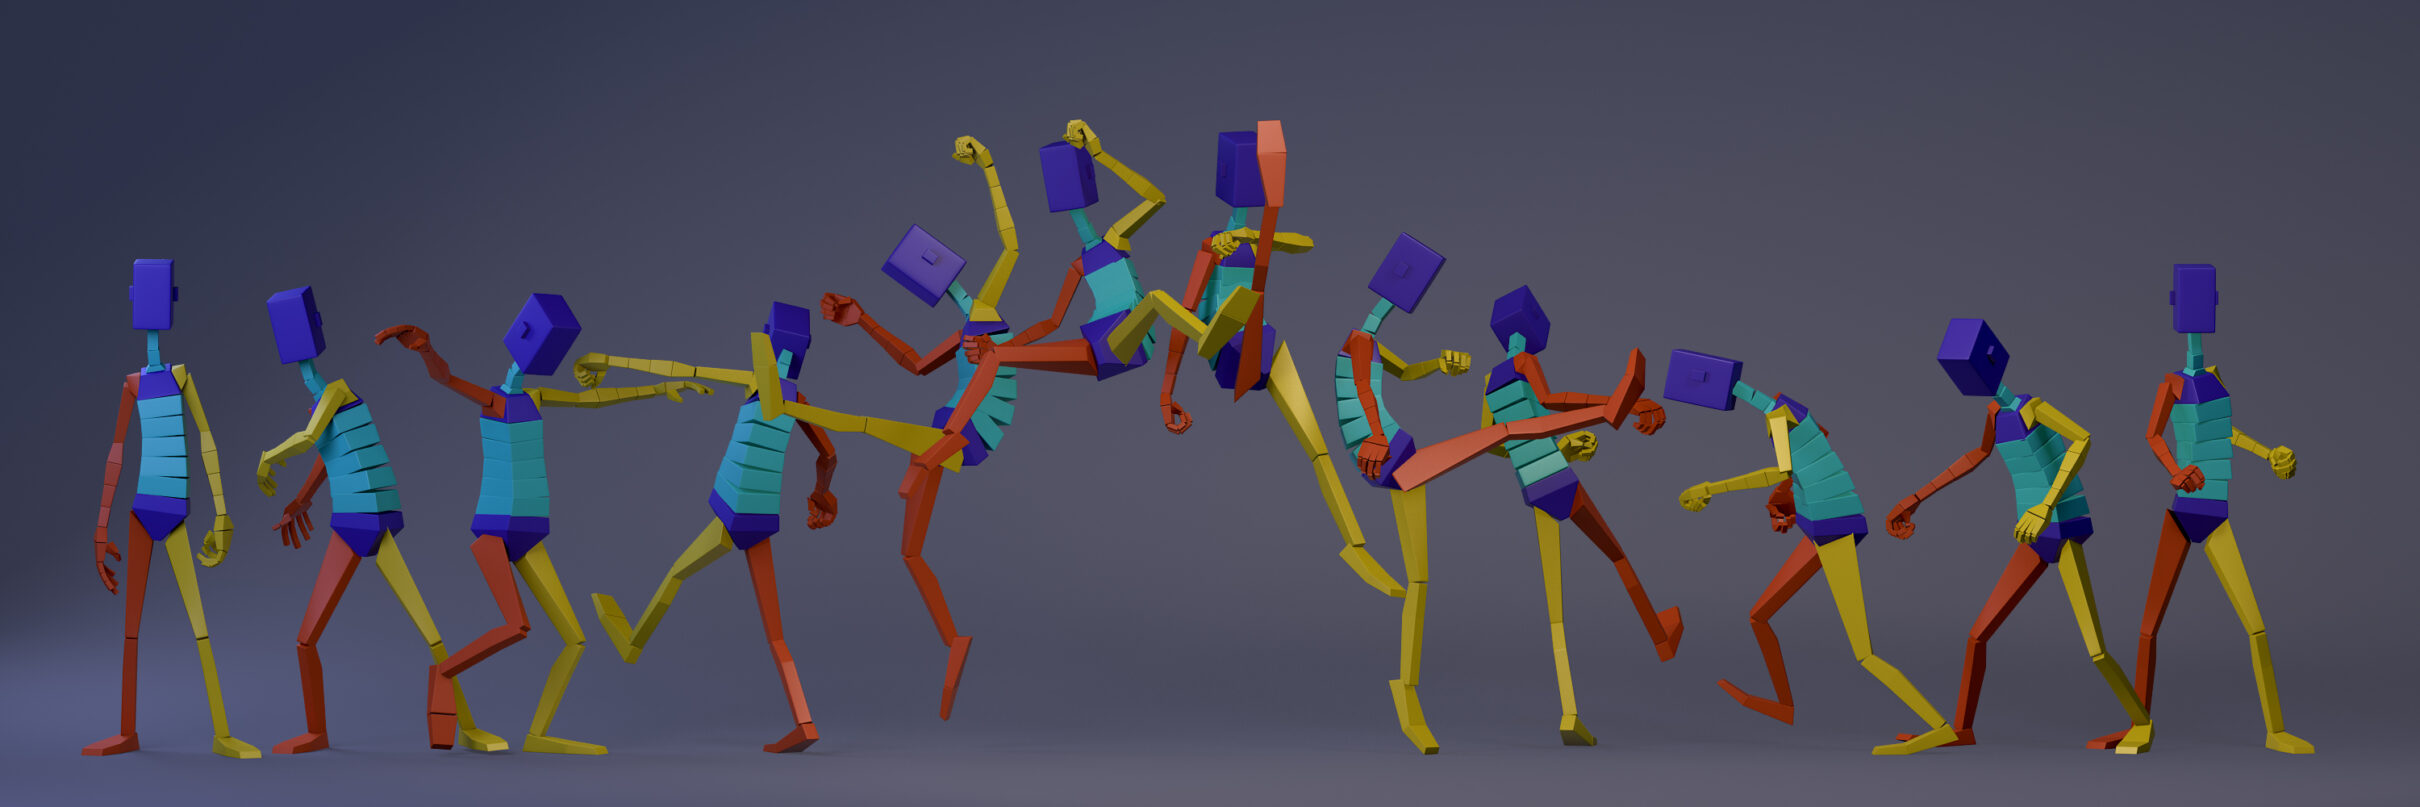
So now, I’ll scroll through the timeline and put in all the key poses, of which there will be many, using the red images in the reference as a guide. Here I’m mainly looking at making sure I put in all the contact poses for the feet as they shuffle around to get a better balance. Also I will want to make sure that they are following the translation and orientation of the hips as the body spins. At this early stage, I also want to make sure I get some interesting and strong poses happening as well as playing with opposing lines such as those created by the hips and the shoulders and the reverse c-shape in the spine. Try and think about what body part is leading and what will be following at this stage also so later on we can think about delaying some body parts to loosen the move up.

Step 03: The Breakdown poses
For the second pass through, I will start adding in a breakdown pose between each key pose. Adding these poses will allow us to better anticipate how the animation will look when we transition from Stepped tangents to either Spline or Auto tangents. As the character is also spinning and we are working with the legs in IK mode, we can also start creating the arcs that we will need to finesse later on. Focus on the path of action of each limb so they flow from one frame to the other without any sudden popping. We can also begin to indicate principles such as drag on the hands and toes and anticipation in the earlier poses to allow the audience to become aware of what will come.

Step 04: Re-timing
Once all the main poses are in, I will go through and create a playblast of the animation. My main aim here is to check that the poses are clear and readable and if the action is too fast, too slow or possibly even spot on. I like to stand back from my monitor when doing this as I think it reveals quite a lot that we just can’t see with the screen right in from of us. In doing so, I found that in my animation, I needed a few extra frames on each spin as they were happening too fast which resulted in some popping, especially when the legs cross for the first time. To add the extra frames, I selected all the controls and opened up the Dope Sheet, which you can find under Window>Animation Editors. In the ‘Dopesheet Summary’ bar at the top, I grabbed all the keys that I needed to move along in order to give me the extra frames and pushed them to the right.

Step 05: Working from the core out
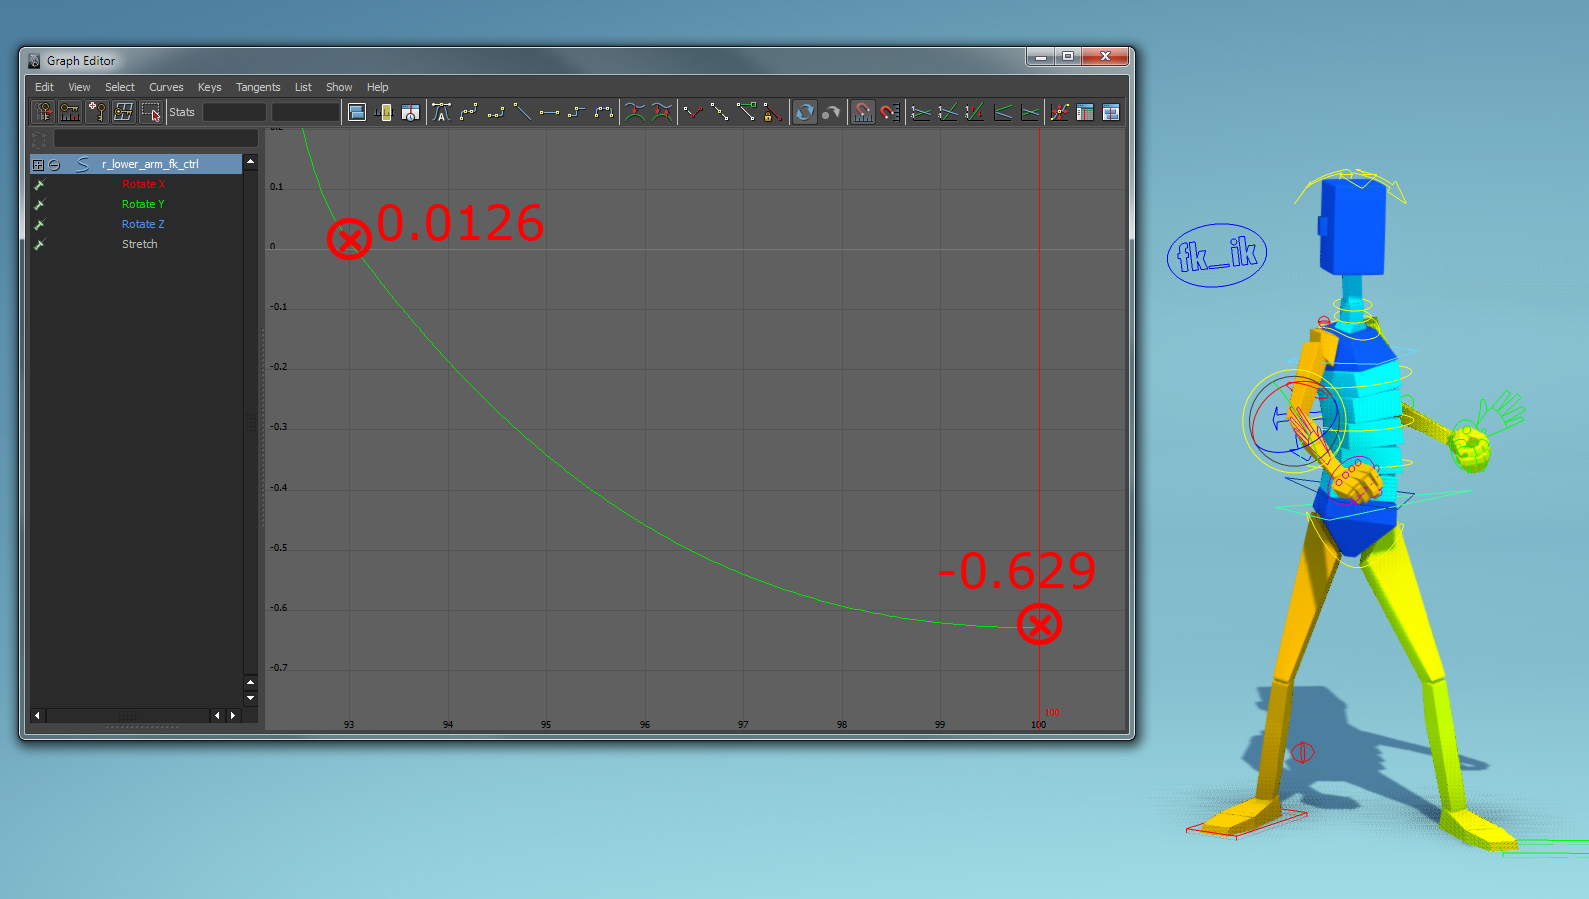
Once you are happy with the timing, select all the animation controls and convert the tangents in the Graph Editor from Stepped to Auto or Spline mode. As always, I begin from the core out when refining, so my first port of call will be the hips. For this move, I’m mainly using the ‘root_ctrl’ for translating the character up and down and rotating him, and the ‘hip_ik_ctrl’ to get some extra rotation in the hips if needed. I start by going through and deleting any keys that are not doing much for the animation or adding too much noise. We can then go through and try to mimic the motion and arc we would expect to see on a bouncing ball. Also, add extra keys if you need to get the arcs flowing well in other areas as he shifts his weight about. Remember, it’s all in the hips so getting this as refined as can be will be crucial for all the other elements.

Step 06: Legs and feet
In this move, the big arcs will be created by the legs and as I am working in IK mode for them, I will most probably end up setting a key on nearly every frame, especially when the legs are in the air. Make sure to create motion trails, not on the controls, but on a vertex on the model such as the ankle or the end of the foot. This will create a more honest representation of the arc being created by the leg swing. As the feet will pivot from the toe or the ball, it is also important that when this happens that there is no popping. What I like to do is create a locator at the point where the foot will pivot from and use that as a guide to position and orient the foot. If we don’t do this and the foot slides around, we will lose believability in our animation.

Step 07: The spine, neck and head
So we’re starting to work up the torso and as all the upper limbs are a child of the spine, we will start there. Again, begin by cleaning up the curves and getting rid of any keys that are not helping. Push the shoulders and the hips to really get some striking poses from opposing lines. Also, add twist to the torso, orient the chest in one direction, the hips in another and the head in a third direction. This will add further interest to the poses and make them more dynamic. Try and delay the neck and head slightly and make sure the path of action on the head is smooth and clean as it swings through.

Step 08: Arms
When dealing with the arms, I like to work on them separately as I can really fine tune one arm without the other distracting me, so+ I use some selection sets to hide some of the geometry. I focus on those arcs once more and although the arms will follow the torso, we will still need to go in there and clean out some of the poses as they may be jittery in places. Also, make sure to edit the spacing as in some instances, for example when the right arm reaches its peak, we will want to ease in and ease out of the key pose to reduce what could be some very quick movement in a small number of frames.

Step 09: Adding drag and breaking up the timing
At this stage, I want to make the motion as smooth as can be, as well as begin offsetting some parts so we don’t come to the final pose and hit it as one lump. I’ll delay the arms by a couple of frames from the spine and in the odd frame here and there I will also push the lower arm further back than naturally possible to really help sell the drag. Then I’ll delay the hands and also really push the fingers back to help sell the path of action that they will be following. To loosen up the approach to the final pose, I’ll make sure the arms hit the pose a few frames later and also have one arm hit the final pose a frame or two before the second arm does.

Step 10: Keep on moving
As we hit the final frames, we will want to keep the motion and the character alive. To do so, we can employ the technique of using moving holds. For the hips, the upper body and the arms, I will add a small amount of motion continuing through to the final frame. It’s important to keep this motion moving in the direction that the body was moving in. The change in movement from the final pose to the final frame may be barely noticeable but the difference between subtle movement and no movement can be huge to the naked eye. Happy animating.
Tip 01: Tools and scripts
For this tutorial, I will be once again using the very excellent ‘bhGhost’ tool created by Brian Horgan, which can be found at www.graphite9.com, along with other excellent scripts. This will be what I will mainly use to check how one pose leads into the next through the blocking stages. For checking the arcs of a selected vertex, I will be using ‘CG_VertexMotionTrail_V2.py’ created by Constantinos Glynos. By default, Maya does not allow you to motion trail a vertex but this tool will do just that.

Tip 02: Show and Tell
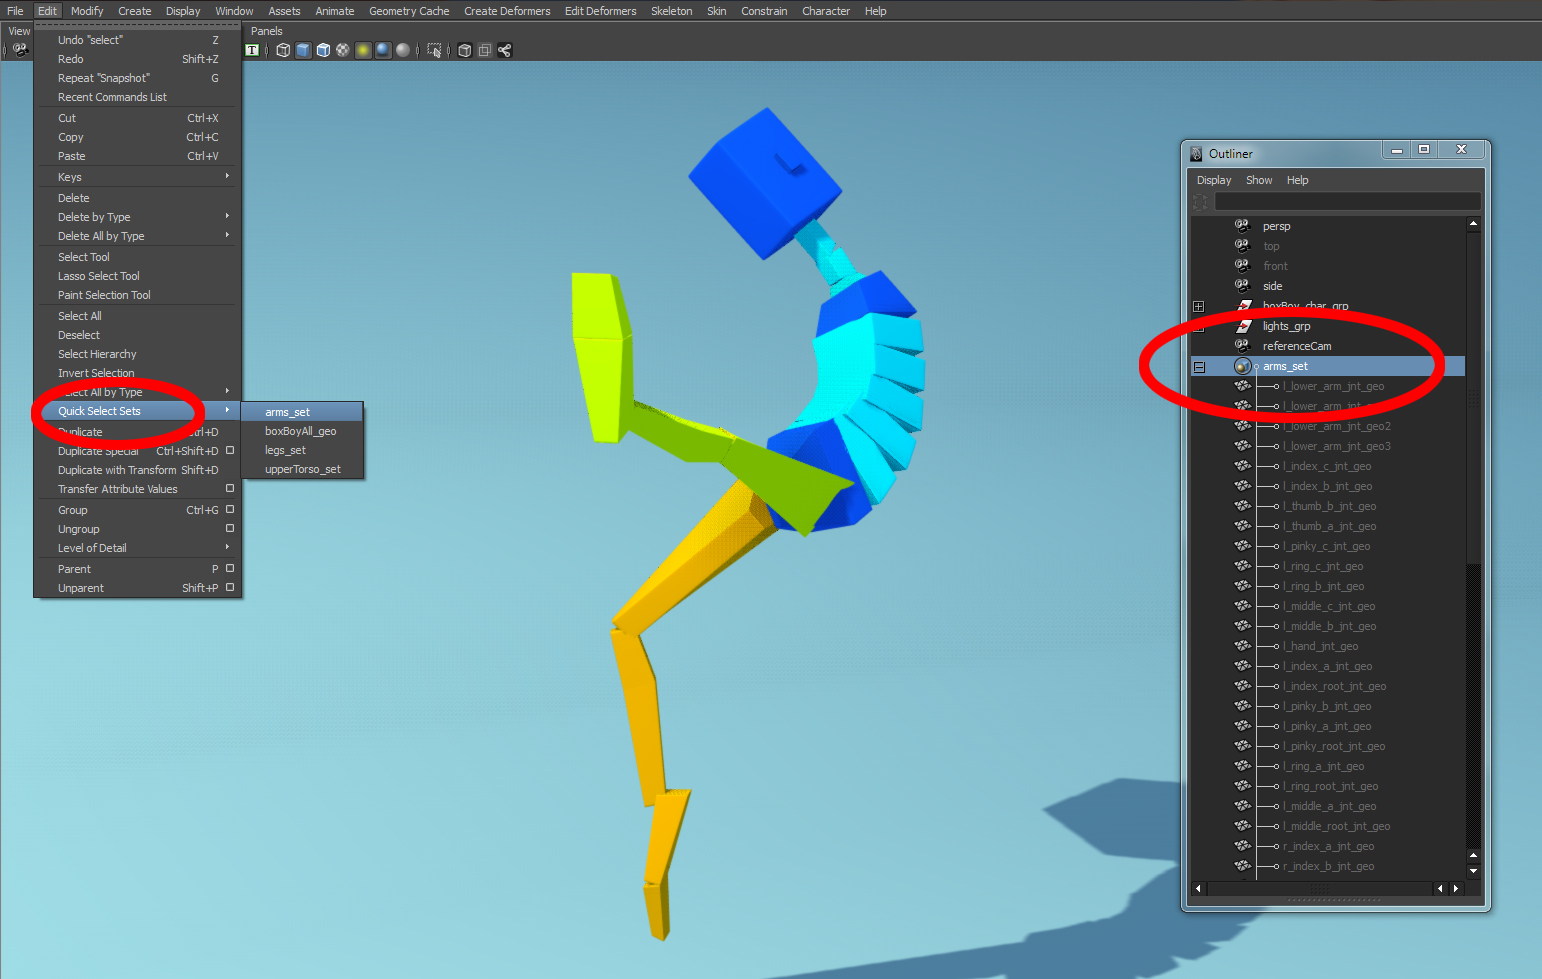
When animating, I like to zone in to a particular aspect without my mind being side-tracked by things that can be resolved later. For example, when cleaning up the spine, I don’t want to look at the arms or possibly even the legs. To help me work in this manner, I use selection sets. Simply grab all the geometry that you want to hide and go Create>Sets>Quick Select Set. By the end of the animation, I had a selection set for each arm, the head, the spine and the legs. To select the geometry within the set, either go to the Outliner and open up the specific set you want to hide/unhide or go Edit>Quick Select Sets to pick the group.
Final Result
Here is the final rendered animation:
…and the result when the principles are applied to a different rig (although the hands/fingers have not been animated):
Support CAVE Academy
Here at CAVE Academy the beauty of giving and sharing is very close to our hearts. With that spirit, we gladly provide Masterclasses, Dailies, the Wiki, and many high-quality assets free of charge. To enable the team to create and release more free content, you can support us here: Support CAVE Academy